


Hi there! Happy Monday!
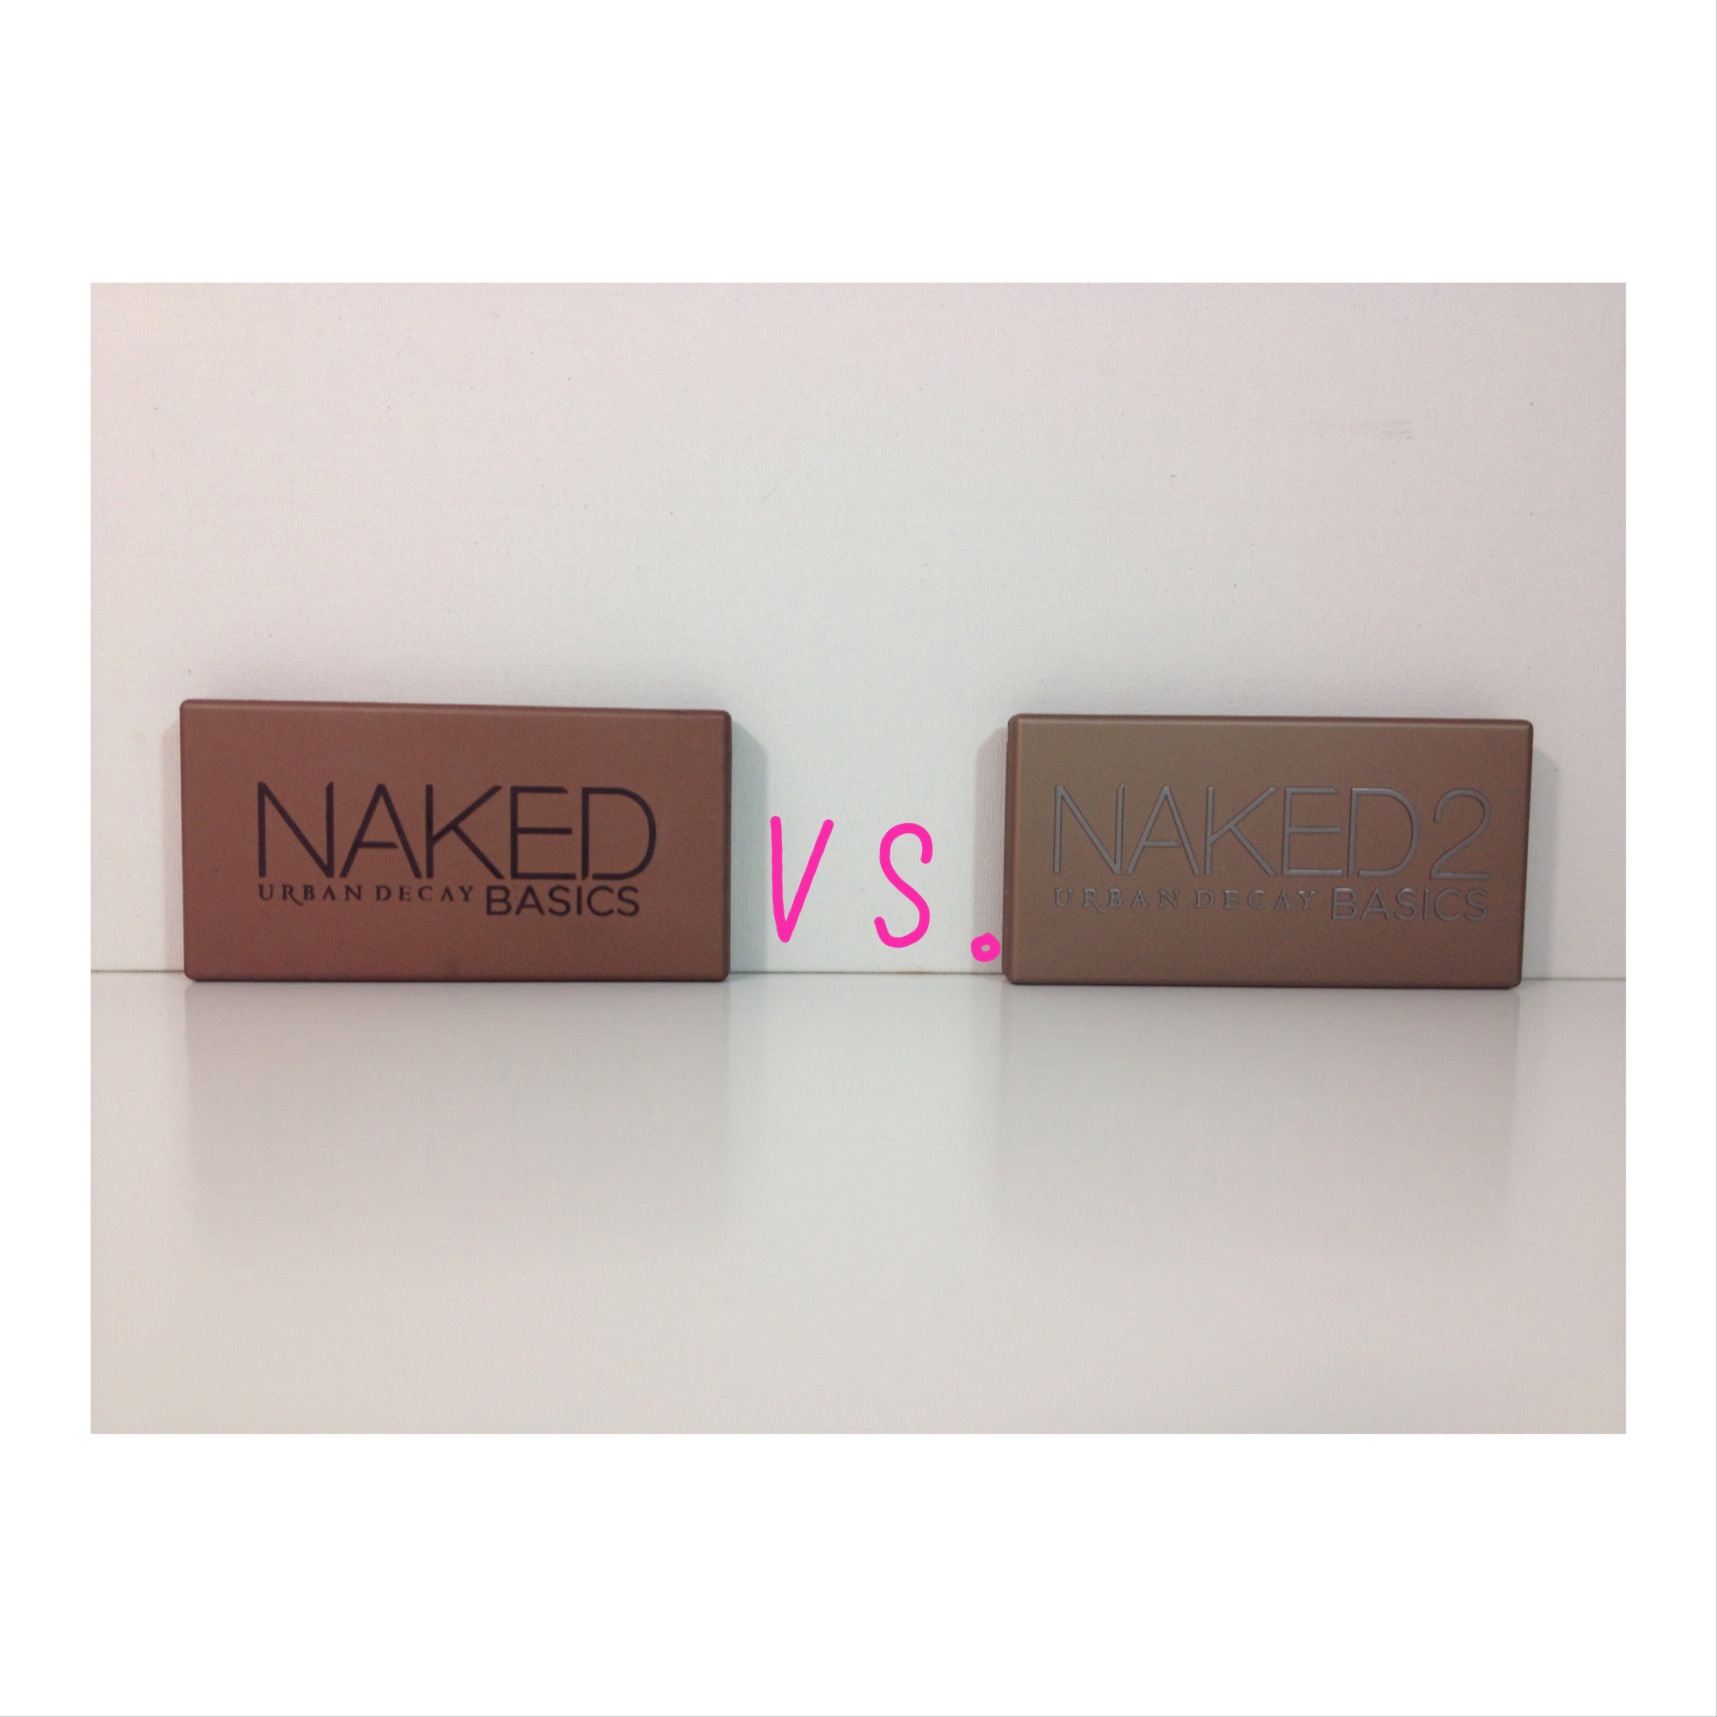
I got my hands on the Naked Basics 2 from Urban Decay and have been using it almost daily since, so now I feel ready to give my review and overview! This palette launched on August 19th and is avaliable at both Ulta and Sephora. I also want to share swatches of both the Naked Basics 2 and the Original Naked Basics. The Naked Basics 2 is a cool toned answer to the more warm toned Naked Basics. Both of these palettes cost $29.00 and have 6 full size highly pigmented, mostly matte, neutral eyeshadows.
I think that both of the Basics palettes are a great choice for those who don’t want to play around as much with their eye makeup and just want more basic eye shadows.They are also mostly matte, with the exception of the highlight shades, so they don’t bring attention to aging eyelids. The Naked 1, Naked 2, and Naked 3 are beautiful palettes as well but offer lots more choices that not everyone wants or needs.
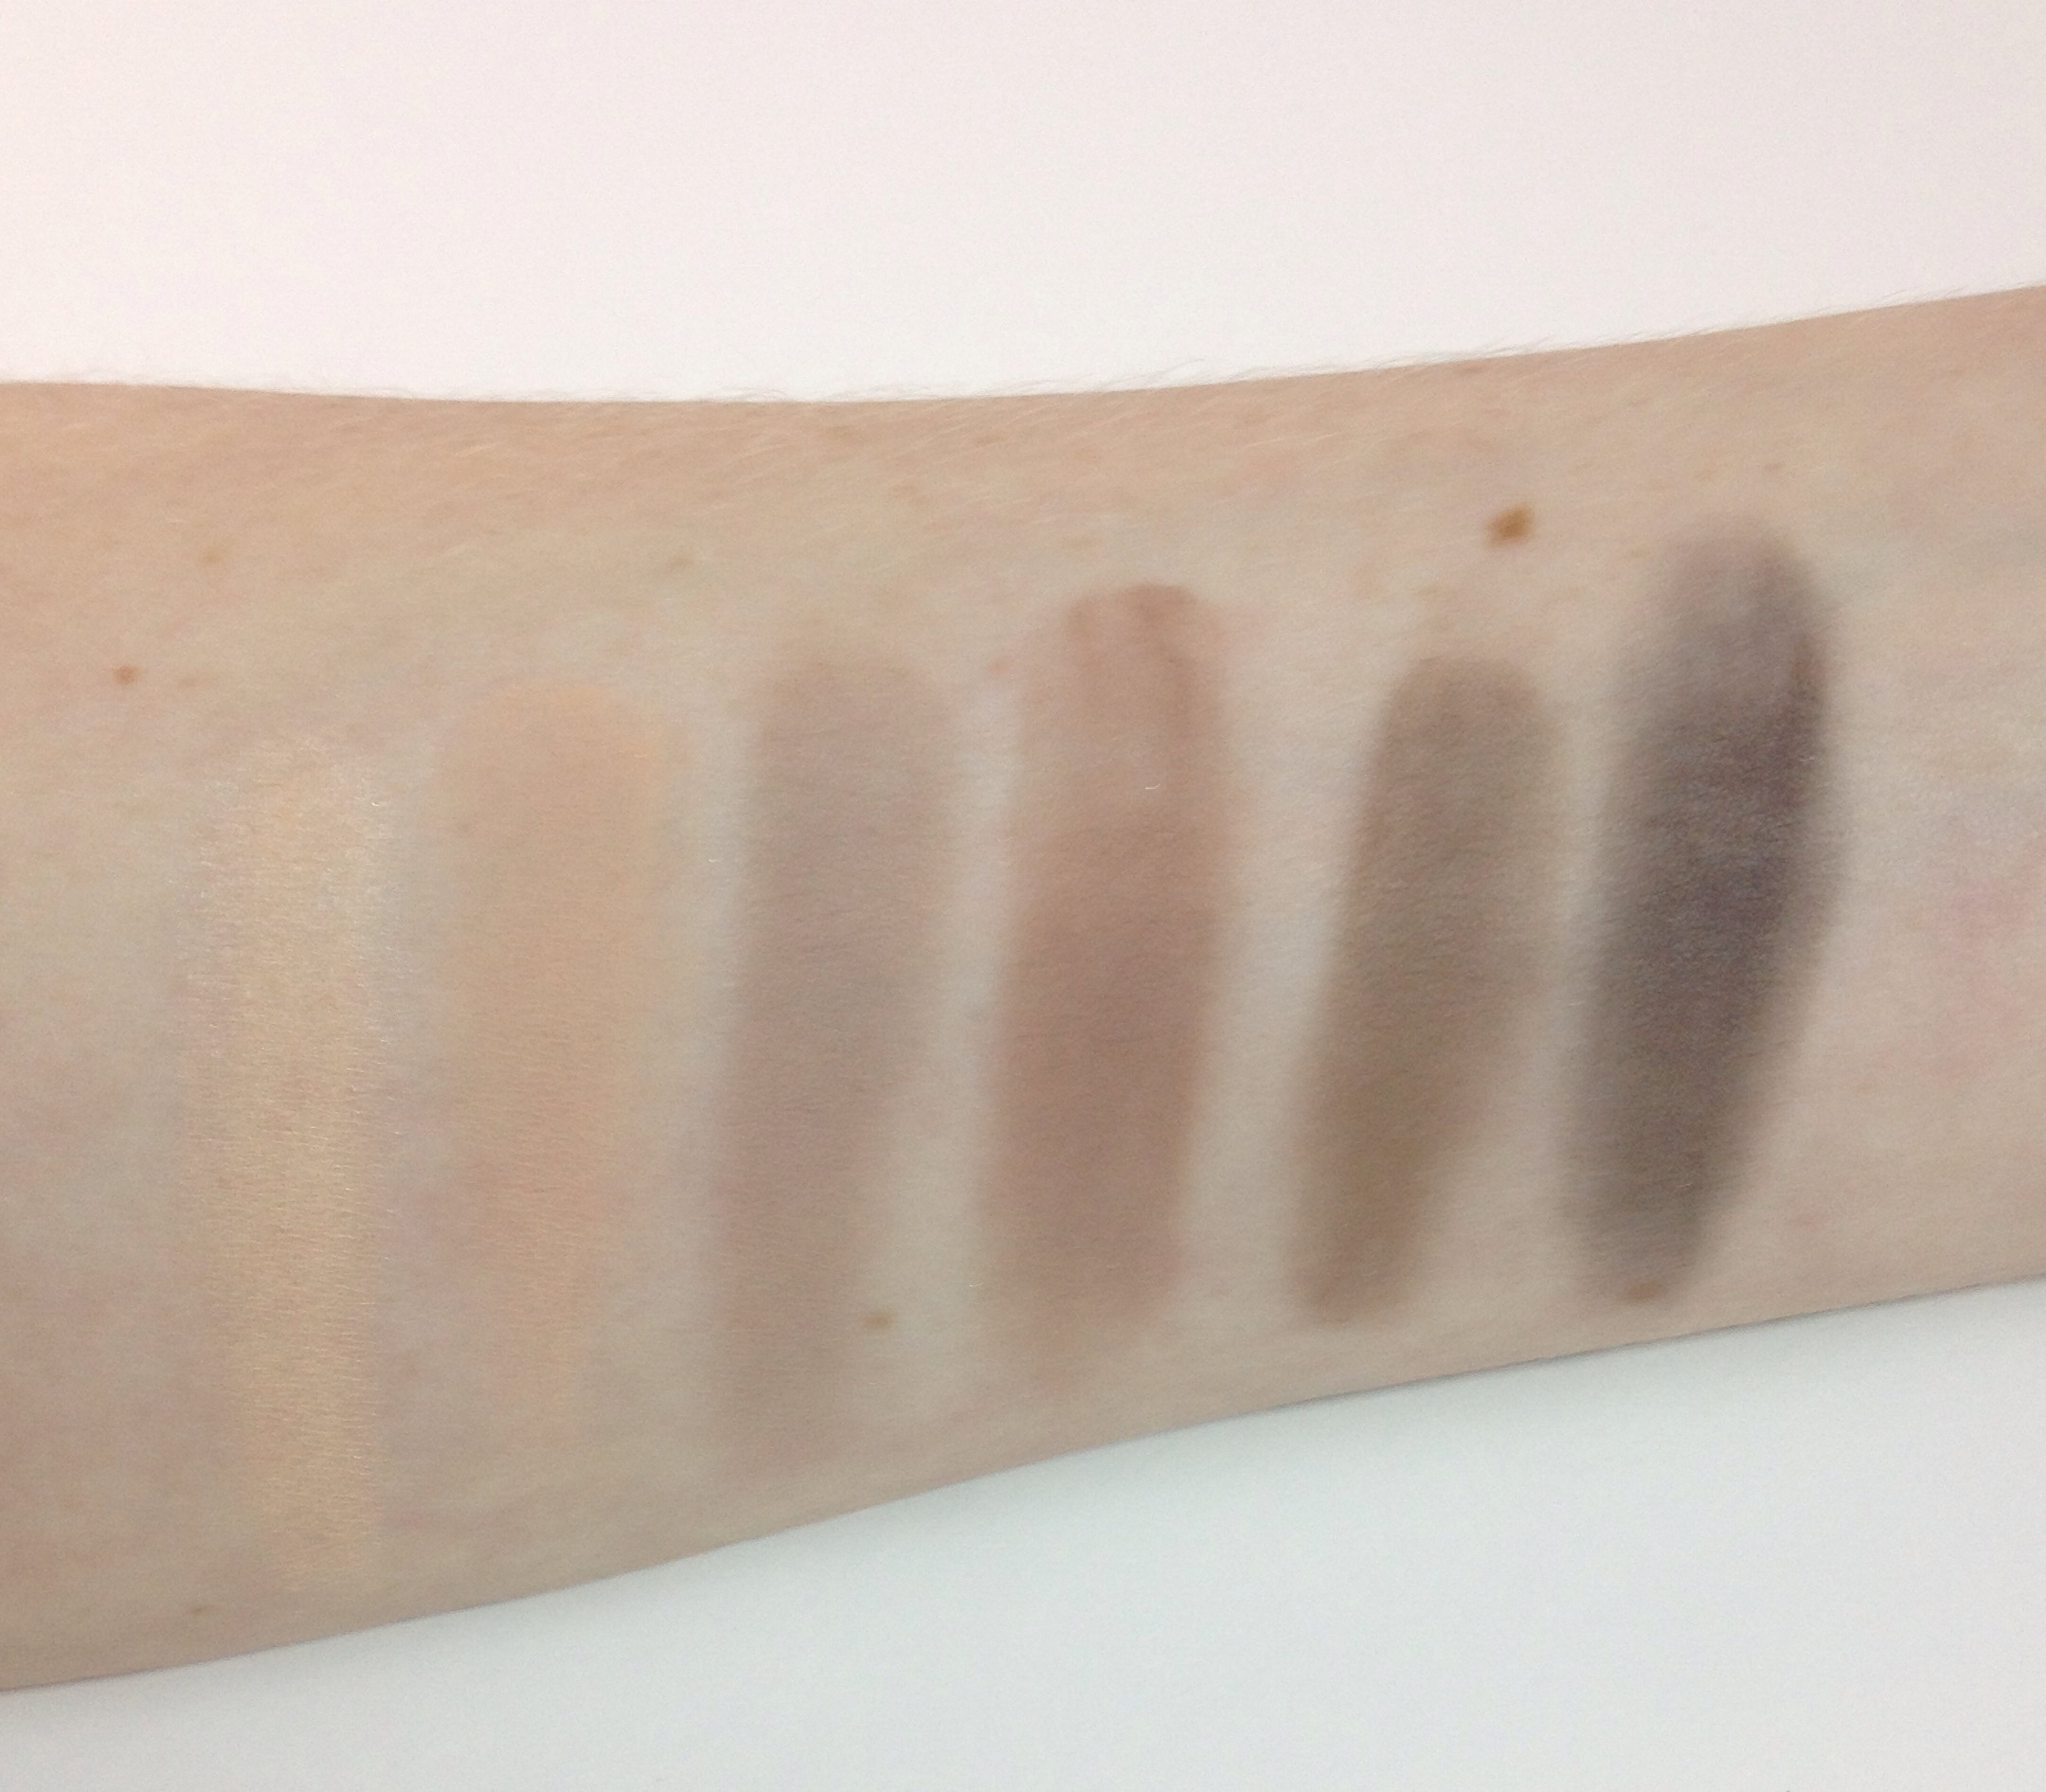
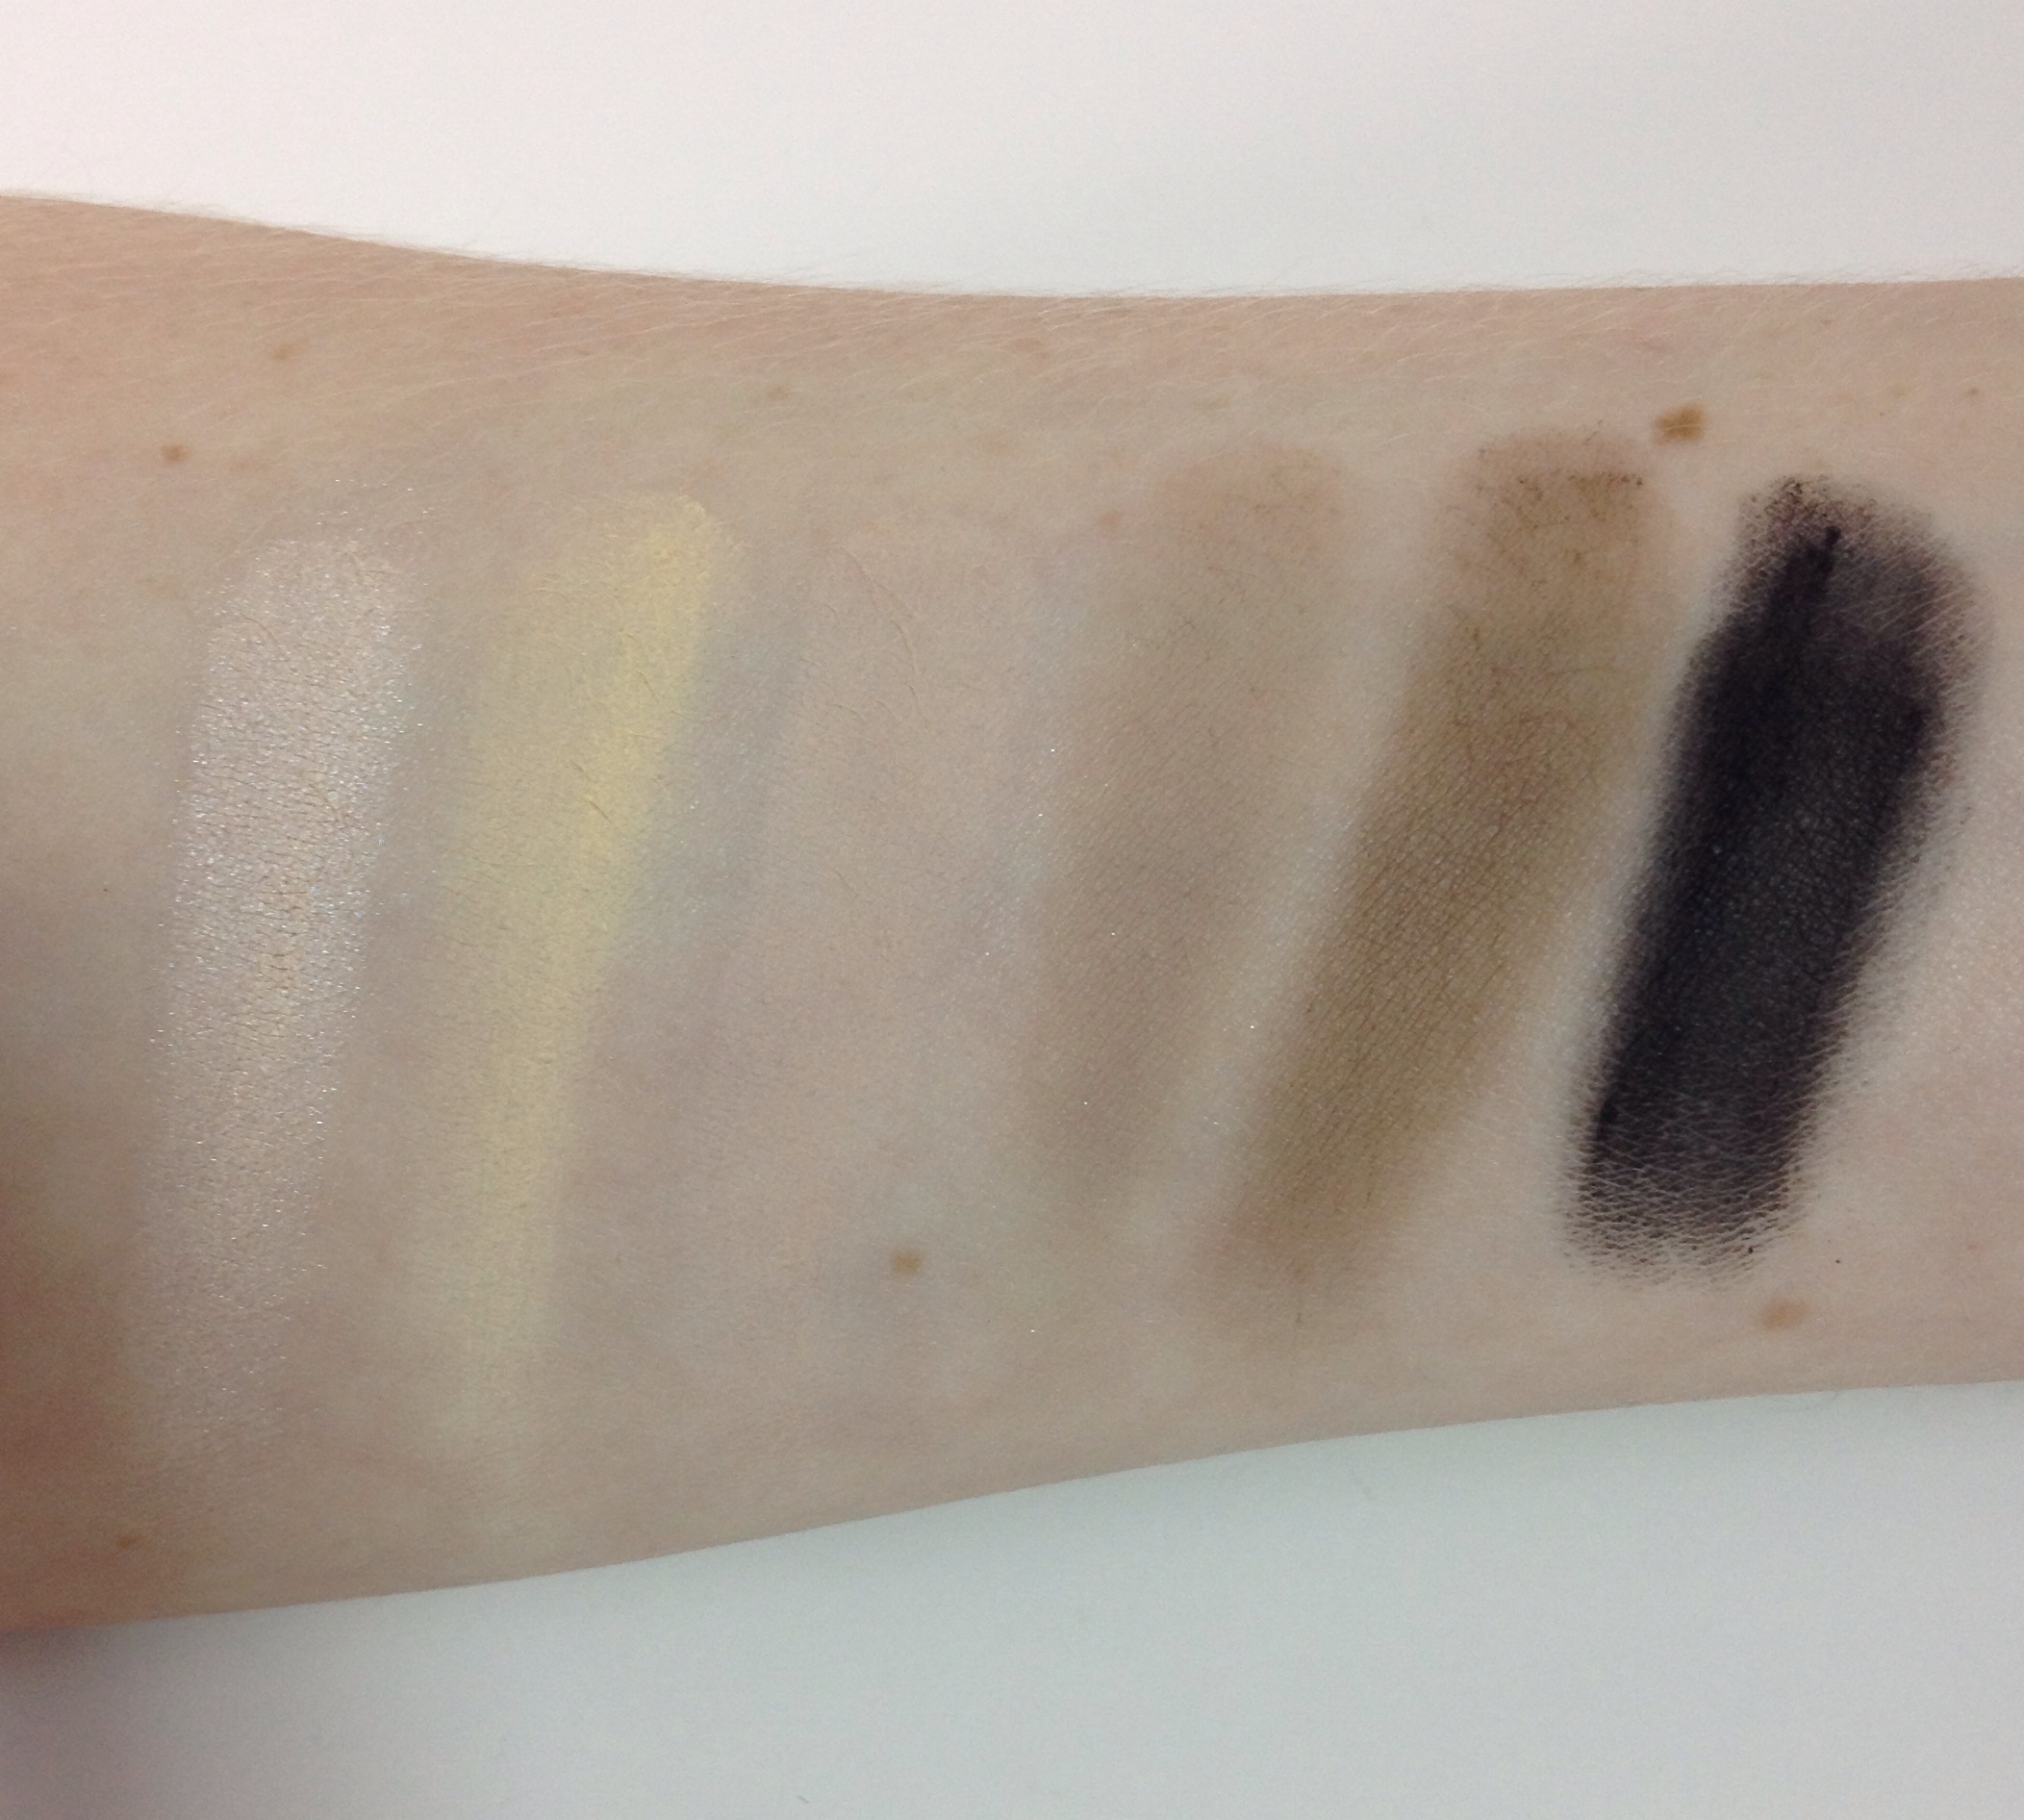
Swatches:
Naked Basics 2:
Naked Basics:
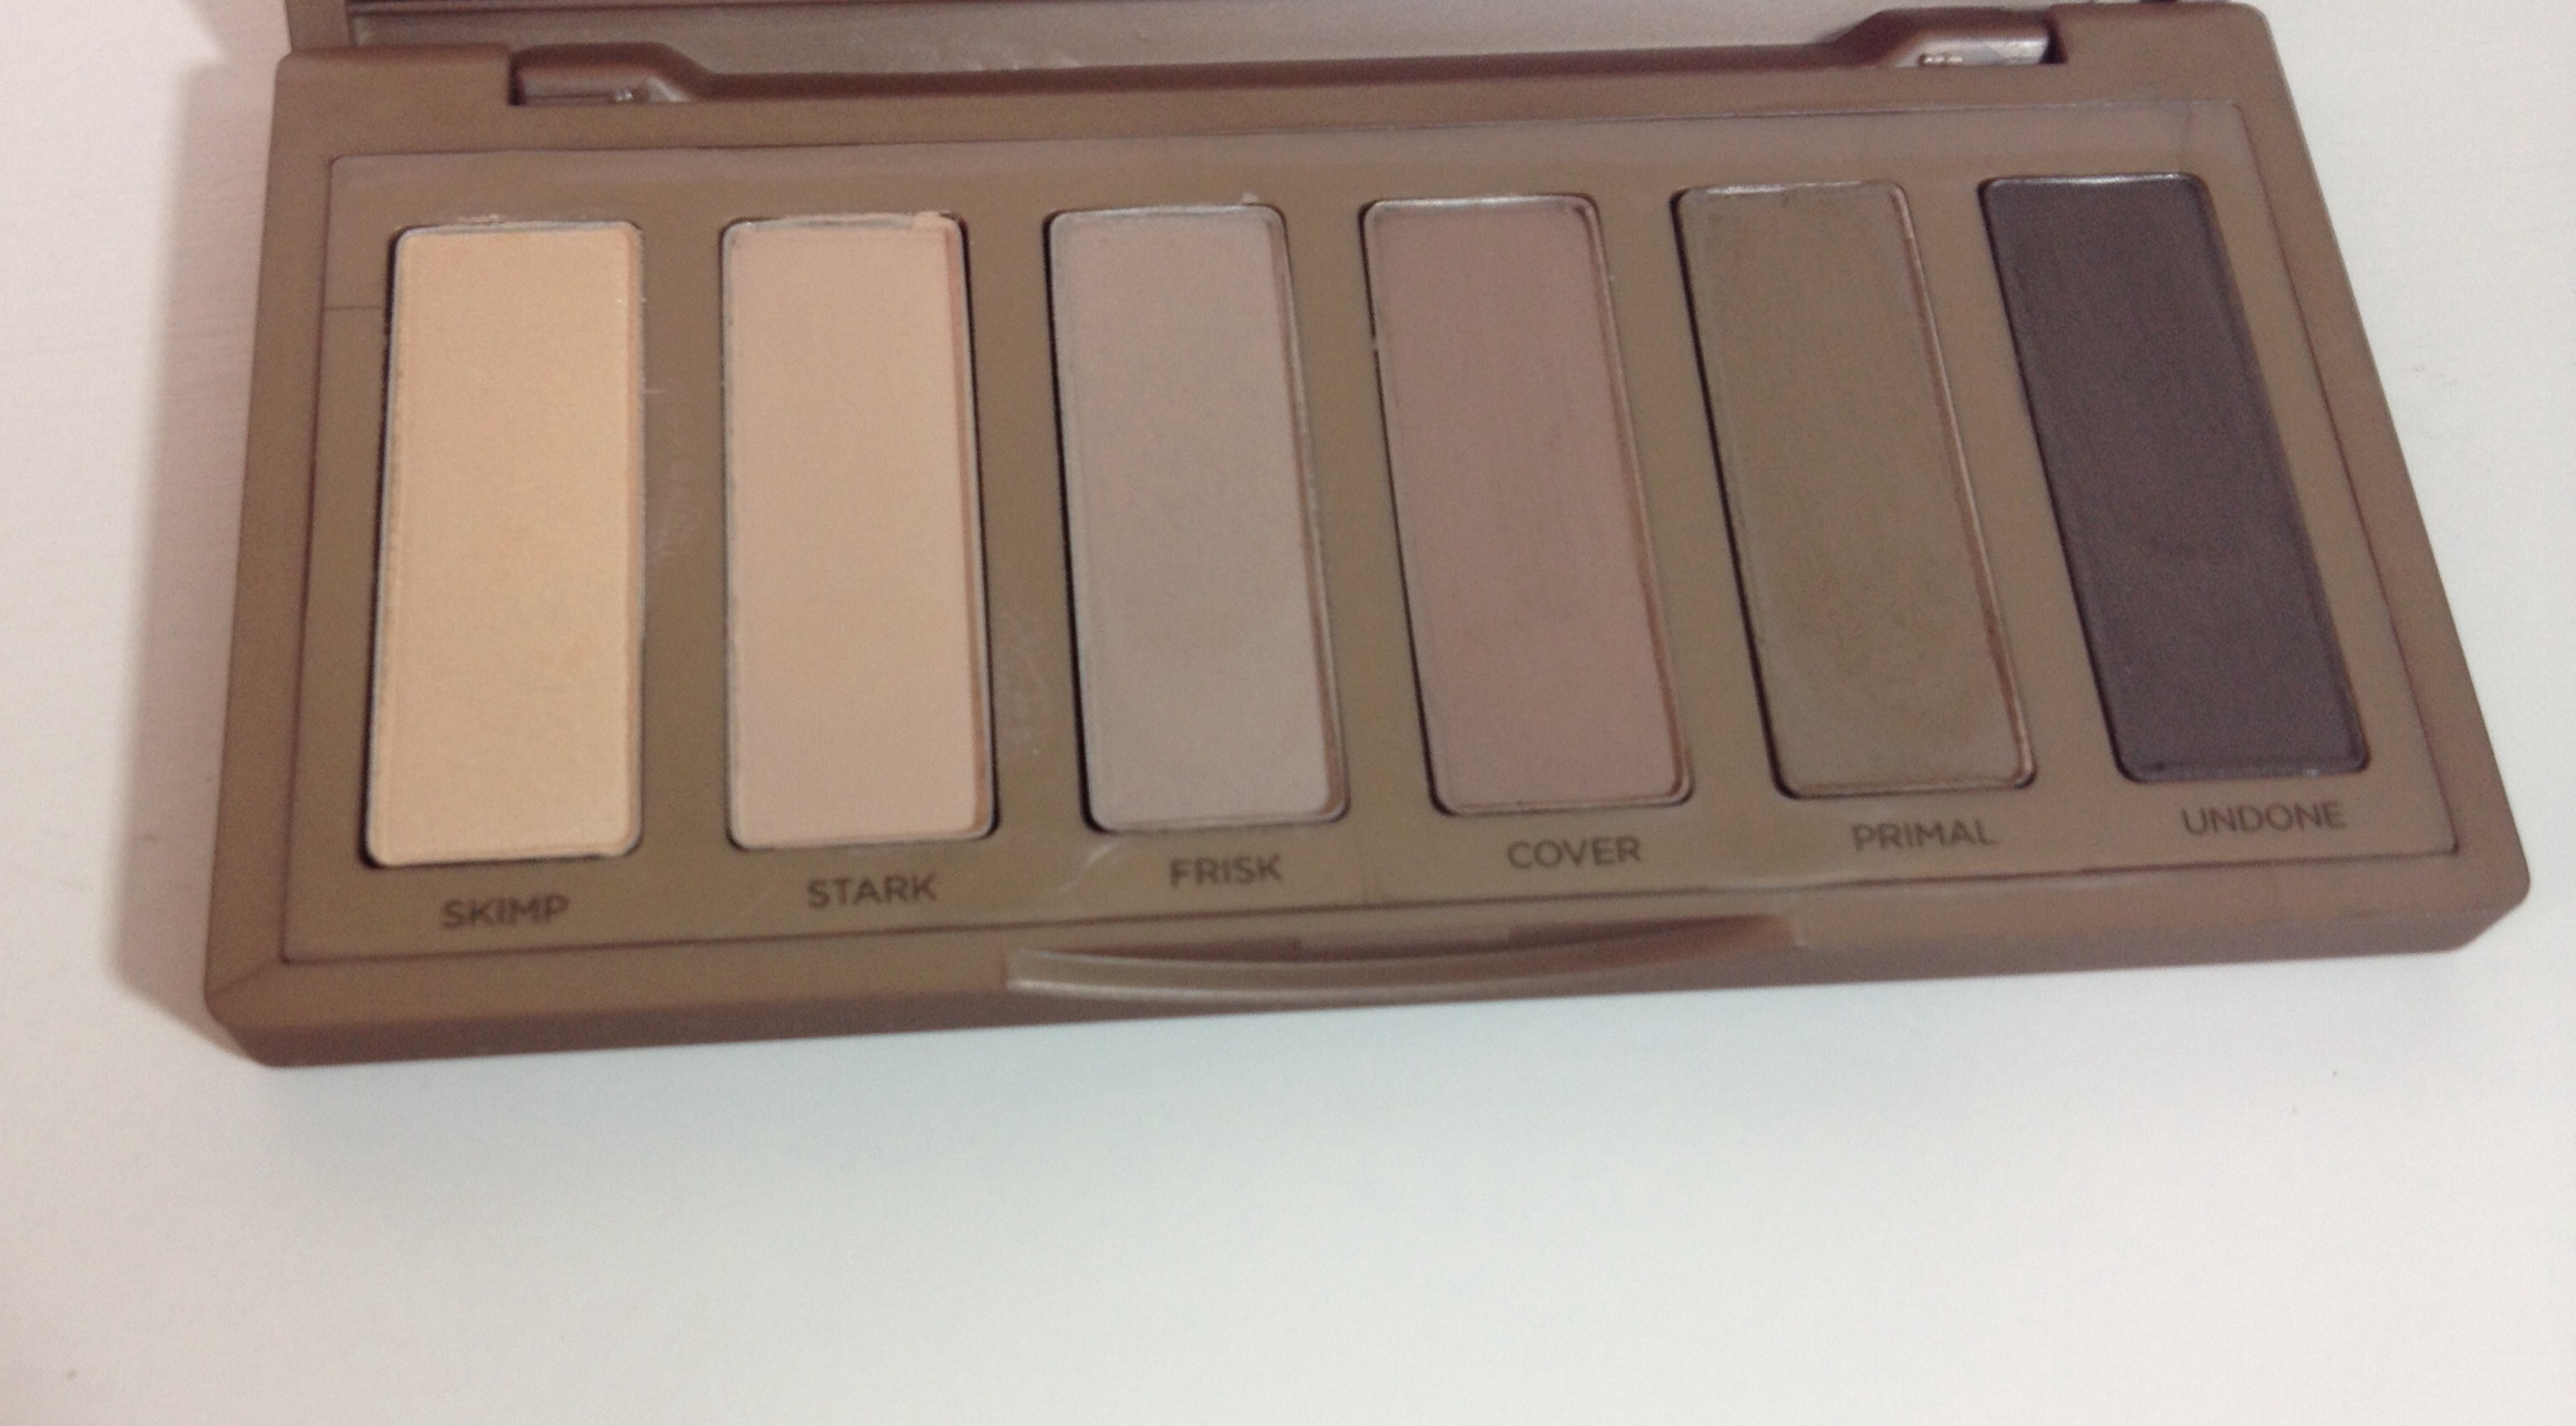
Naked Basics 2 in Pan:
Naked Basics in Pan:
*Don’t mind the broken eyeshadow!! It broke shortly after buying it because I got a faulty box but never got around to exchanging it. I love this palette and it gets used A LOT!*

Overall I am really enjoying the Naked Basics 2. I tend to gravitate to warmer eye shadows, so it is quite a change for me but I’m really enjoying it!! I love the fact that you can get a smokey eye or a very natural eye easily with this. I think I am going to have fun bringing in some of my other eye shadows with this palette as well, but you definitely can get a complete eye look using just the shadows provided with Naked Basics 2. I love that these Basic palettes are tiny, perfect for travel, and highly pigmented!! I don’t think you *must* have both, but if you want to try out cooler toned eye shadows, this is a great way to start with some beautiful neutrals. I still am the most comfortable with warmer eye shadow colors because that is what I use the most often, so I think I would still grab the Naked over the Naked 2 for a trip away, but I am excited to keep playing with the cooler tones of the Naked 2!
Have you tried the Naked Basics or the Naked 2? Thoughts?? I would LOVE to hear from you!! I know some people have had enough with the Naked line in general but I am a neutral eye shadow lover, so for me I love trying out all of the neutral palettes!! I still need to get my hands on the Lorac Pro 2!! EEEEEEEK!
Have a wonderful week!! Thank you for reading and don’t forget to subscribe : )
NEW:
Hi there! Happy Wednesday!
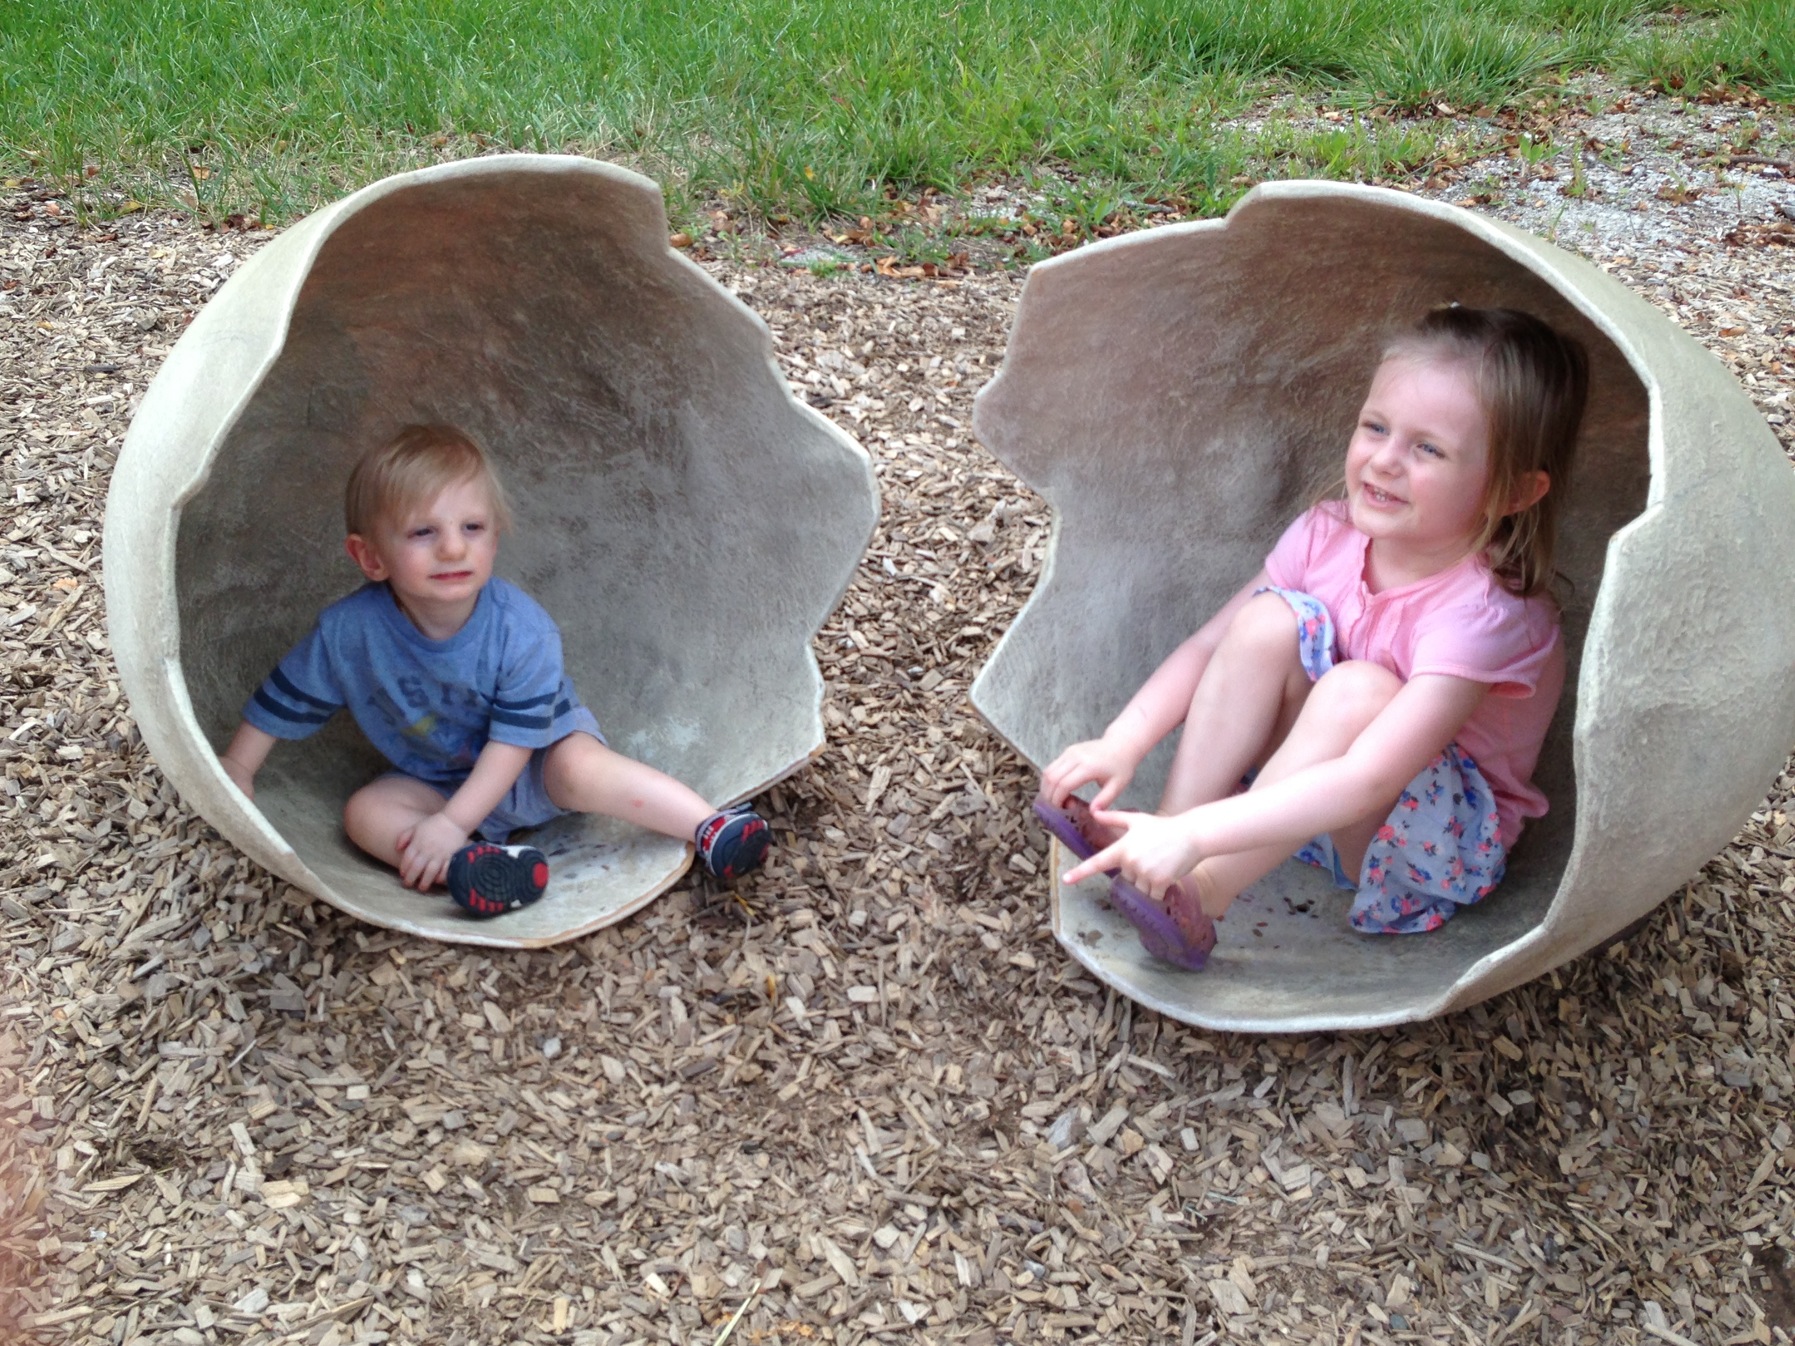
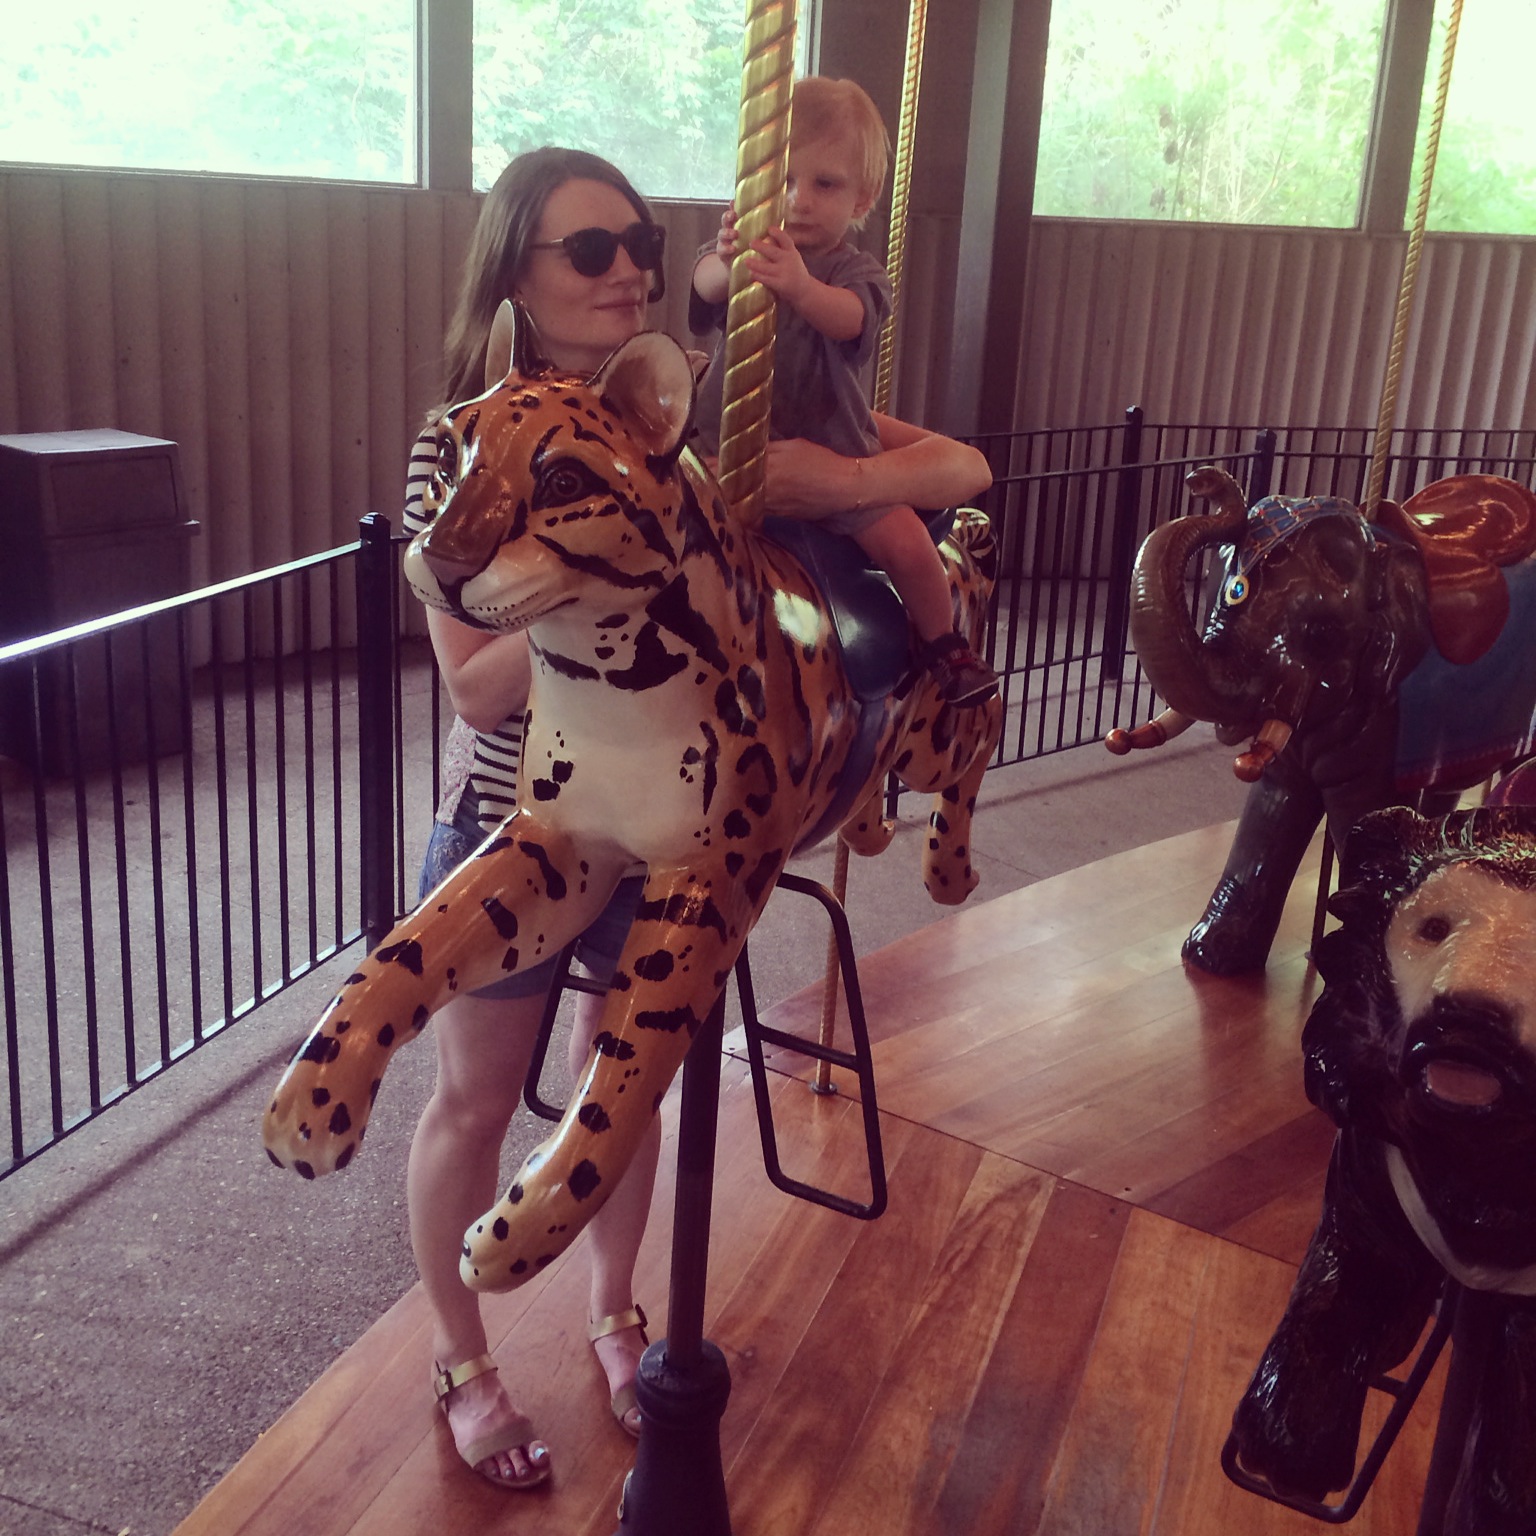
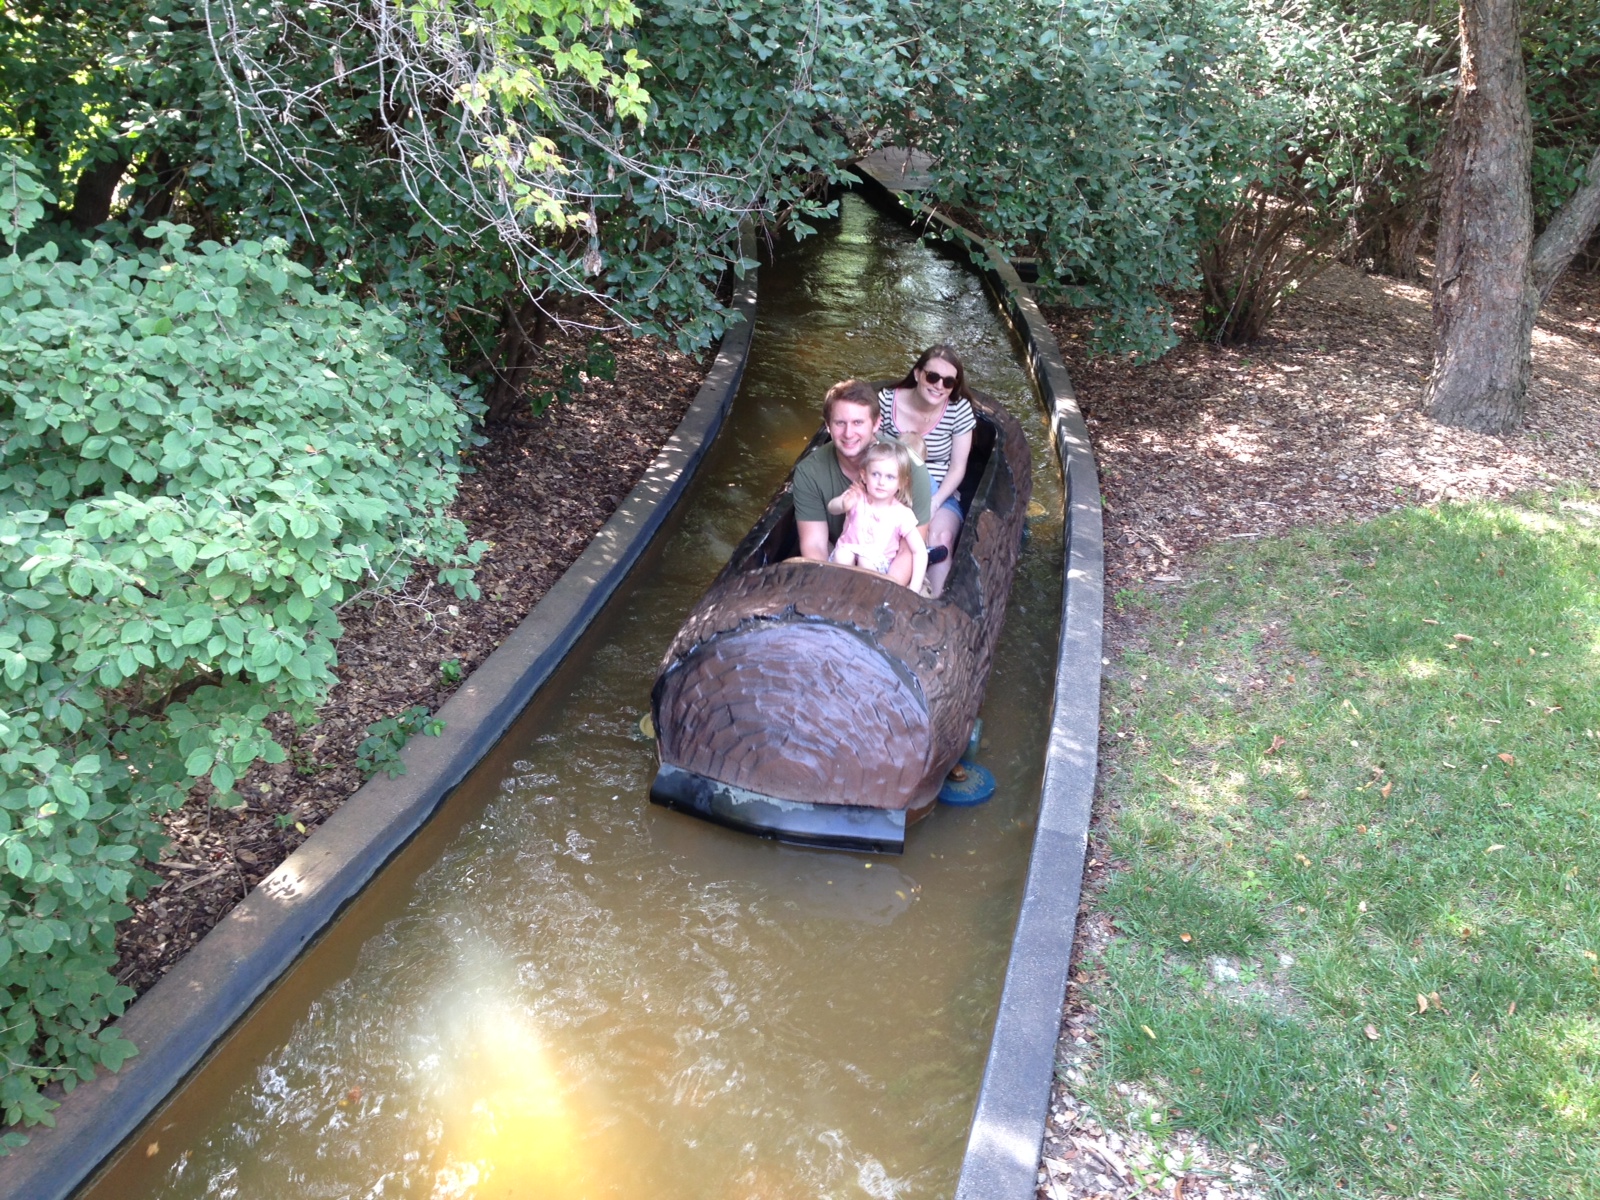
We had a wonderful long weekend with my parents and I want to share some of our favorite pictures! Almost all of these pictures are from our day at the zoo, but we also had a great time boating, swimming, and relaxing at our lake cottage : )
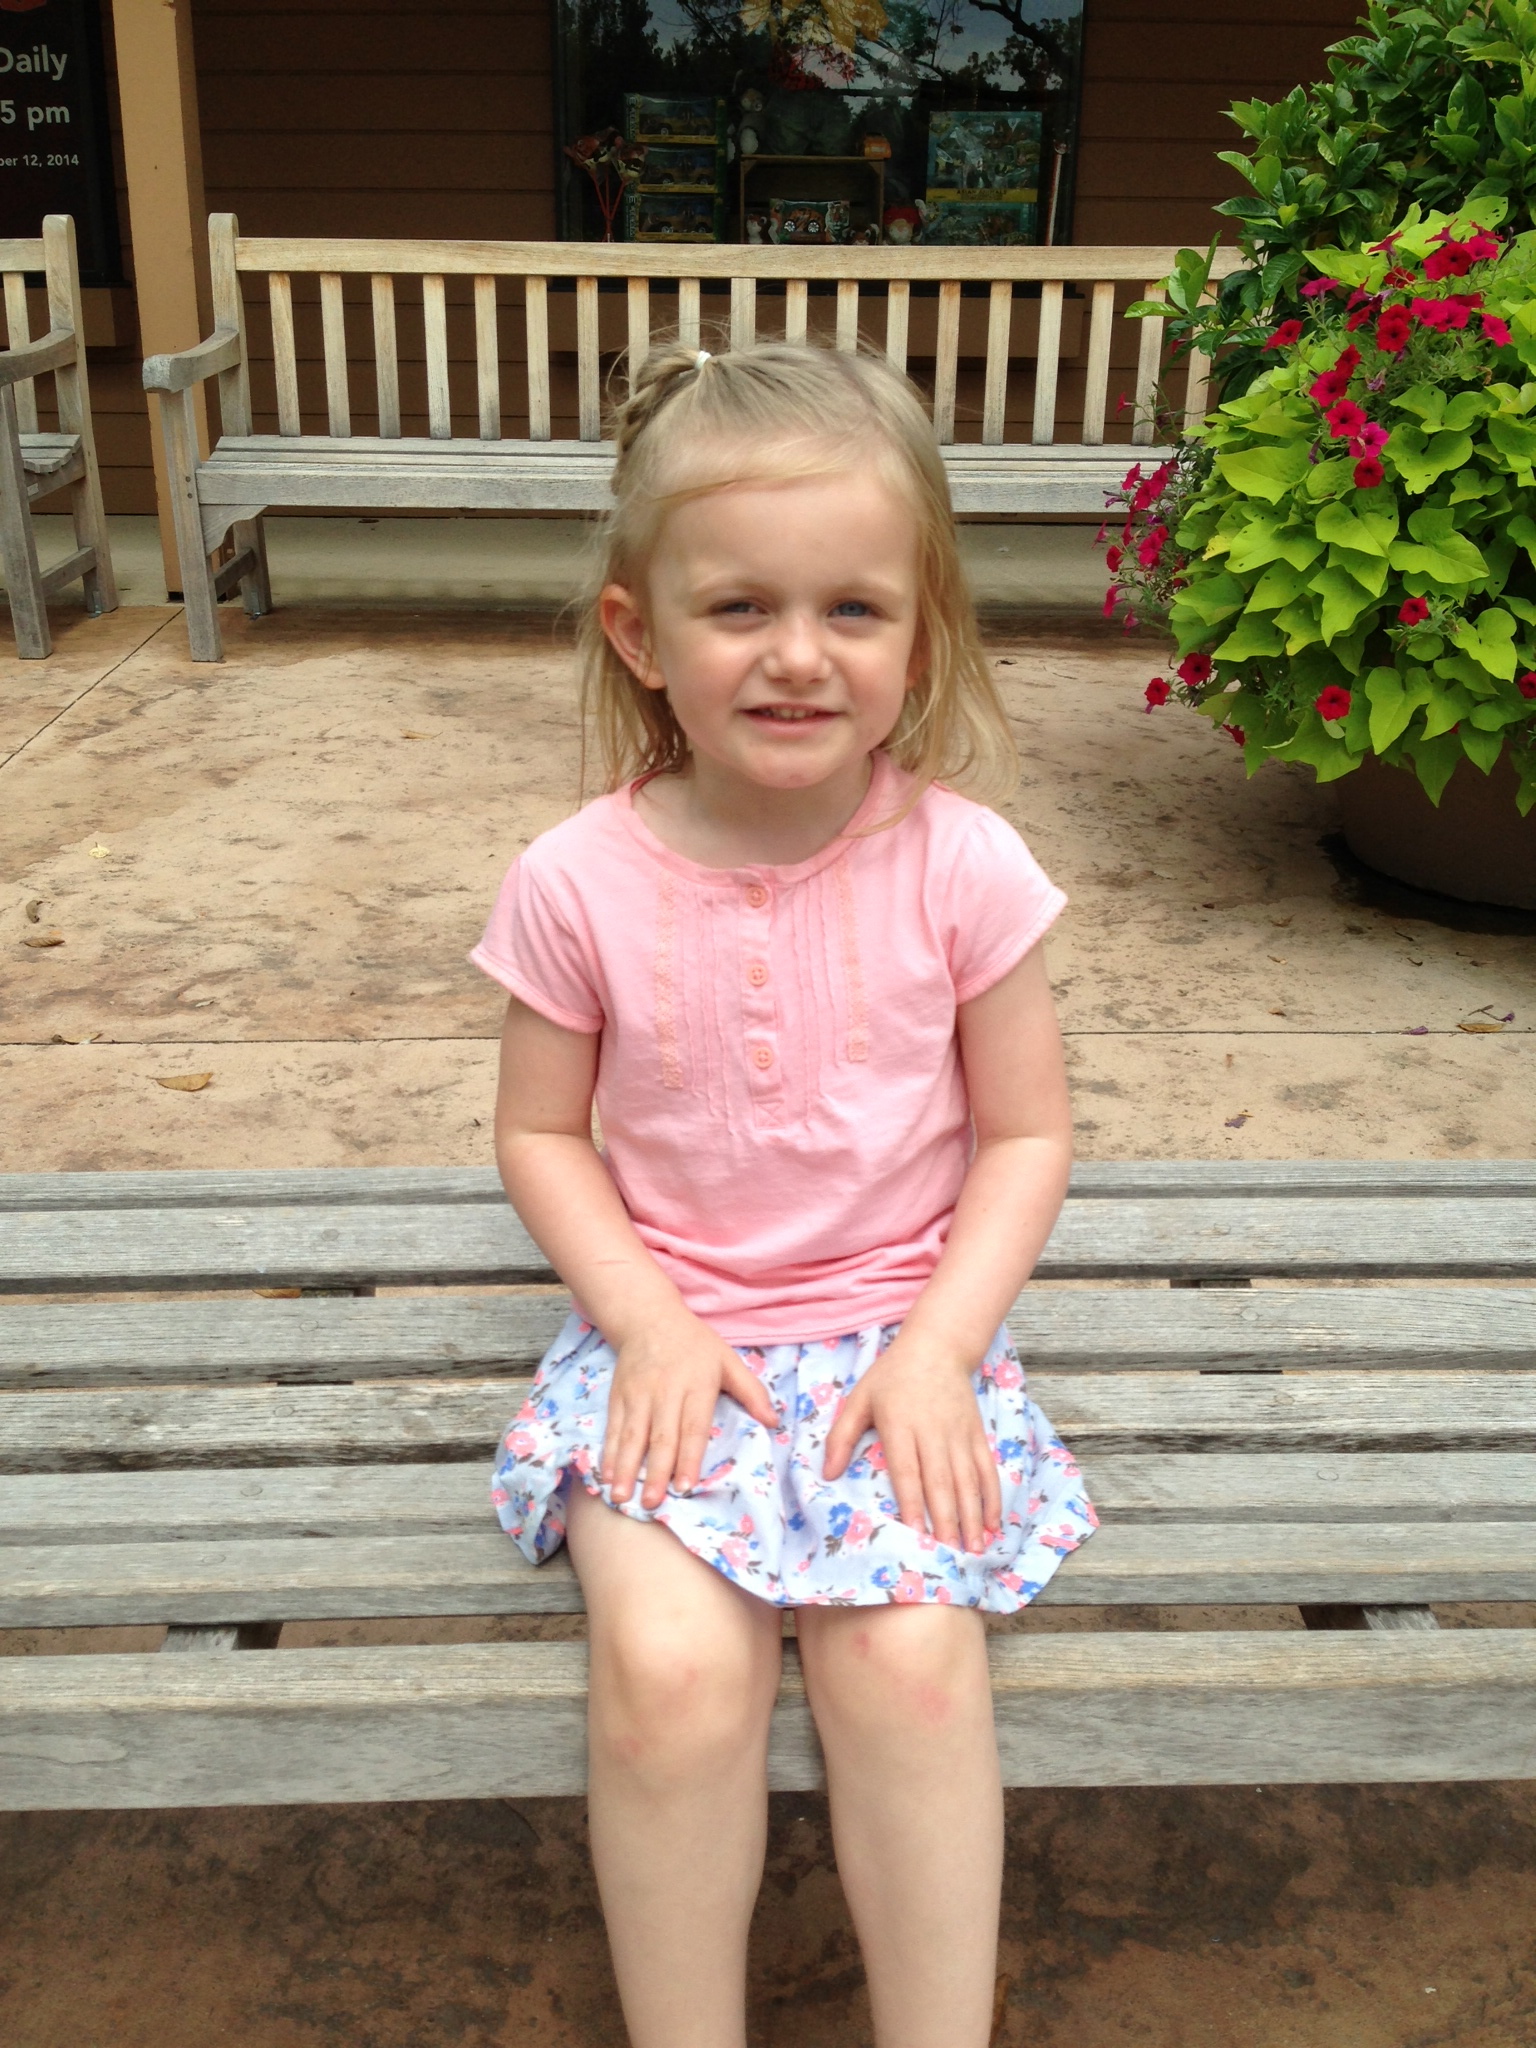
Hailey ready to get her sunscreen on (if you don’t want to shell out almost $20 at the giftshop, don’t forget sunscreen like we did! oopsies!) so we can explore the zoo!!
Mandatory picture by the entrance to the zoo ; ) Next year we will have 3 little ones…one for each letter…in this pic!!

Ready to go!!

Riding the train!! Choo Choo!

Train selfie!!
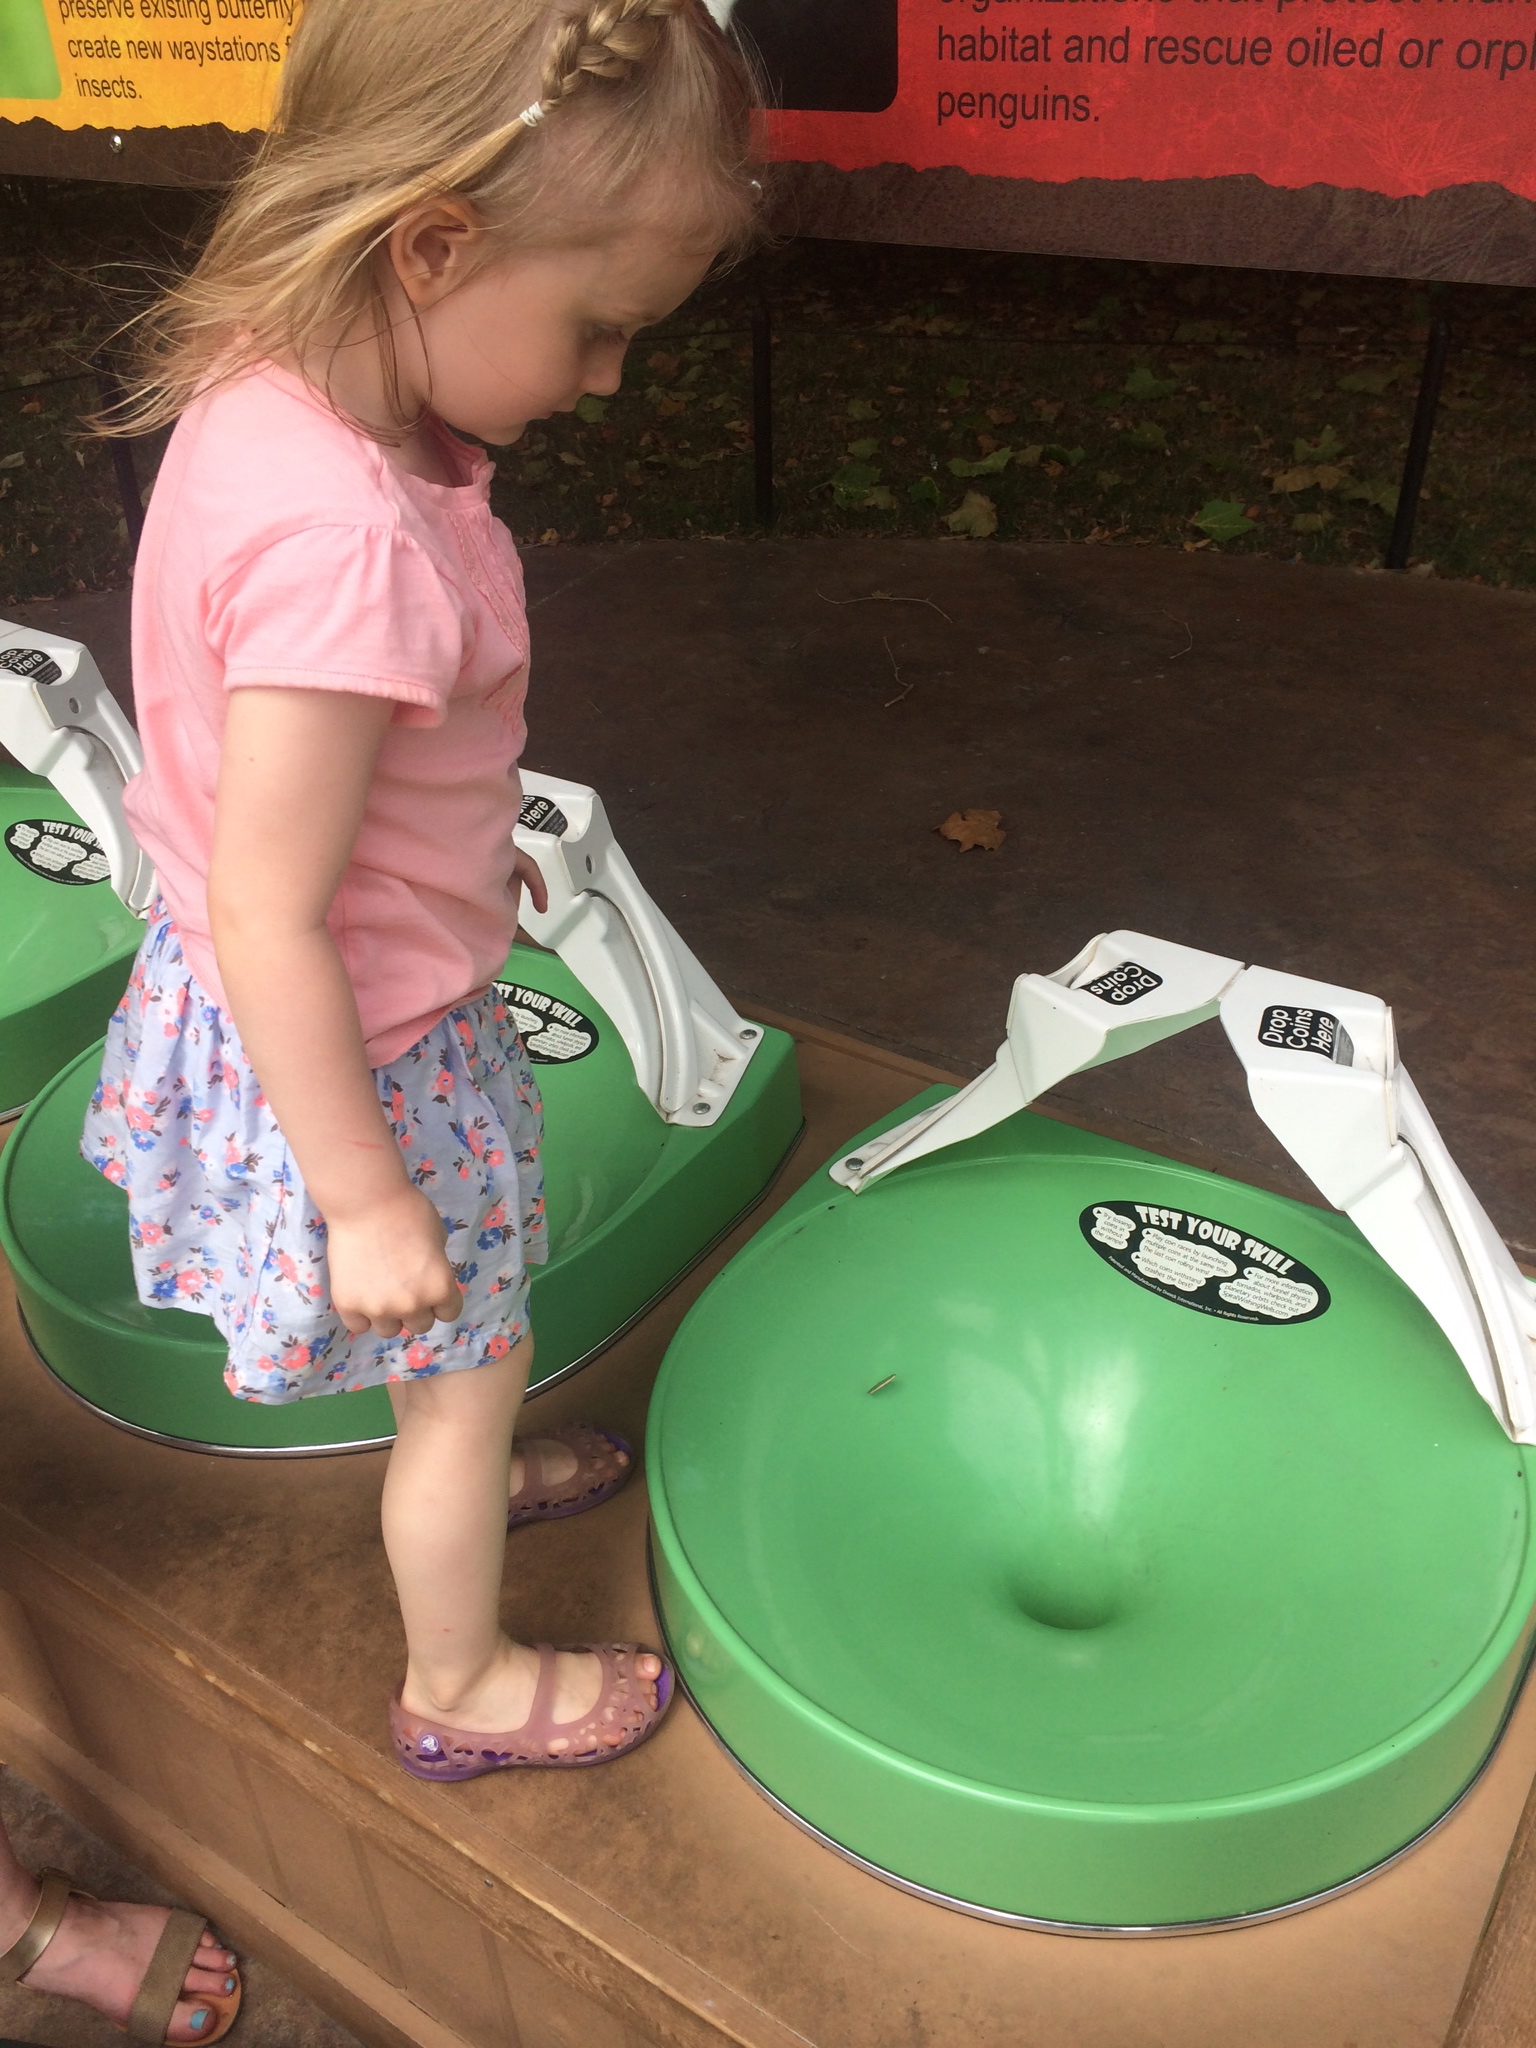
Voting for the conservation project! We all voted for the penguins…Hailey’s choice : ) : )
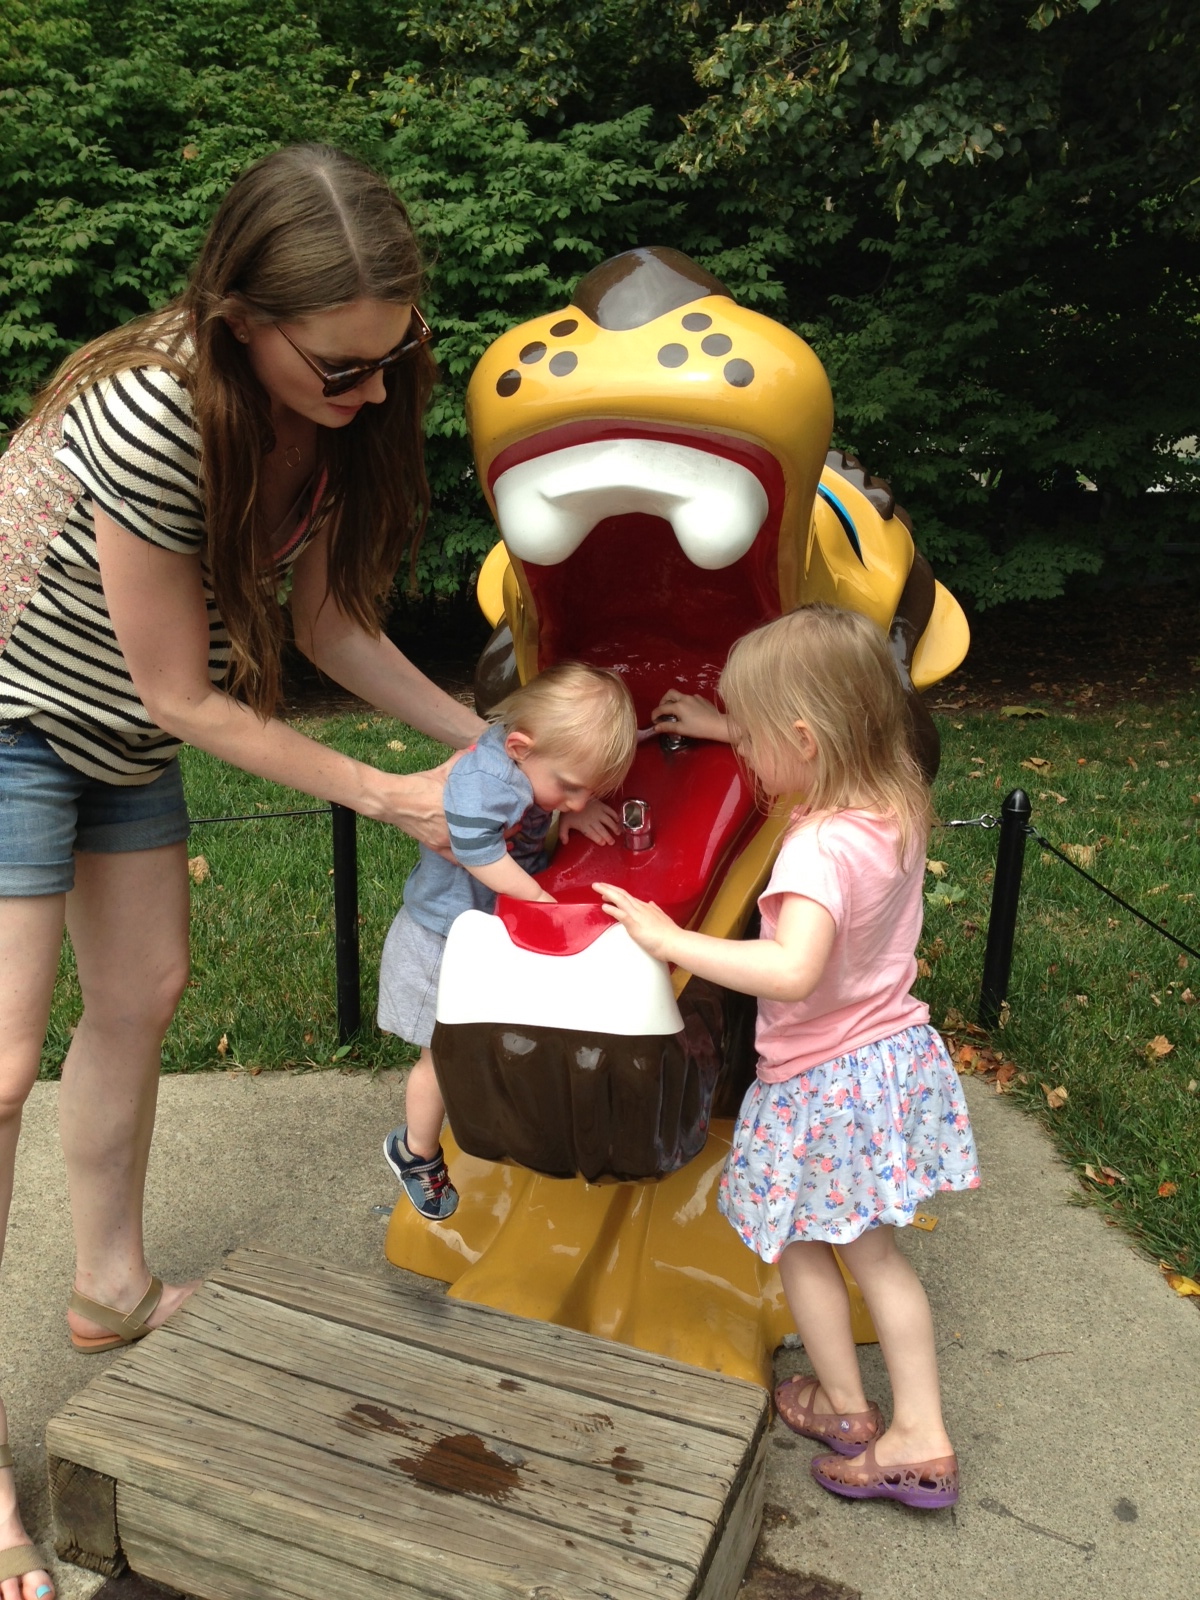
SOMEWHERE there are picures of me with this same drinking fountain (ahem…mom!! haha) …I GEEK over tradtions like this!!
Safari guide!!

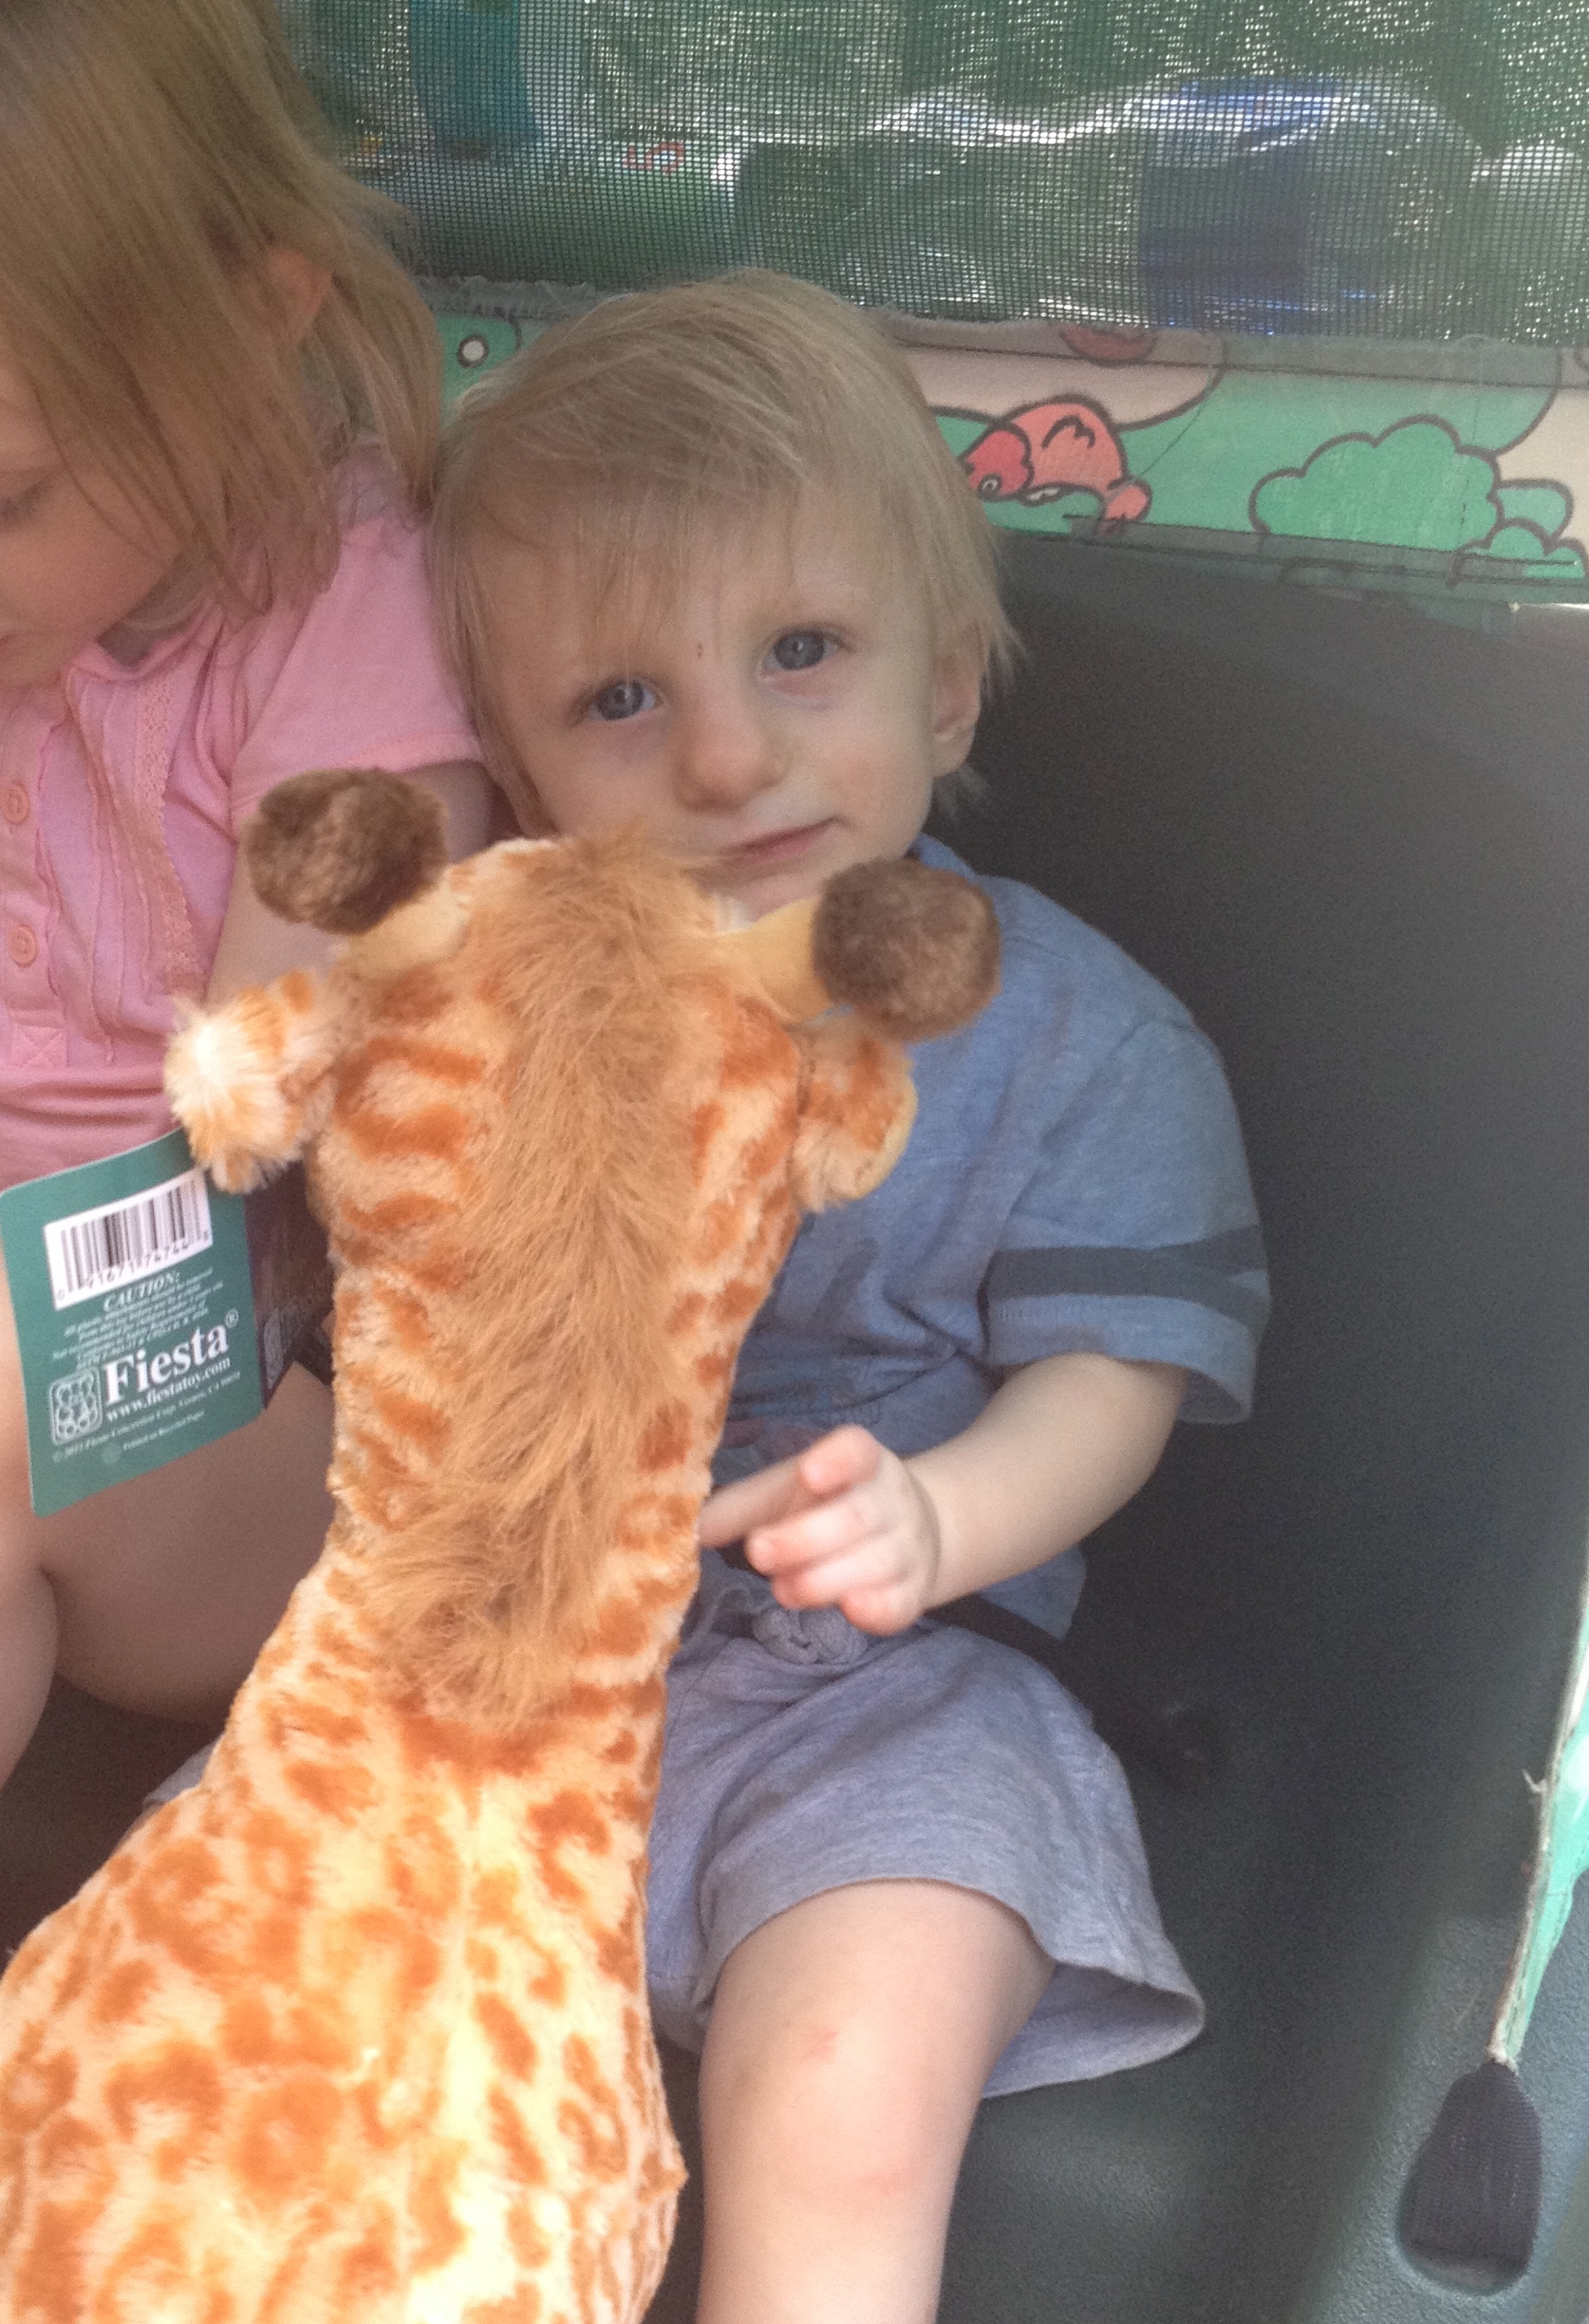
Oh no big deal…just Connor LIVING HIS DREAM and feeding a giraffe! His favorite animal, by far! 
We weren’t sure he would recognize them or even like them in person…he was IN LOVE!! It totally made my weekend to see that joy on his face!! 
Zuri the giraffe : )

Hailey loves music of any kind so this was a fun moment for her!! 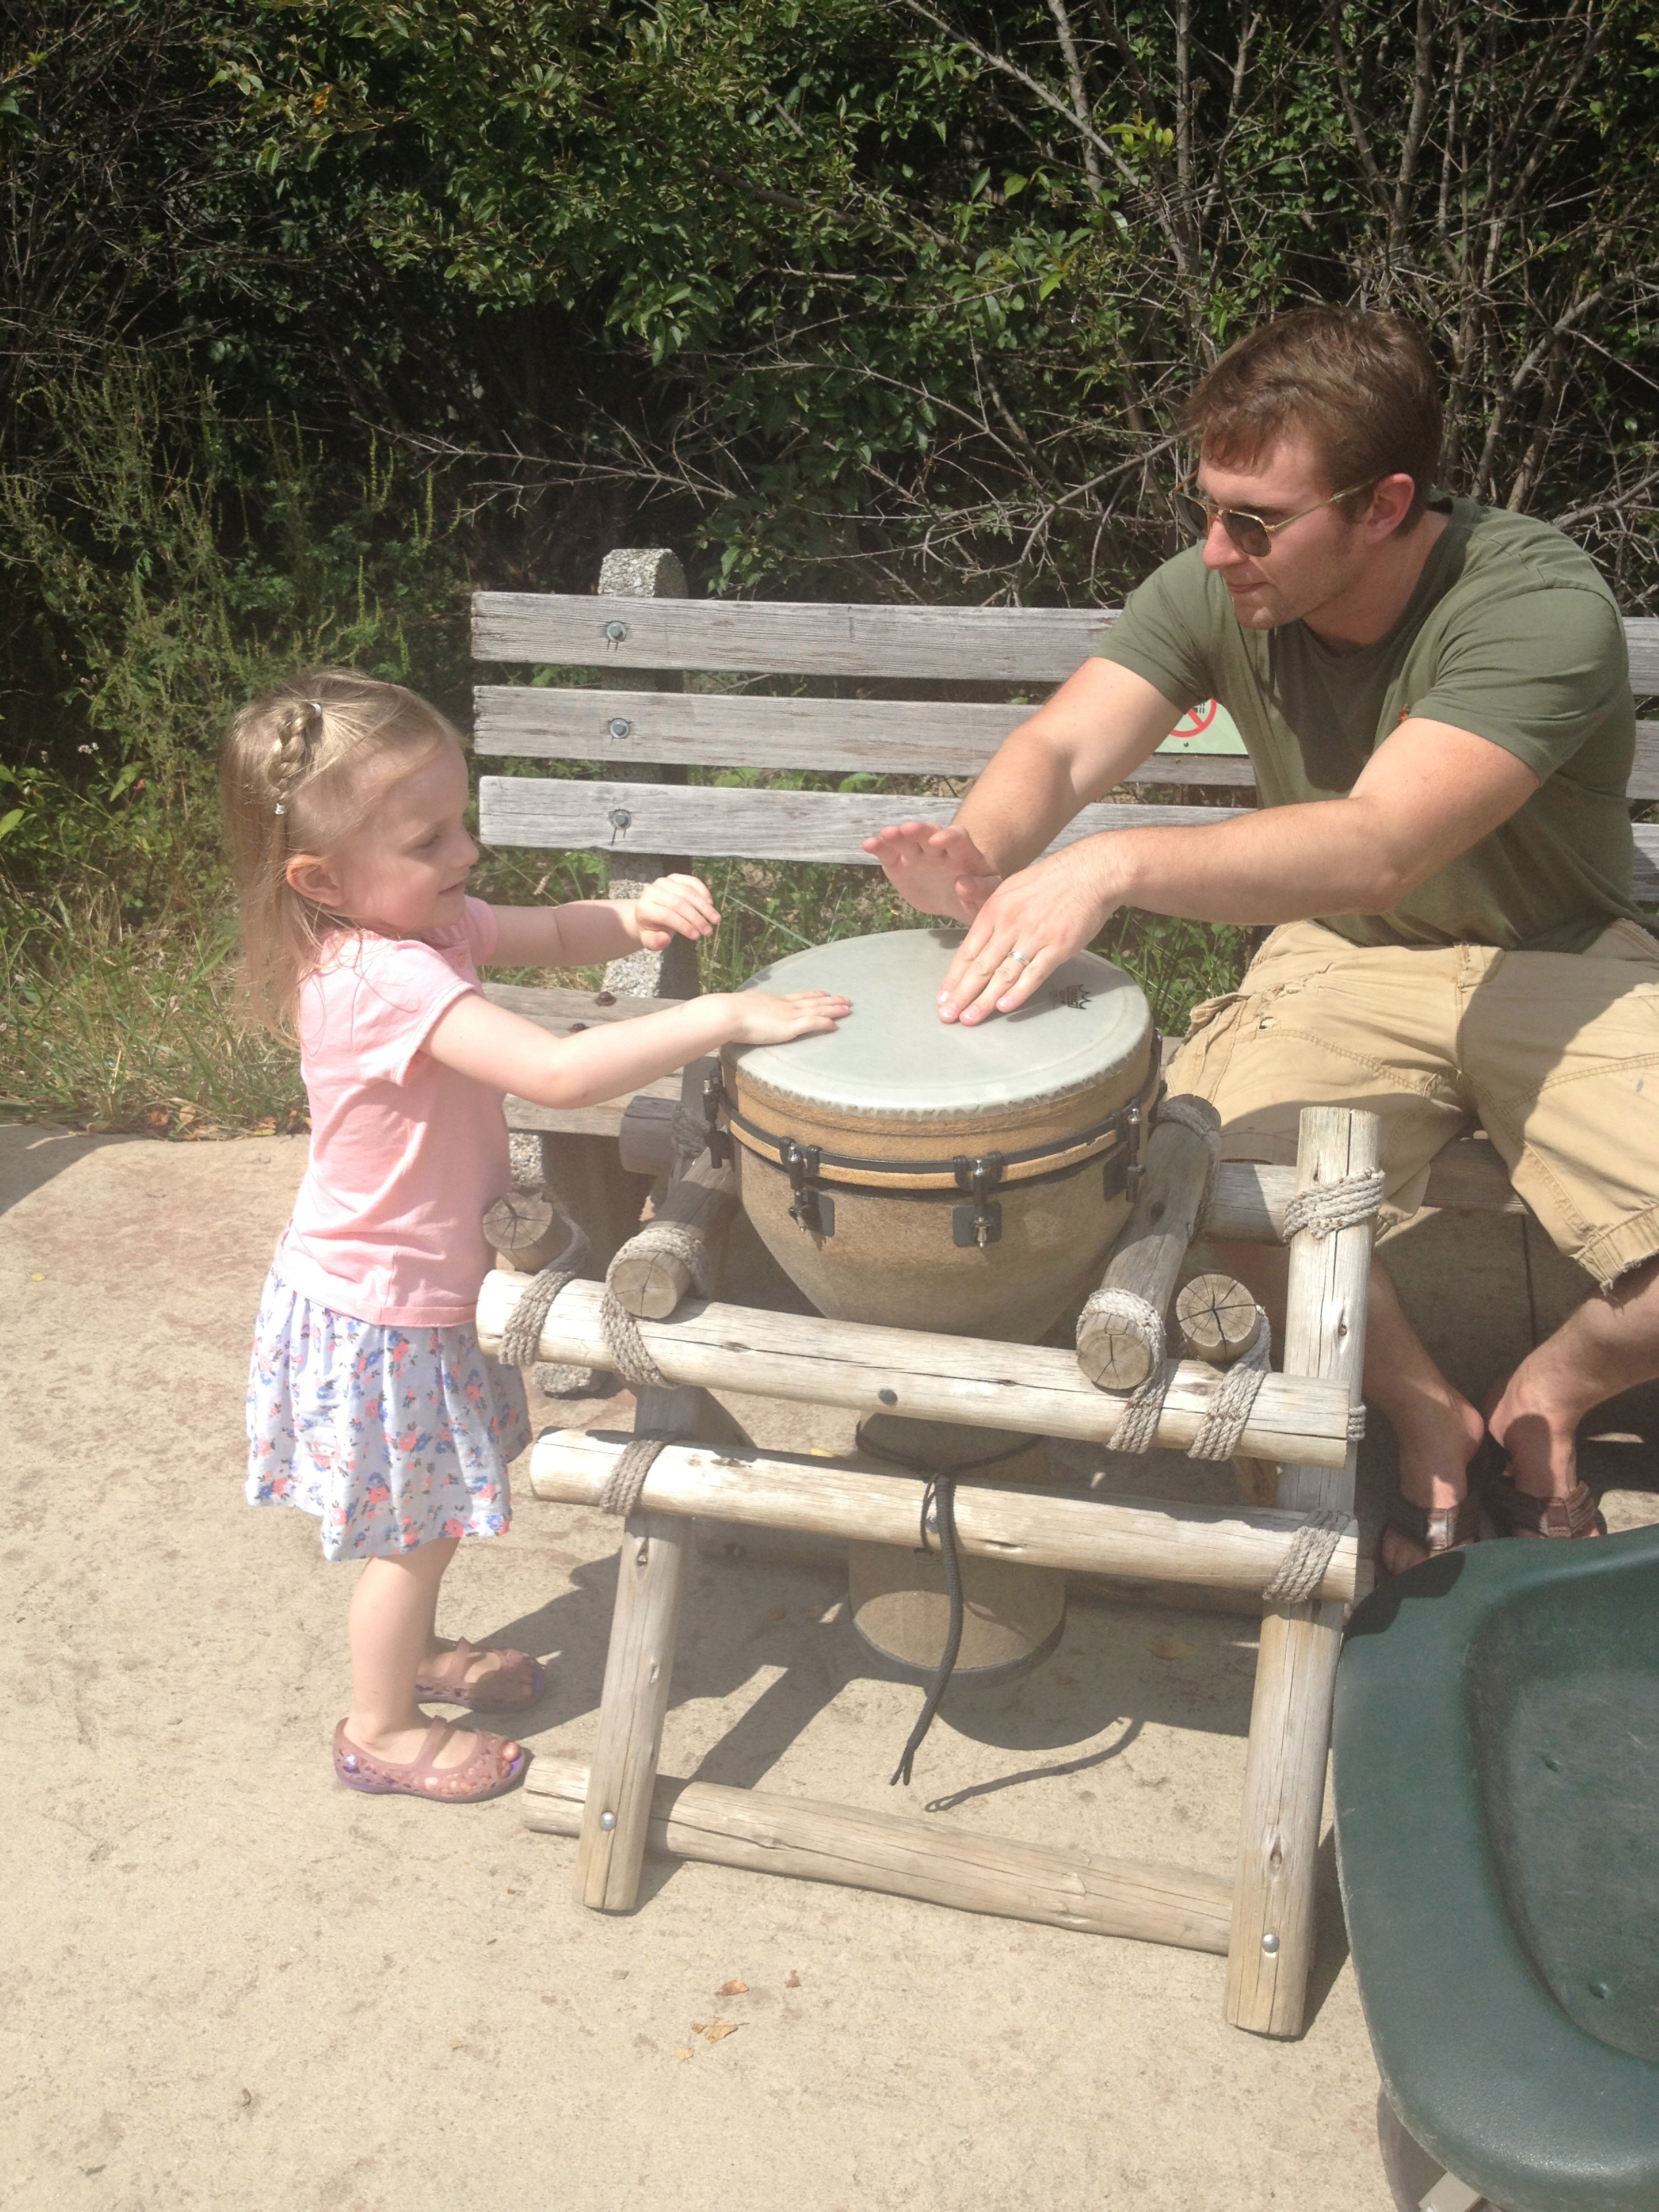
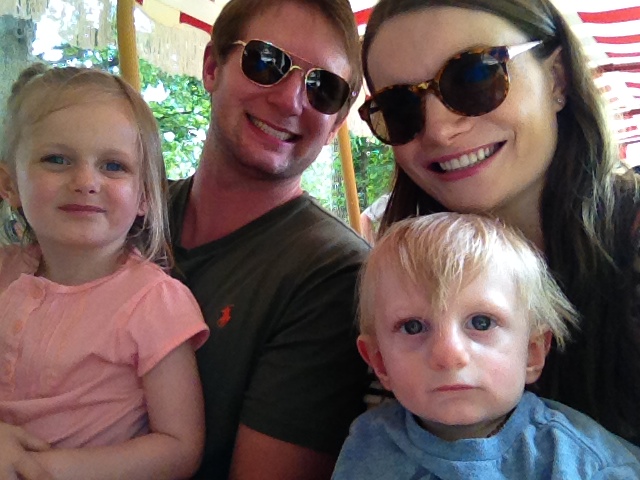
My little loves!!
Hailey LOVED when the animals were nice and close!! She talked to this Orangutan for a bit!!

We worked hard to get her the exact animal she wanted!! It had to be the panda WITH the bamboo ; )

If there aren’t any giraffes I guess this kitty will do ; )
My mom is the bomb.com at getting pictures like this in the perfect spot on rides!
Meet Connor’s newest giraffe friend, Zuri ; )
Morning boat ride with my girlie!!

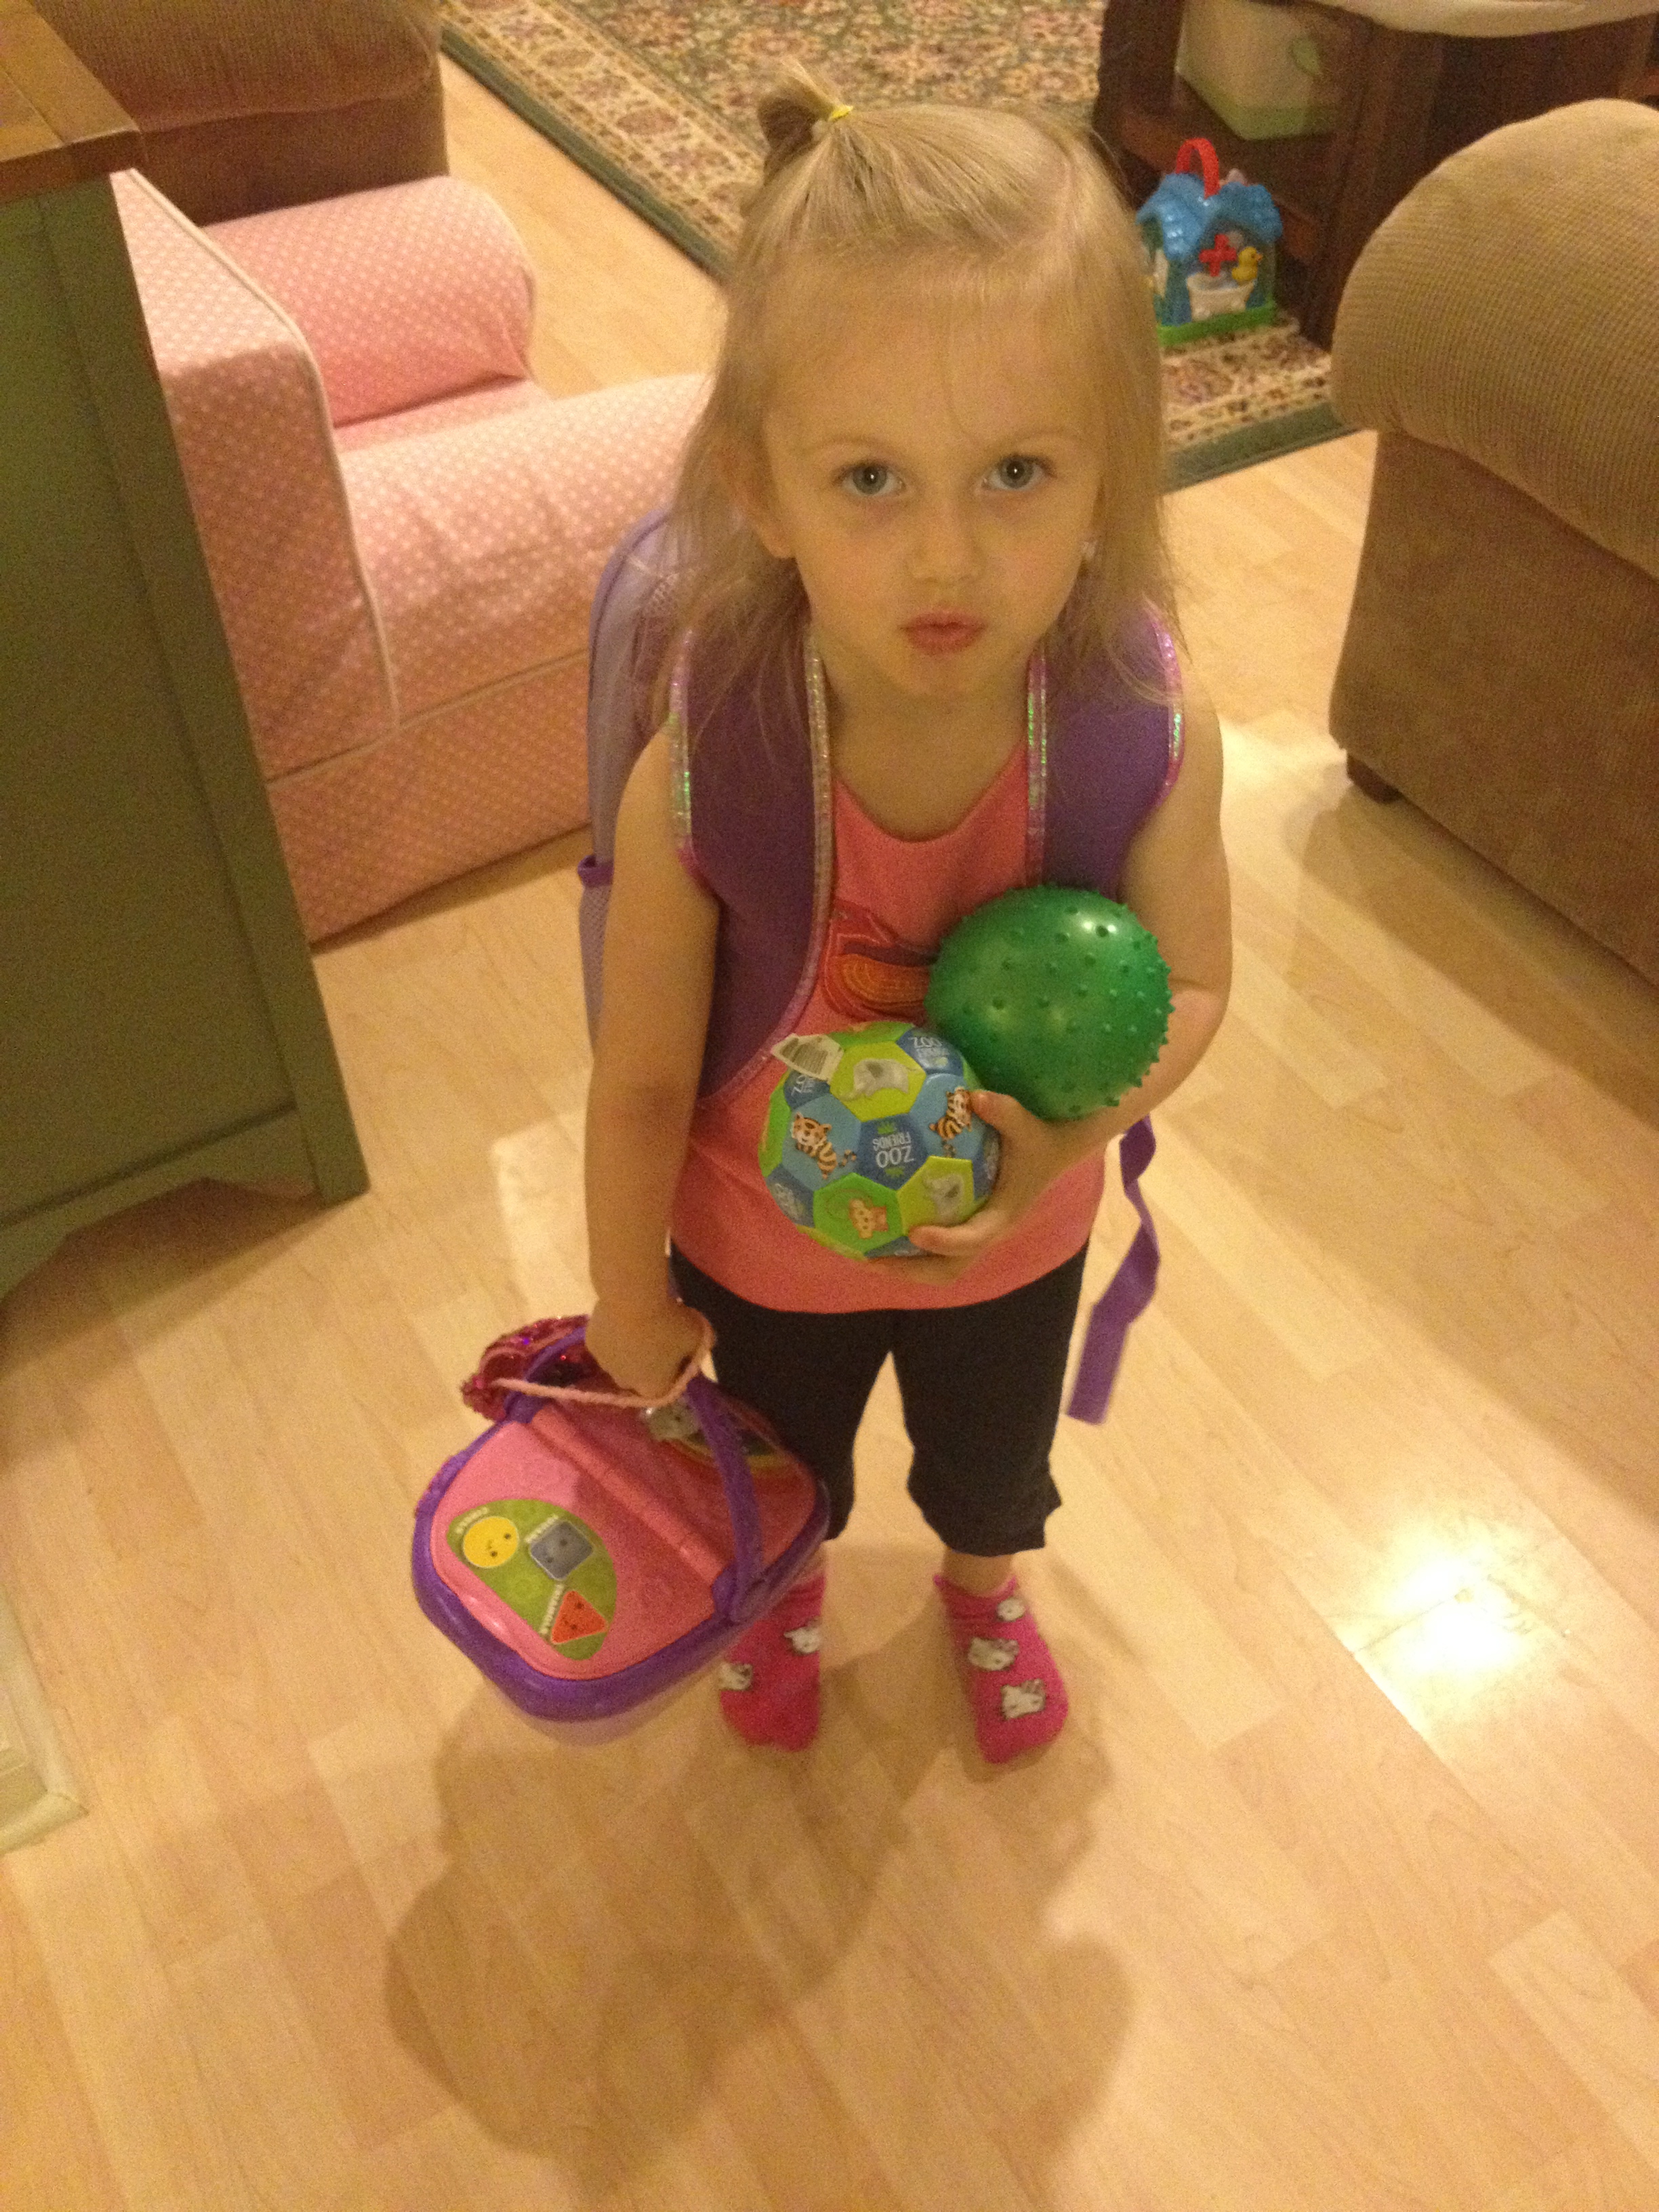
Hailey was packing for school! One more week till pre-school! AHHH!
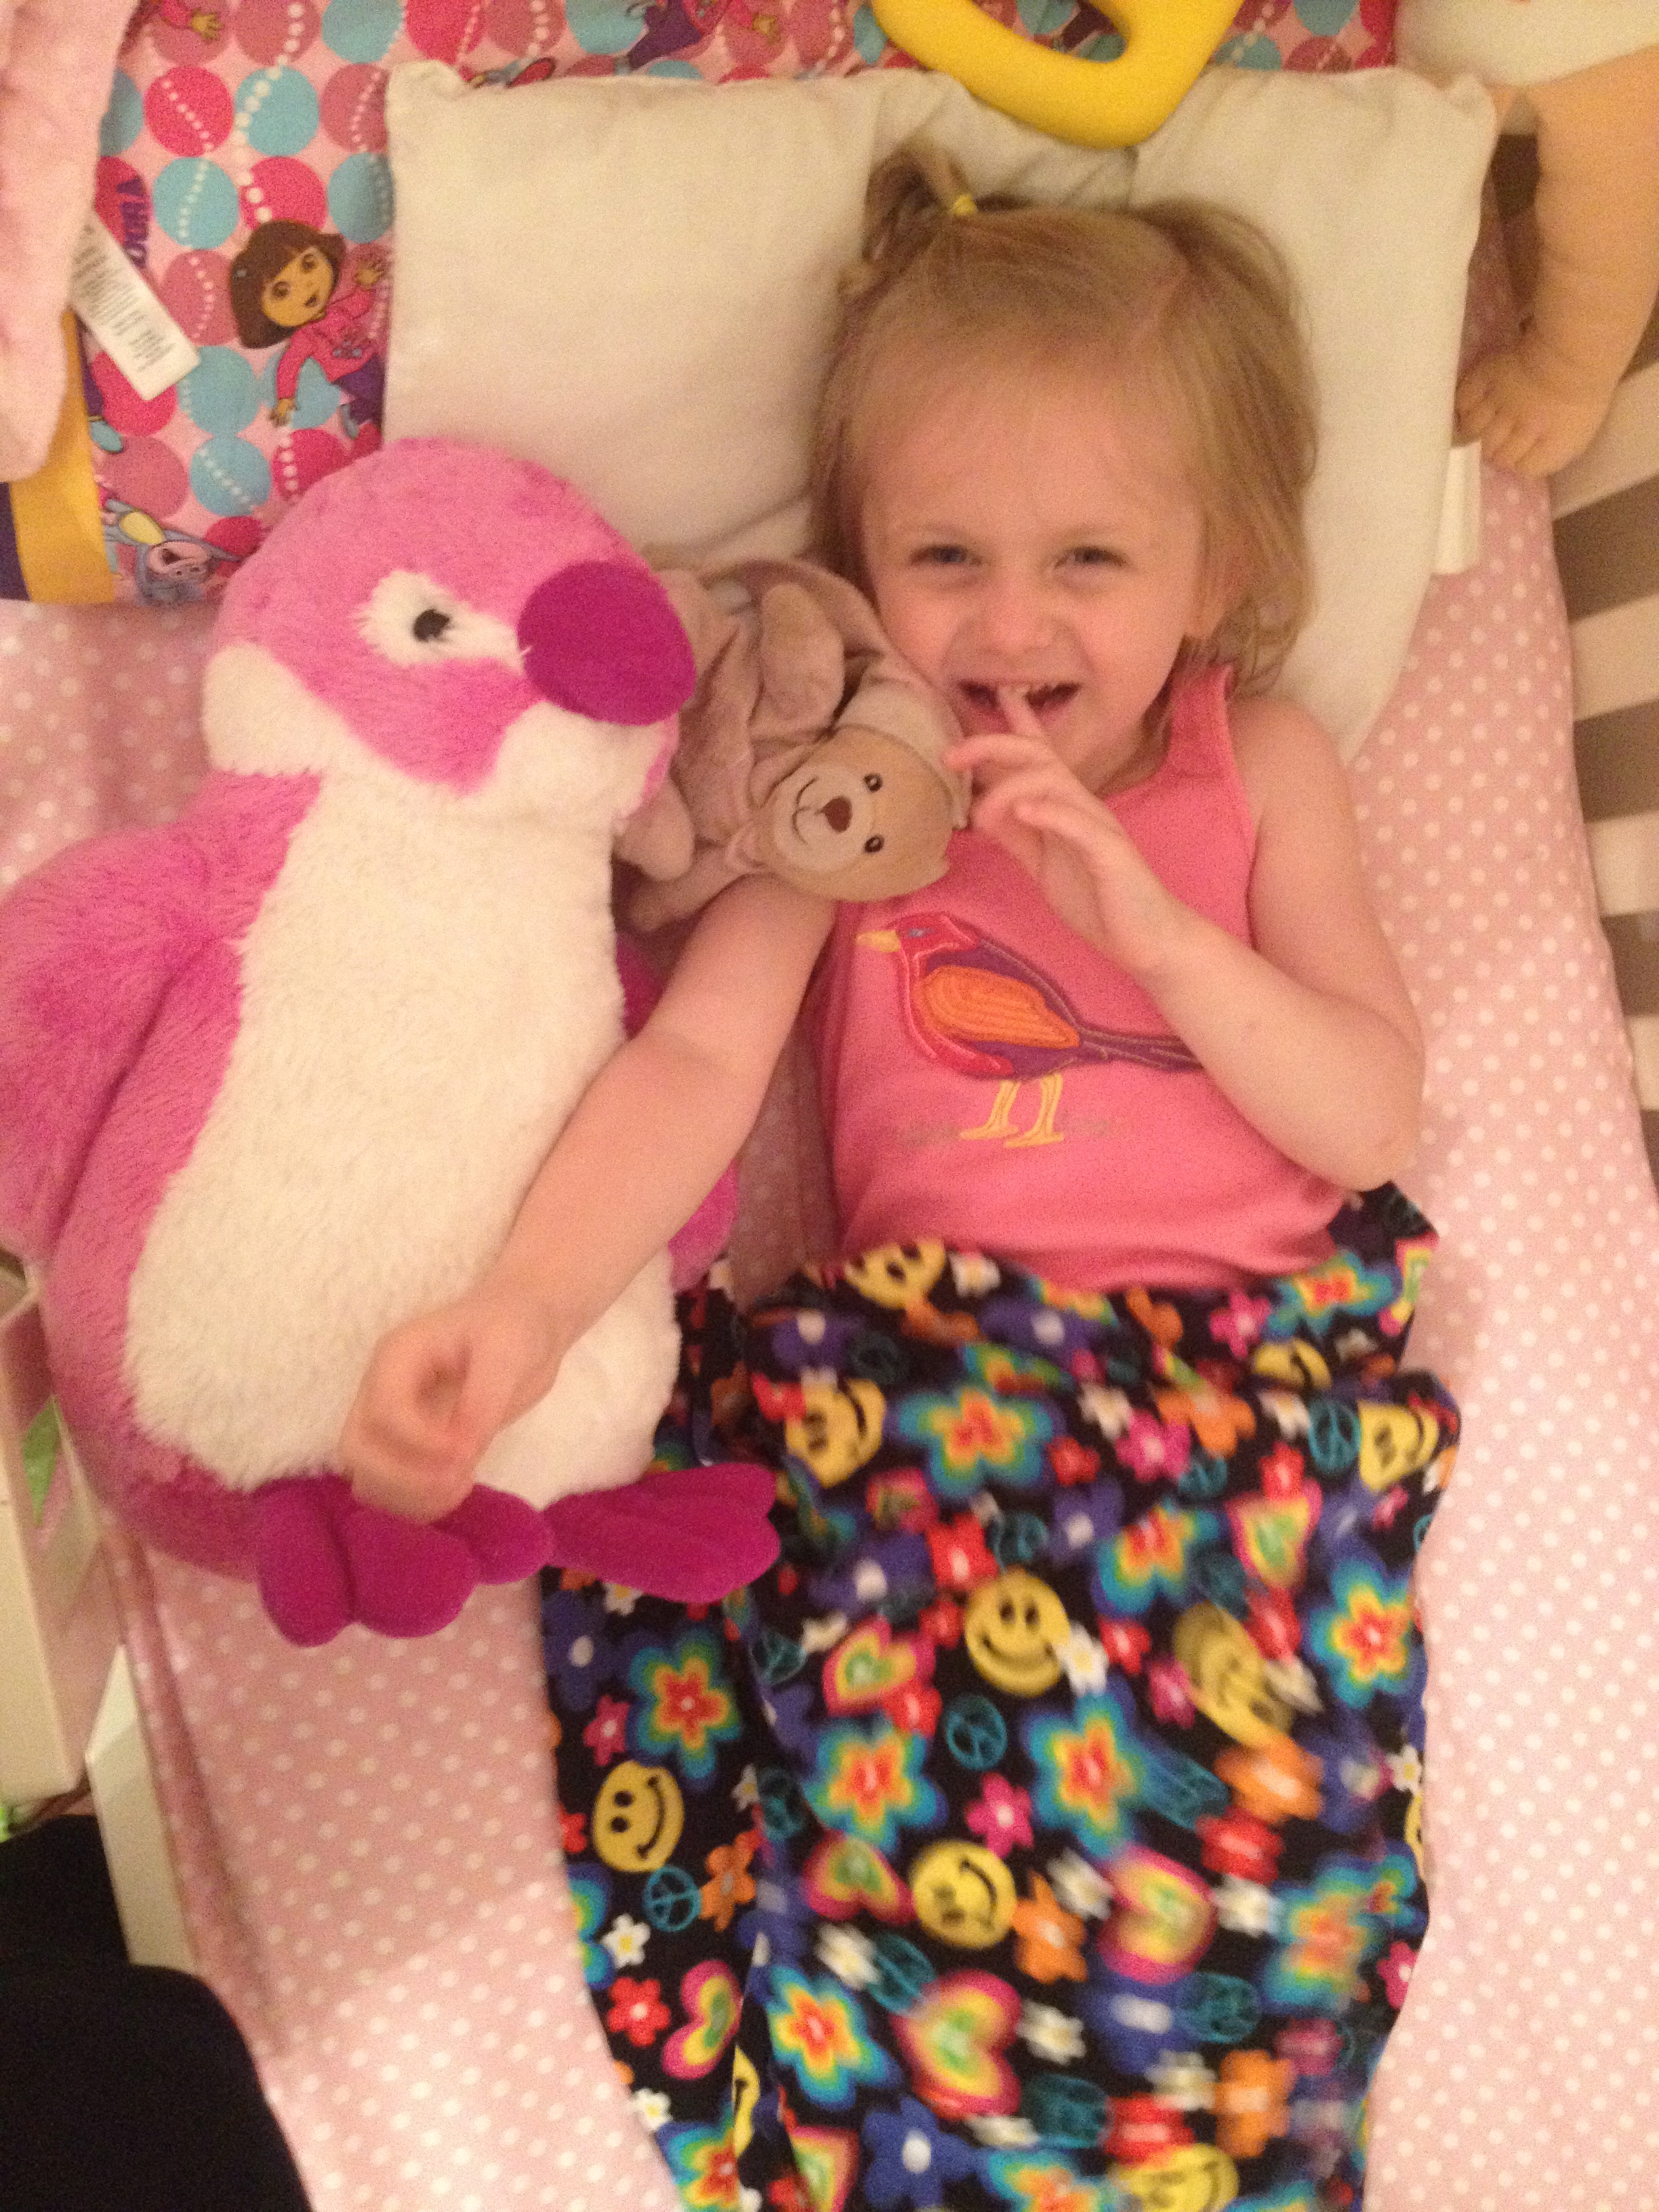
Connor picked the giraffe, and Hailey opted for the pink penguin : ) We named her Icee because Hailey had her first taste of an ICEE at the zoo ; )
Do you enjoy these picture posts? I love showing off my family with you : ) Stay tuned for a *GENDER REVEAL* coming up pretty soon!! So get excited!!! Please subscribe and share! Have a wonderful rest of your week and don’t forget to check out my Leah’s Friday Five on the Pearls and Pastries Shop Blog this Friday!!
Hi there! Happy Monday!!
I received a request to talk about the correct way to apply liquid foundation and today I am going to share my top 3 ways to apply it. I want to also say that I am not a professinal makeup artist…but I do play around a lot with different makeup, make up brushes and applicators, read blogs and watch videos on makeup a lot…so there is that ; ) If you have any questions or requests, please never hestitate to reach out to me! I would LOVE some more participation from my readers!!
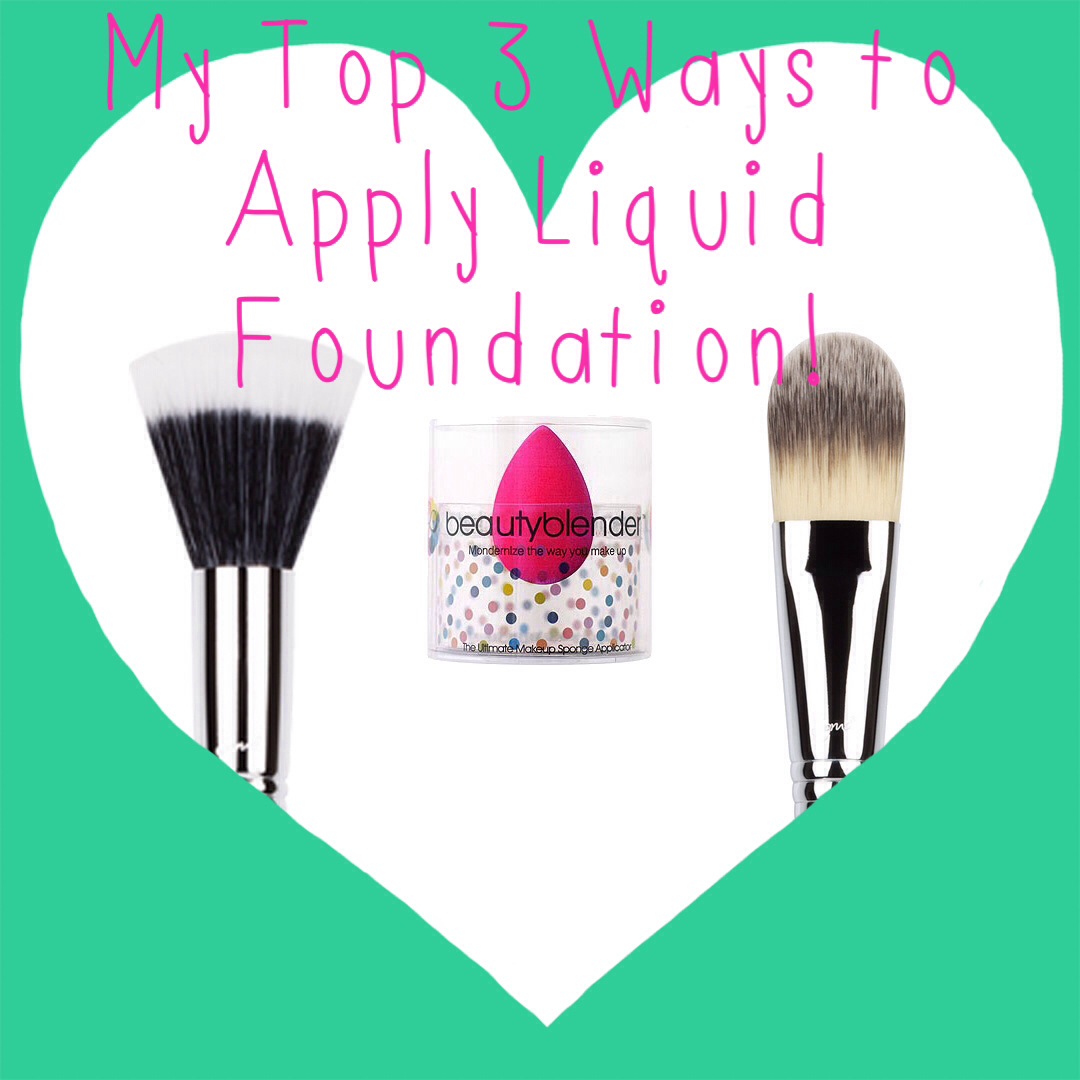
#1 Stipple It On!
I LOVE LOVE LOVE to stipple on my foundation!! To stipple means to dot and that is exactly what you do with this technique! You dot on the foundation instead of brushing the foundation on. Stippling on your foundation gives a beautiful diffused finish because the foundation doesn’t go into lines or scars as easily, but rather brushes over them for a beautiful flawless appearance.
What I Do:
I put a little bit of foundation on the top of the hand that I won’t be holding the brush with (so in my case my left hand) between my thumb and pointer finger. I use the pointer finger of my right hand to dot foundation on the area of my face I want to start with because I like to work in sections. I work in sections because if I dotted foundation all over my face some of it may begin to set before I’ve gotten to it. I stipple the foundation onto my skin by making quick dotting motions up and down to get the perfect finish.
What I Use:
My absolute favorite stippling brush is the F50 Duo Fiber from Sigma Beauty. This brush is sold individually as well as in sets. I use this brush so often that I have two so that it’s in constant rotation even when I’m washing some of my brushes. This brush can also be used to apply cream or liquid blush and bronzer.
#2 Traditional Foundation Brush
When I first started out this is the technique I used, and it’s still a great option. I think that this is a great way when you are first starting out with makeup or with liquid foundations. Using a traditional foundation brush can cause streaking, which nobody wants, but as long as you make small strokes it can be fairly easily avoided.
What I Do:
I put the foundation onto my hand just like I described above, but this time I use the brush to brush on my foundation as if I was painting. I am careful to use very short strokes, and change the direction of the brush as I go. Changing direction when using a foundation brush like this helps so that it isn’t all strokes going the same way which can look streaky.
What I Use:
The foundation brush I use the most frequently is my F60 Foundation Brush from Sigma Beauty, but I also have had great luck with foundation brushes similar to this from Real Techniques, Tarte, and Sephora’s brush line.
#3 Beauty Blender Sponge
I am sure by now almost all of you have tried this sponge, and if not you have probably at least heard about it! This is a GAME CHANGER for me!! It is completely worth the price! This allows me to build up the coverage as needed and you can never see the foundation (a big no-no!)…all you see is beautiful skin that looks airbrushed.
What I Do:
I like to lightly dampen the sponge before using it. I use the round end to apply foundation to my chin, cheeks, nose and forehead. I use the pointy end to apply foundation to harder to reach places like my under eye area and around my nose. I both dot and blend the sponge to get the perfect seamless look.
What I Use:
I have only used The Original Beauty Blender but I know there are lots of other imitators flooding the market now! I have read and watched lots of reviews, and the only sponge that seems to stand up to Beauty Blender is the Miracle Complextion Sponge by Real Techniques. The Real Techniques sponge is about 1/4 of the price of the Beauty Blender, so that might be a great option for some people. If you would like to see me do a comparision sponge on any of these sponges, let me know! Also, if you have tried any that you love (or don’t love!!) let me know in the comments!!
I hope that this post was helpful! Please take a minute to subscribe if you haven’t already! Just enter your email into the box on the right side of this page and you’ll get an email to confirm your subscription!! It will make my day : ) : ) If you have ANY questions please let me know and have a fabulous day!!
Hi there! Happy Wednesday!
Awhile ago I shared my Get Unready With Me: My Night-Time Routine and now I would like to share my morning skincare routine. While pregnant I do not use certain products, so this will be updated after the pregnancy and I can share that when the time comes.
MY MORNING SKINCARE ROUTINE:

Step 1: Solve Math Problem Alarm App , Drink Water, and Drink Coffee
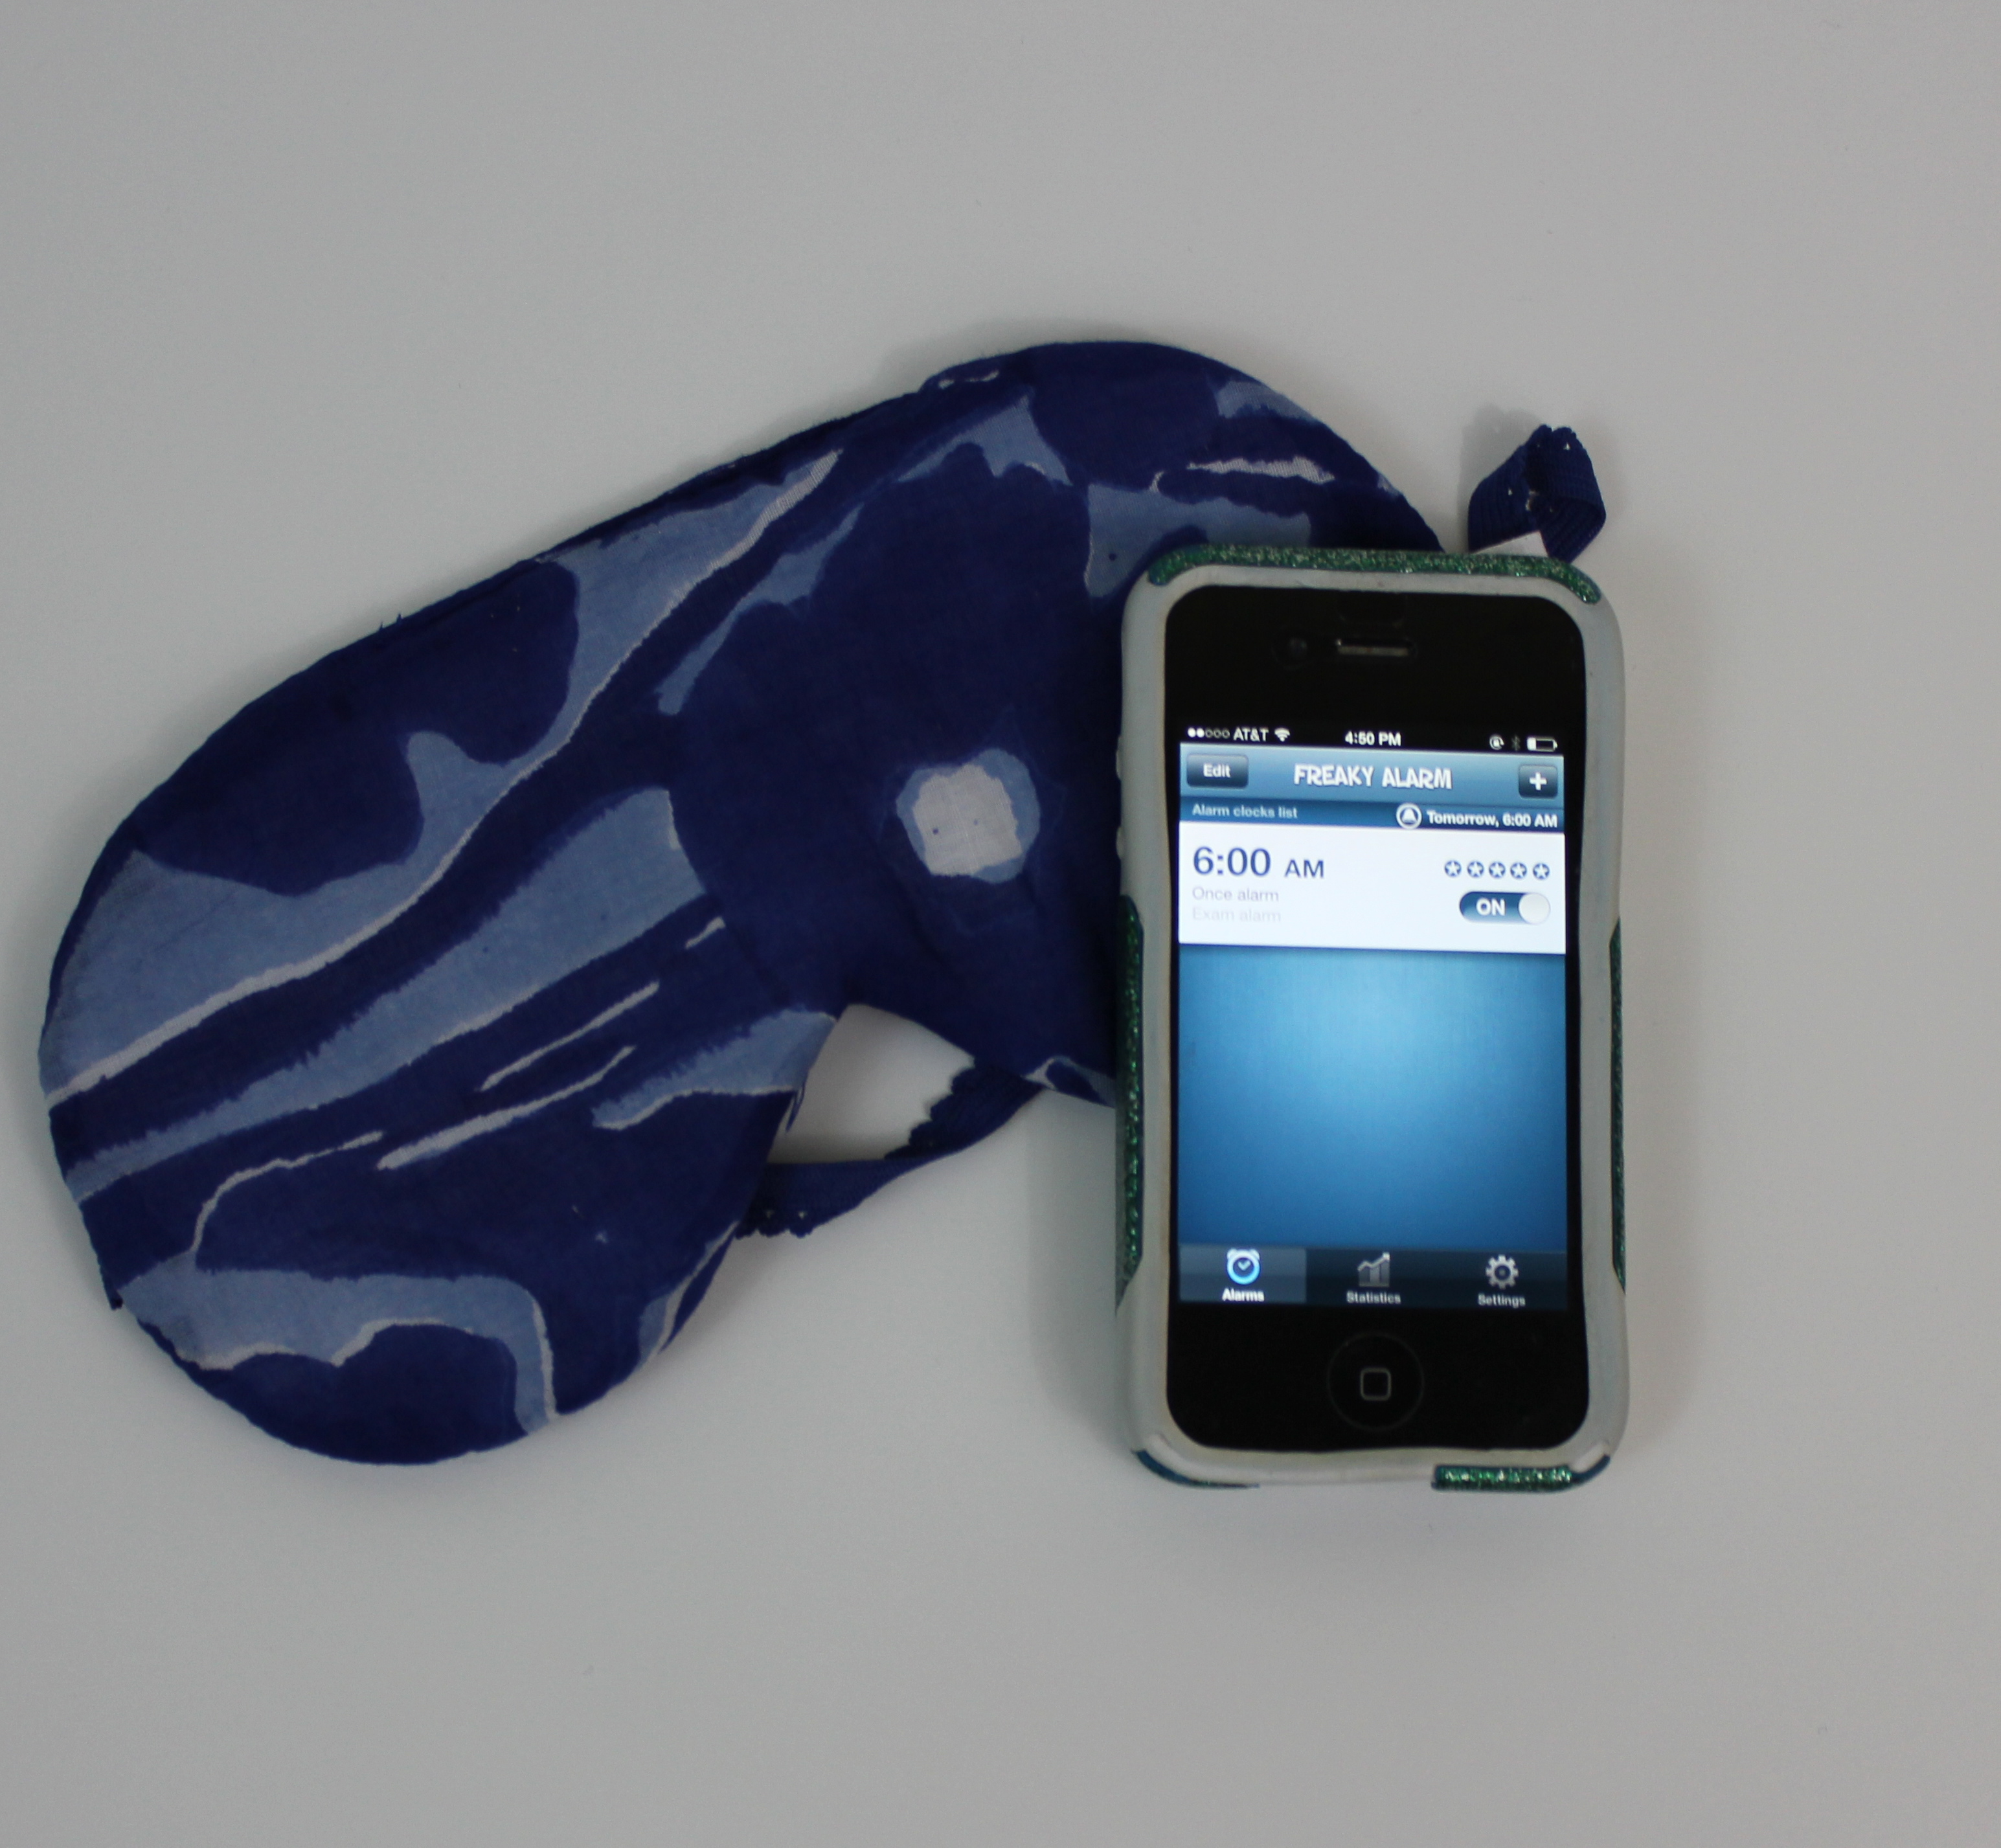
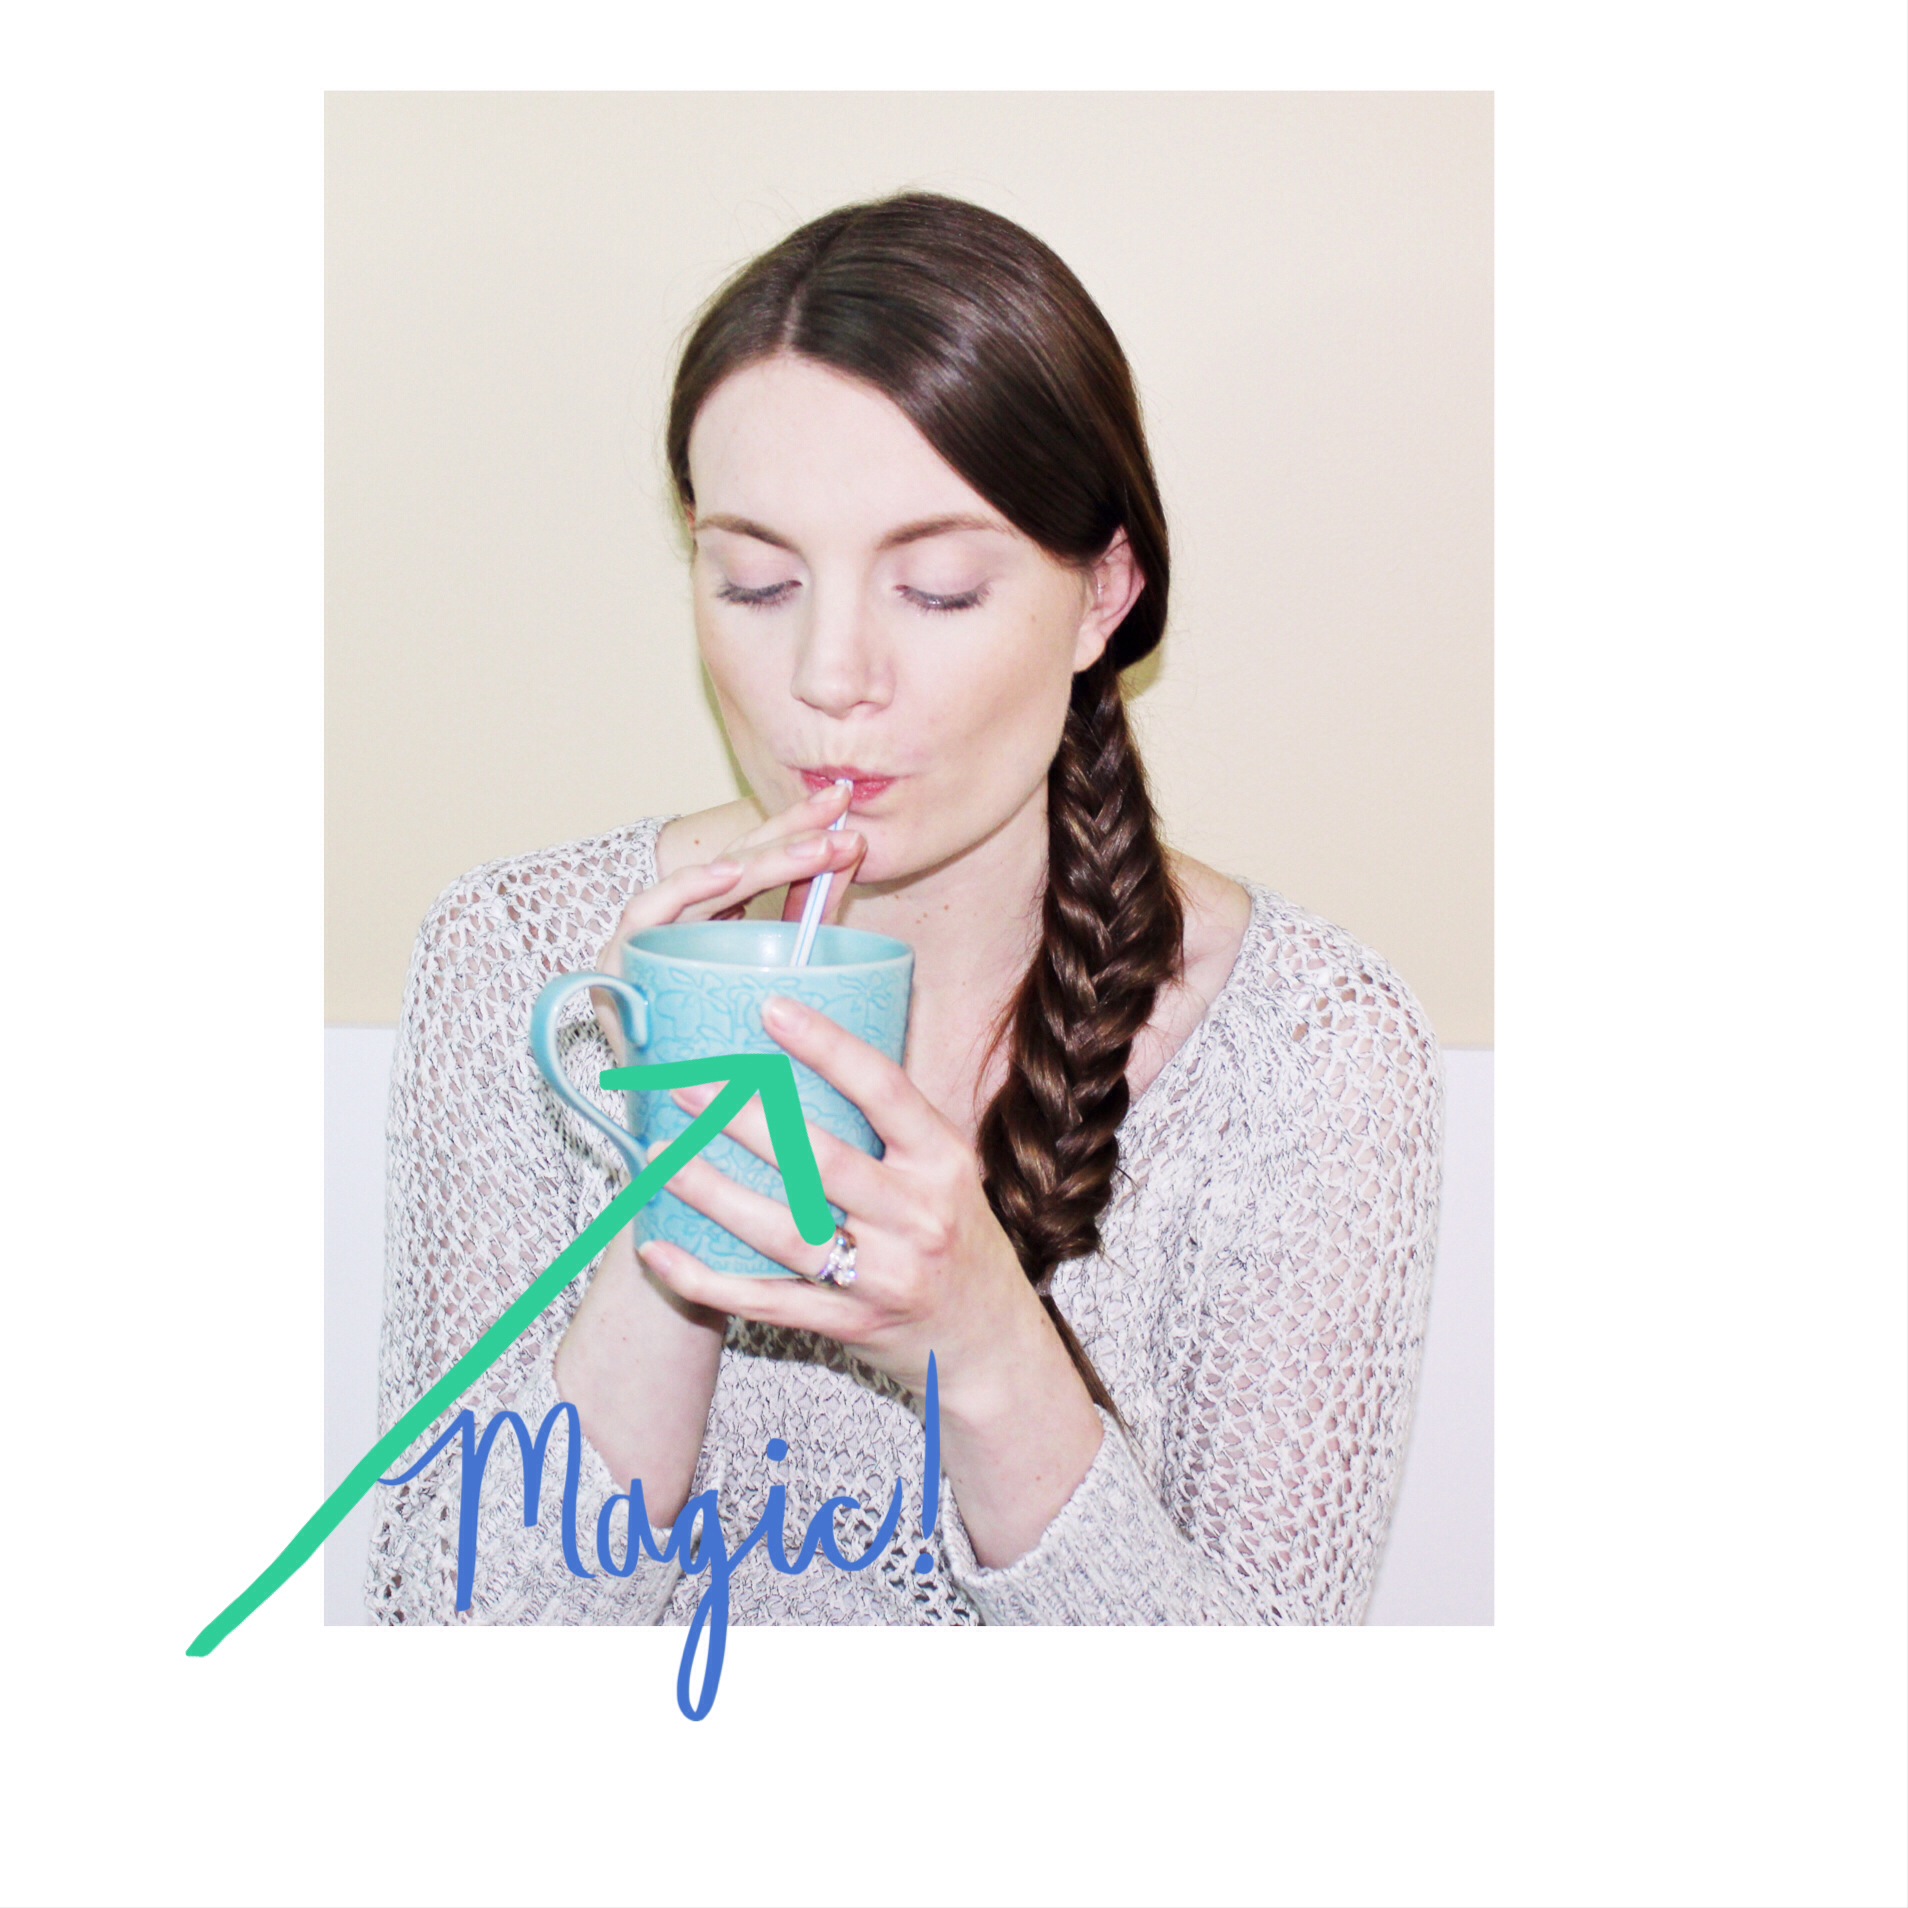
Math isn’t my thing, and so having the Freaky Alarm App makes sure I get up because I really have to think to solve even simple math in the morning!! The next step is throwing on a sweatshirt or a big comfy sweater because even in August, I’m cold most mornings. And then I drink a big glass of water which absolutely is part of my skincare routine(sometimes lemon water). And then finally, finally, my coffee (decaf right now!)…through a straw of course ; )
Step 2: Hair Goes Up
I put my hair up into a messy bun using a hair tie like these from Lucky Girl Hair Ties on Etsy or a big claw clip.
Step 3: Cleanse Face
I wash my face with my all-time favorite facewash, Purity by Philosophy with my Clarisonic. Then I dry my face with Kleenex Hand Towels to make sure that I’m not putting a dirty towel onto my just cleaned face. I also use a wash cloth just for my face after showering that I change out every couple of days to keep it as clean as possible.
Step 4: Use Toner
My favorite toner is an oldie but a goodie, Sea Breeze, and I like the one for sensitive skin.
Step 5: Use Moisturizer
I use Esteé Lauder Day Wear and it is my FAVORITE of all time!! I love that it has built in SPF 25, and never feels greasy on my combination/oily skin.
Step 6: Use Brightening Eye Cream
I have pretty bad dark circles…maybe it has something to do with two little kiddos and a pregnant mama?! ; ) To counteract the dark circles, I have been using the It’s Potent! Eye Cream from Benefit for a couple of years. I can tell that it helps, because a few times when I have not used it for awhile I can really notice a difference.
That’s it : ) Then I do any needed body grooming, get dressed, do my makeup, and hair. I hope that you enjoyed this post! What do you like to use for your morning skincare routine? Have a fantastic rest of your week and don’t forget to subscribe by entering your email in the box on the right side of this page! Thank you for reading!!
Hi there! Happy Monday!
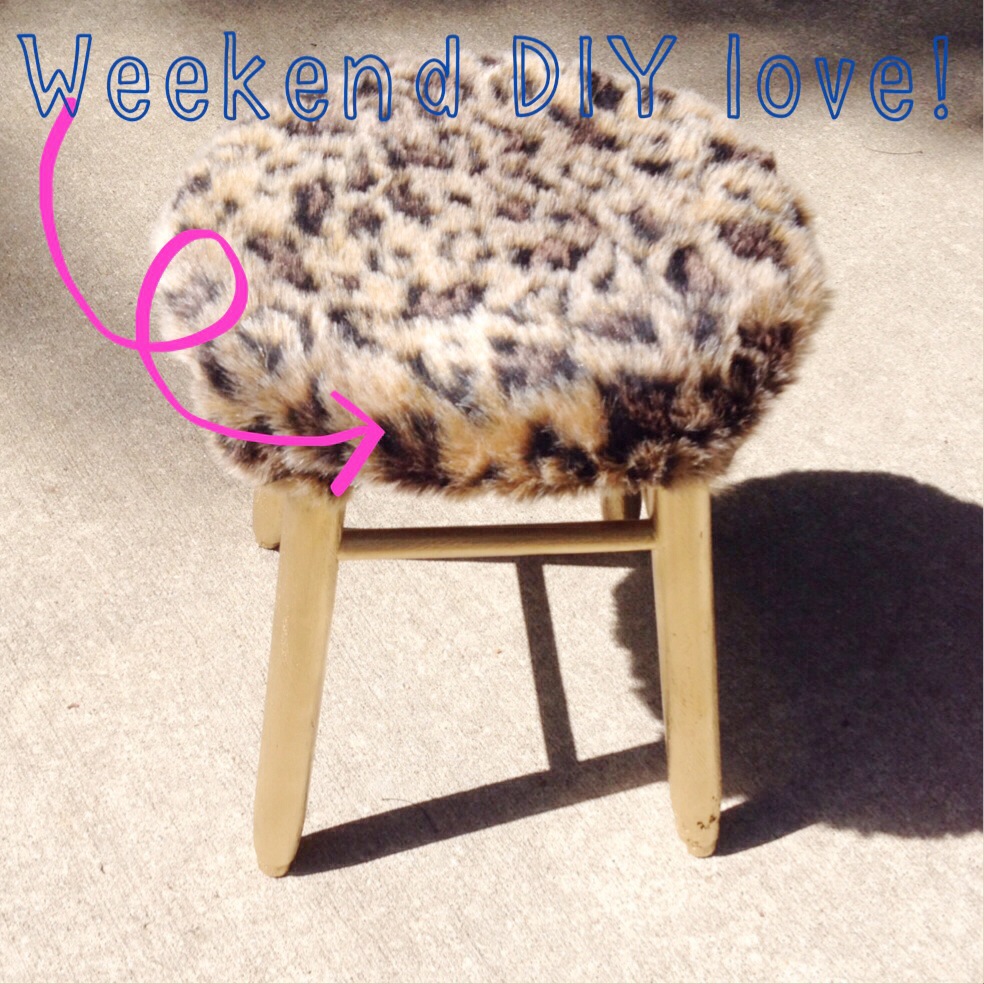
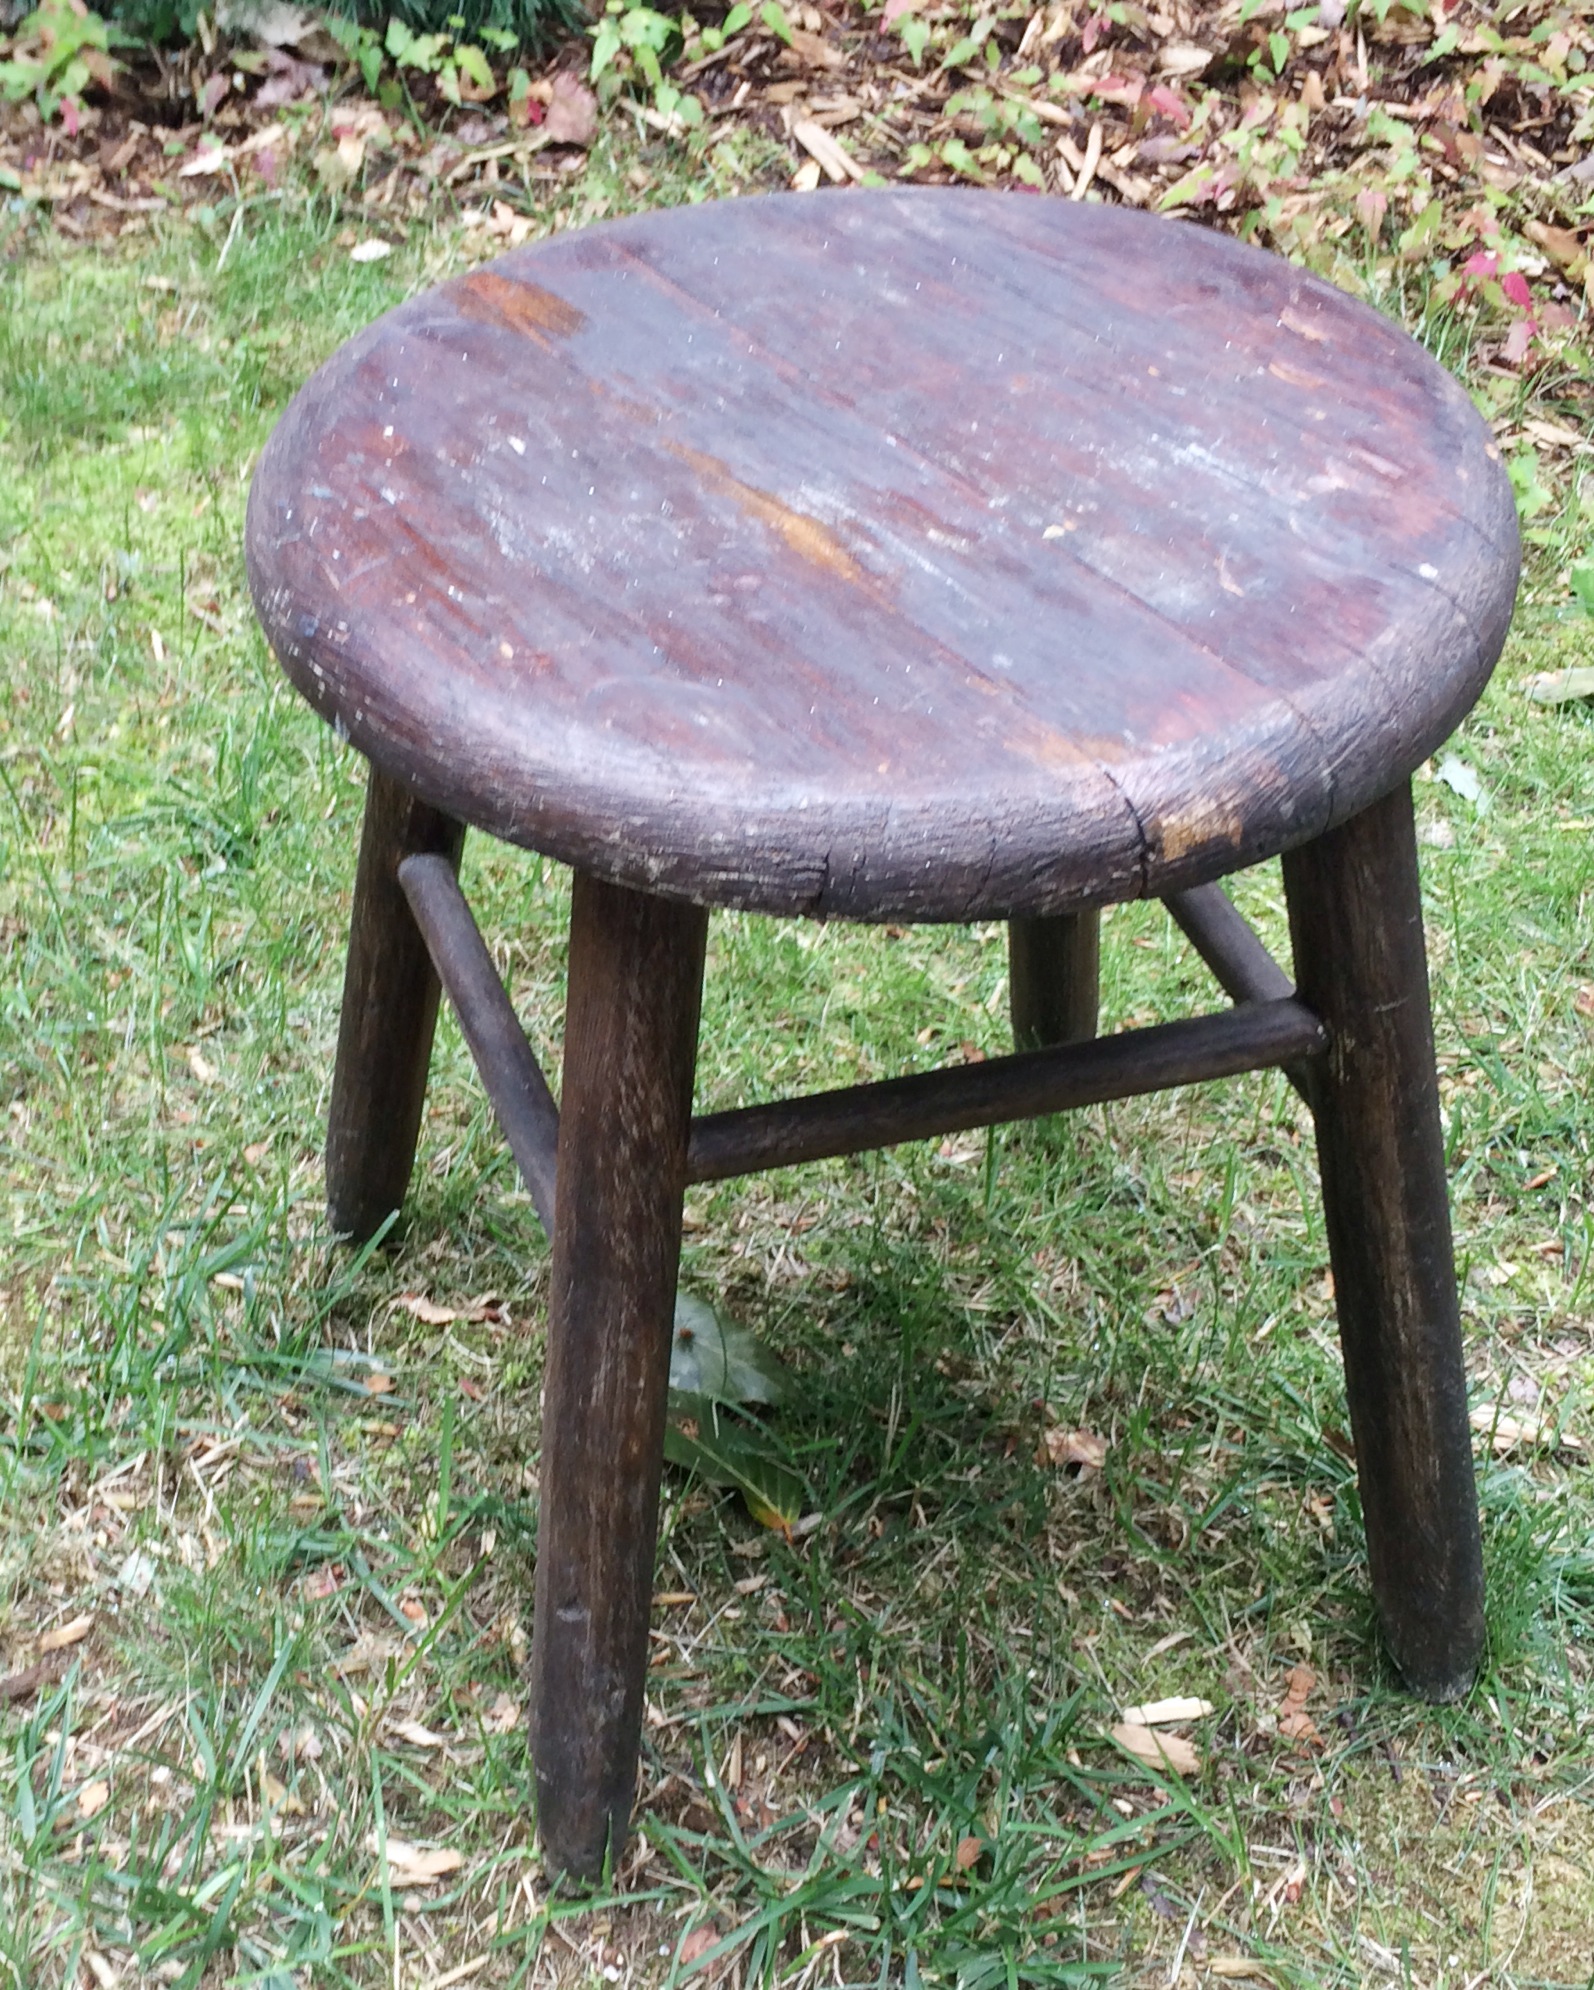
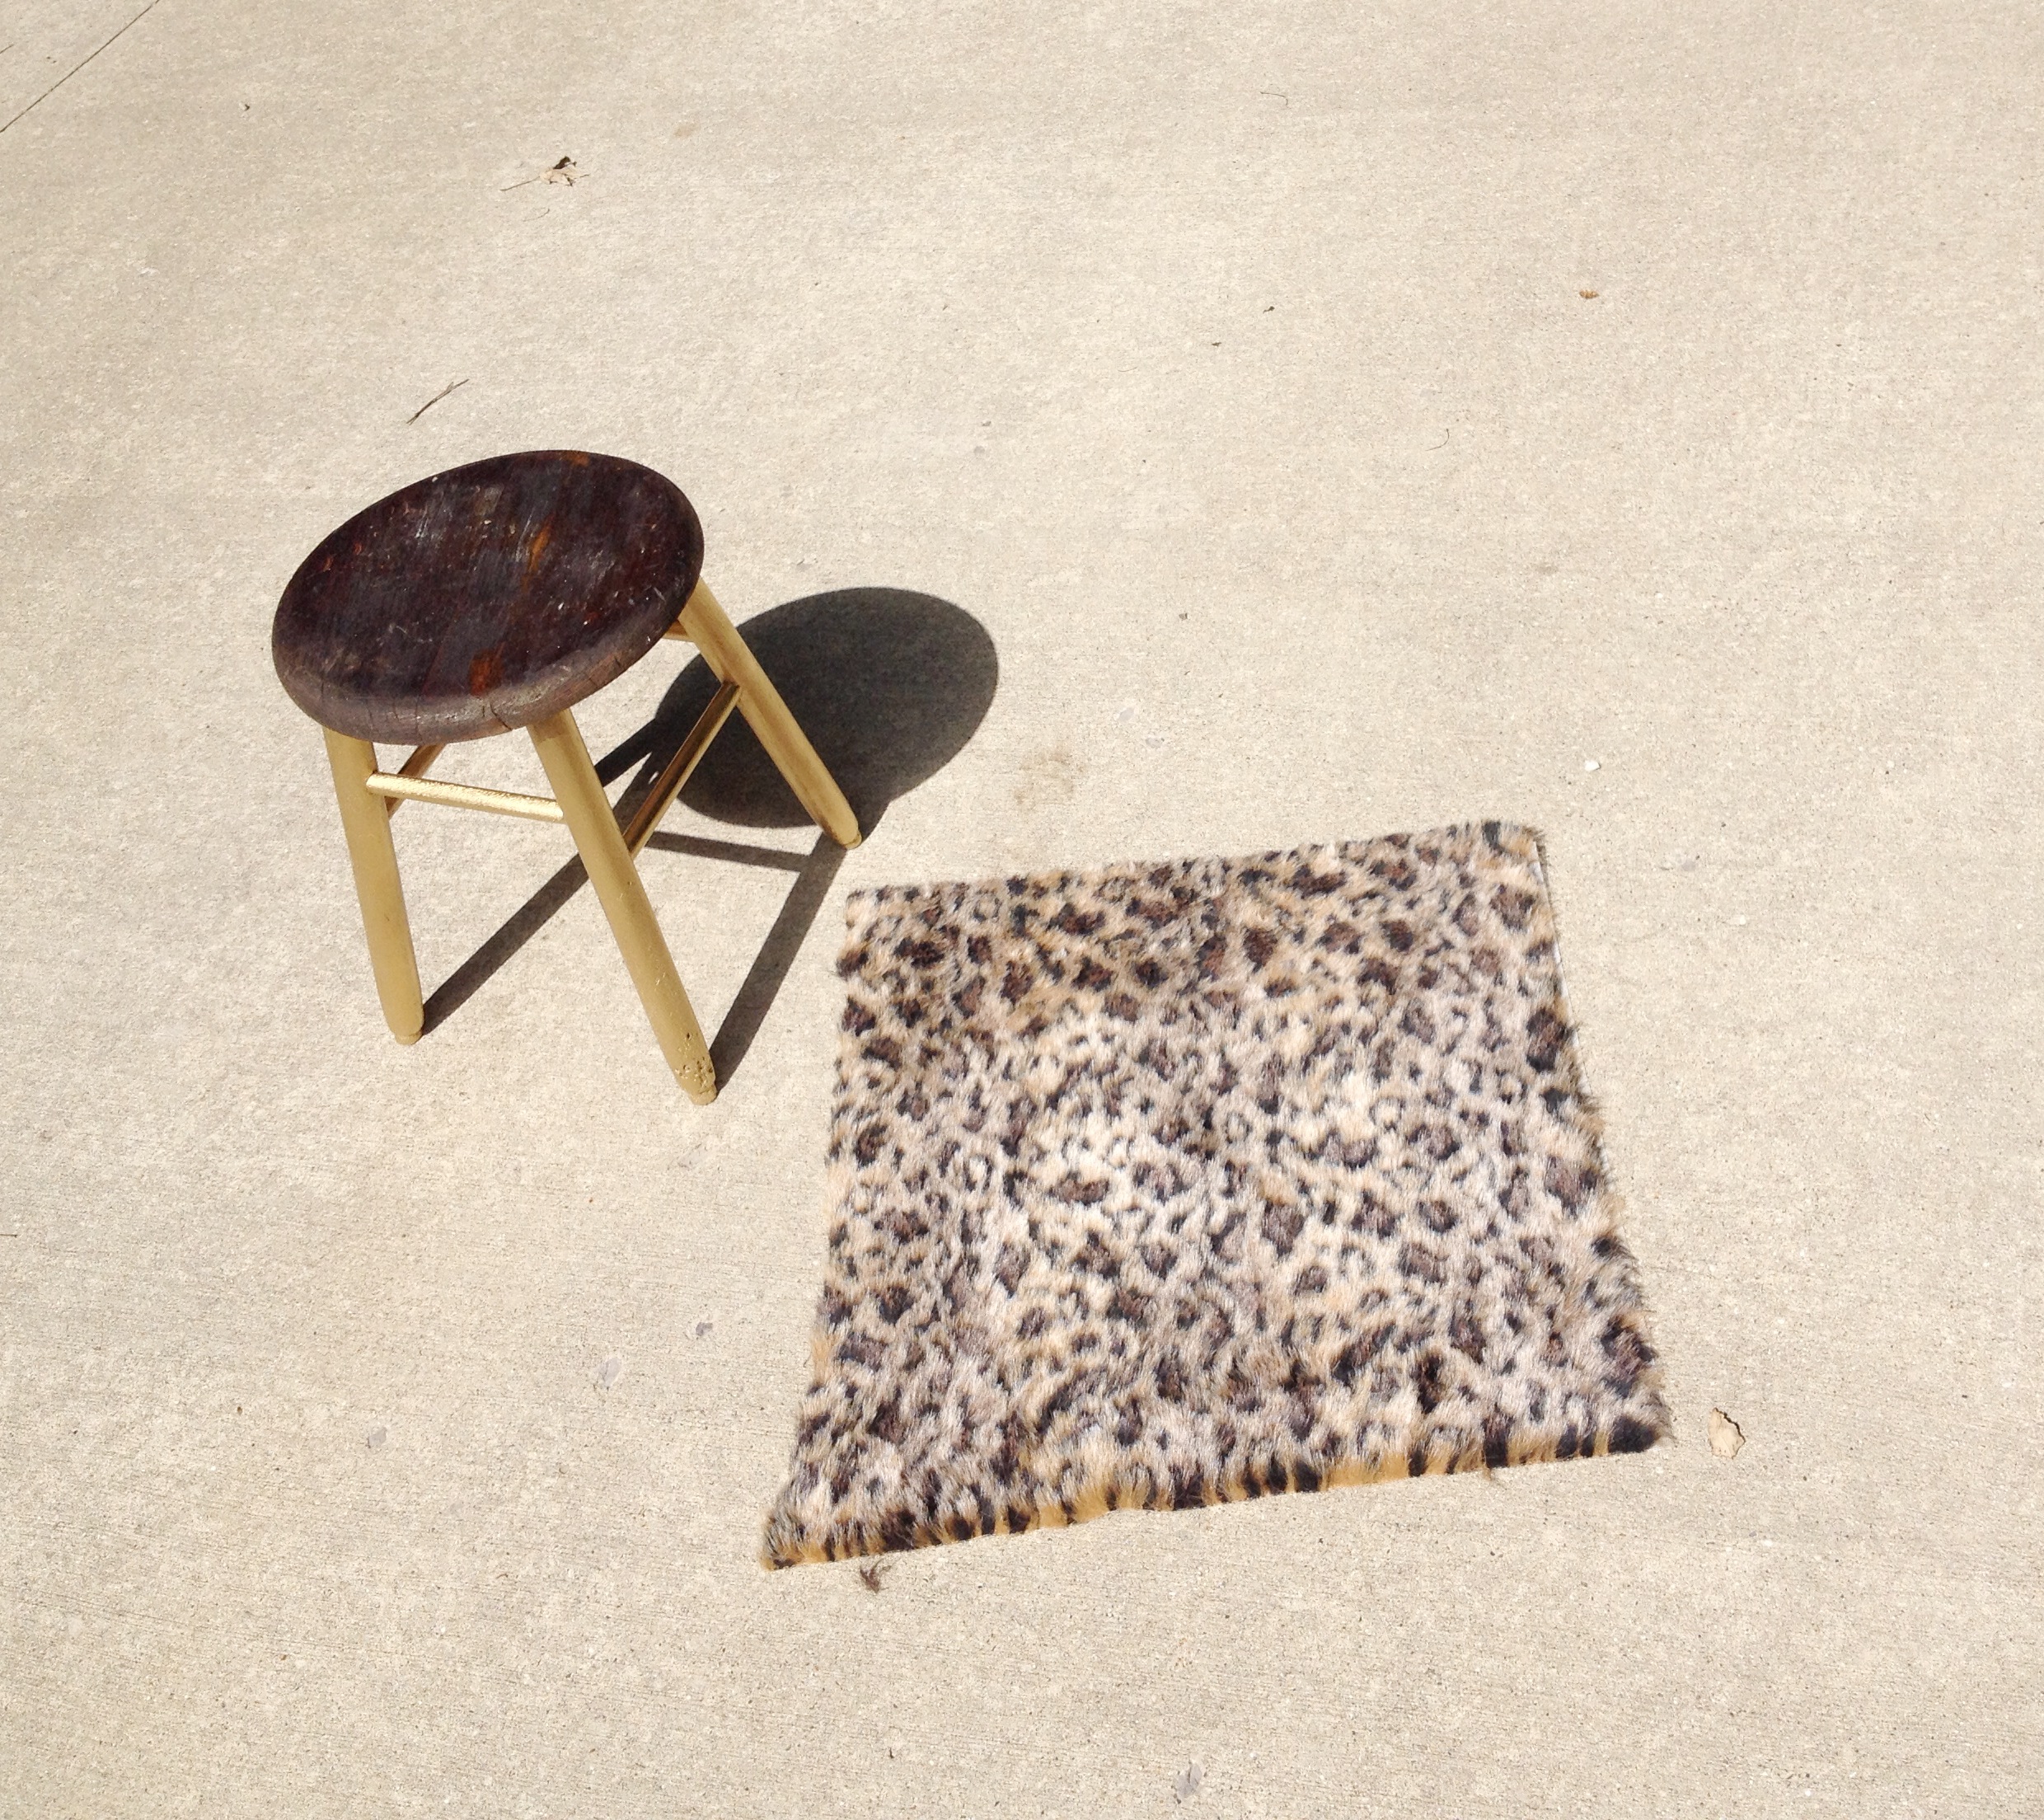
I hope that you had a great weekend! I LOVE fur covered stools, but they are really expensive! This fur stool from Pottery Barn Teen is $179 and this fur stool from Anthropologie is $348! So, I found myself an old sturdy barn stool, some spray paint, and some faux fur fabric, and then got to work! I used an old barn stool, but any wooden stool should work! You can find stools for less than $20 on ebay, at garage sales, or maybe even at Target.
FAUX FUR STOOL:
What You’ll Need:
Wooden Stool (padded top is okay, just the bottom of the seat must be wood)
Spray Paint
Faux Fur Fabric
Staple Gun
Optional:
Sandpaper
Step 1:
Clean and sand your stool. Sandpaper grit doesn’t matter much, just don’t get one so heavy that it will gouge out the wood on the stool.
Step 2:
Spray paint the legs of the stool. Don’t worry about getting it on the seat, it’ll get covered in fabric : ) Let dry.
Step 3:
Cut fabric to the size you’ll need. *Tip: I didn’t measure exactly, I just tossed it over the seat of the stool and made sure I had enough to fold under to the bottom of the seat.
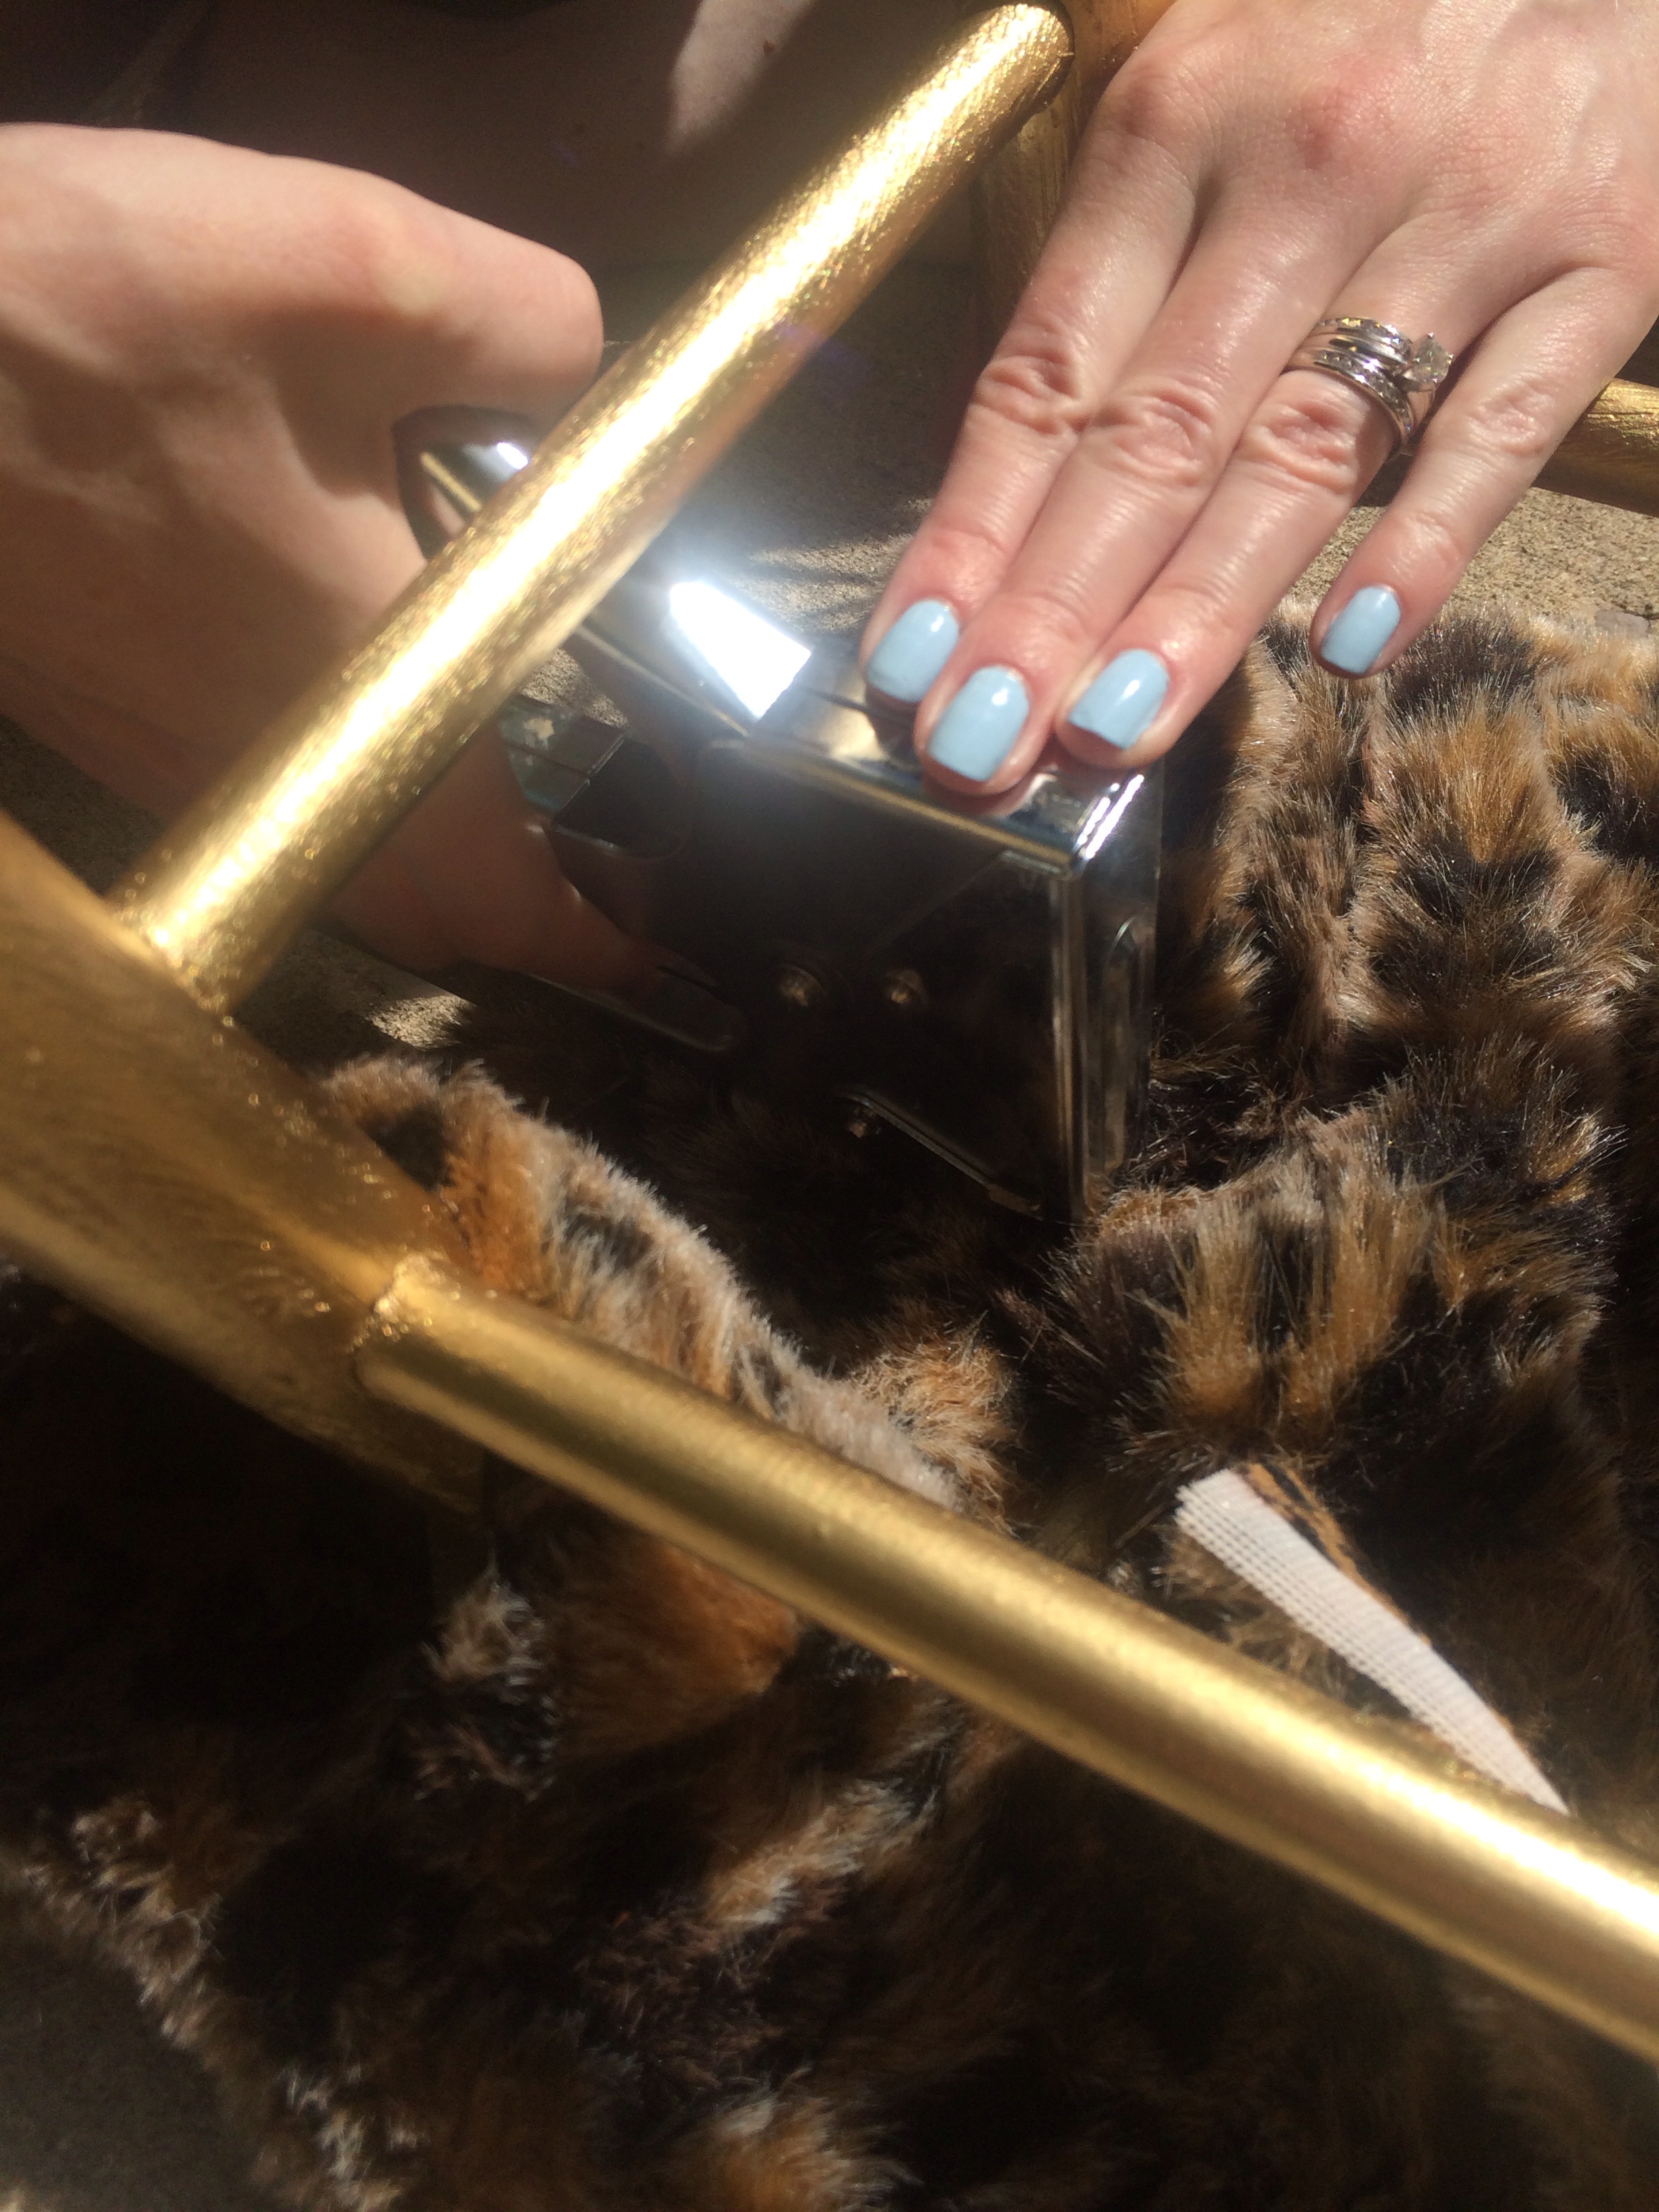
Step 4:
Staple the fabric to the bottom of the seat and done!!
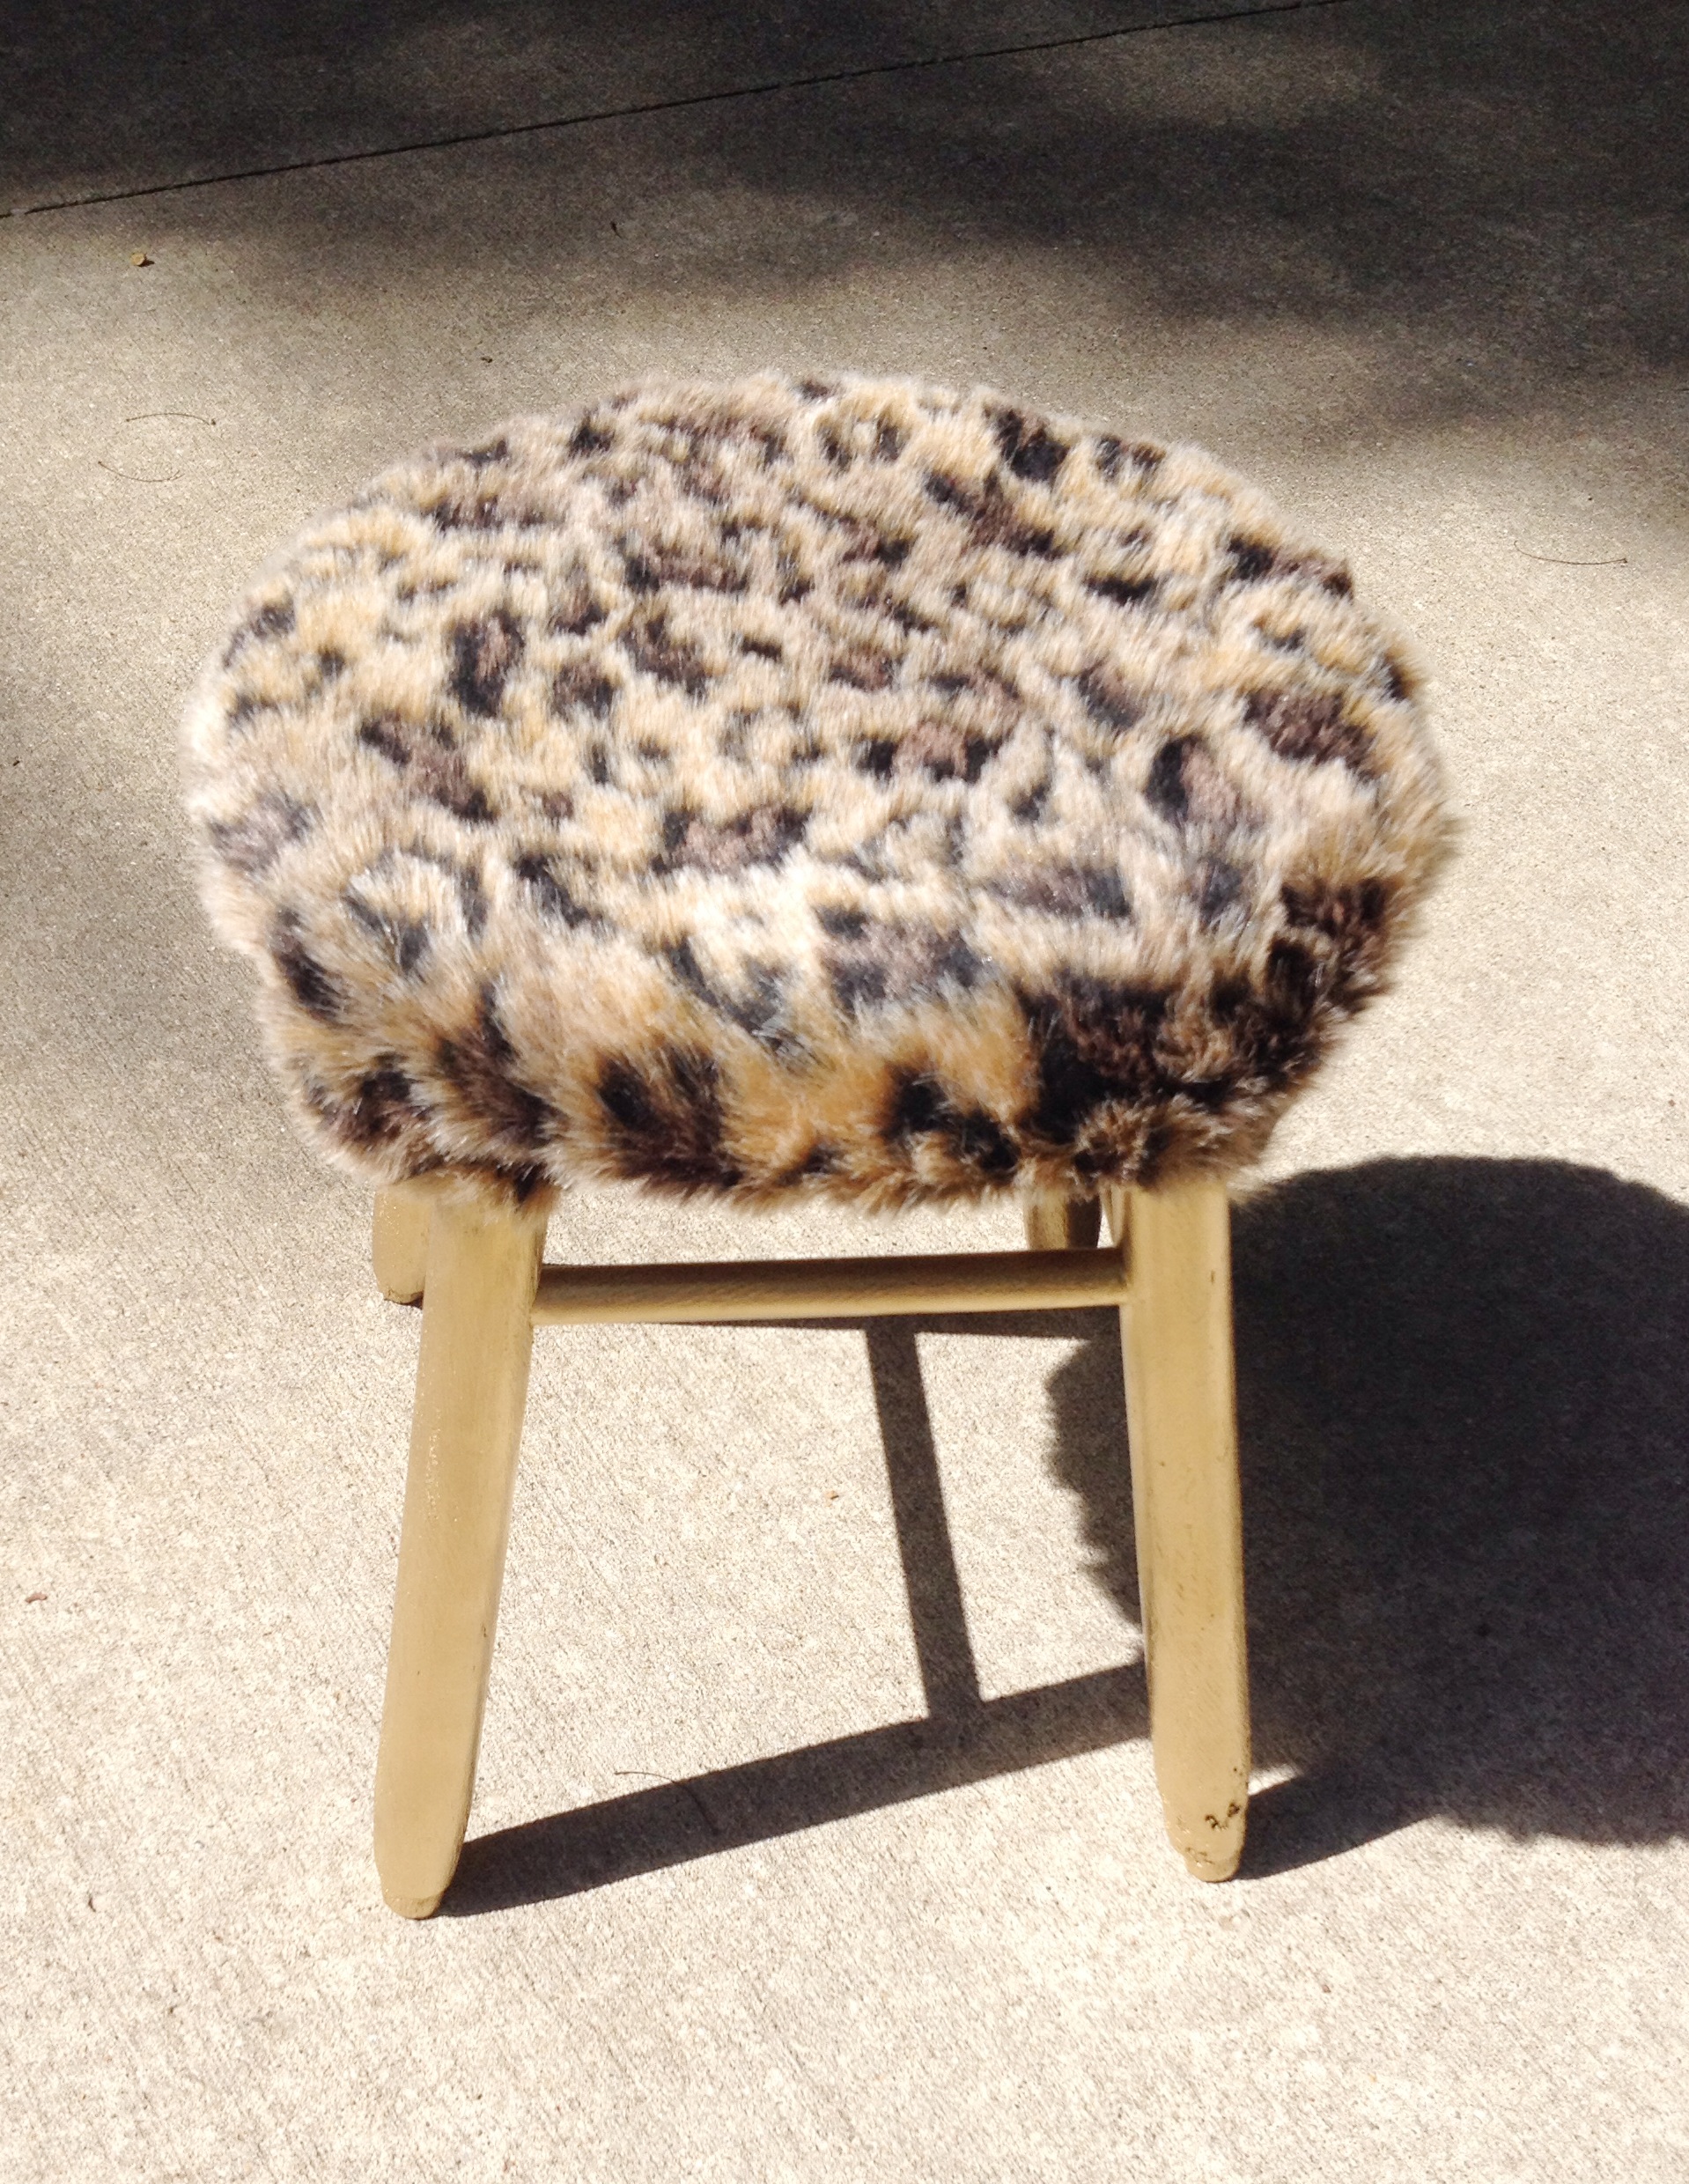
I hope you enjoyed this post! If you did, please be sure to subscribe if you haven’t already, and share it on your Pinterest!
Hi there! Happy Wednesday!
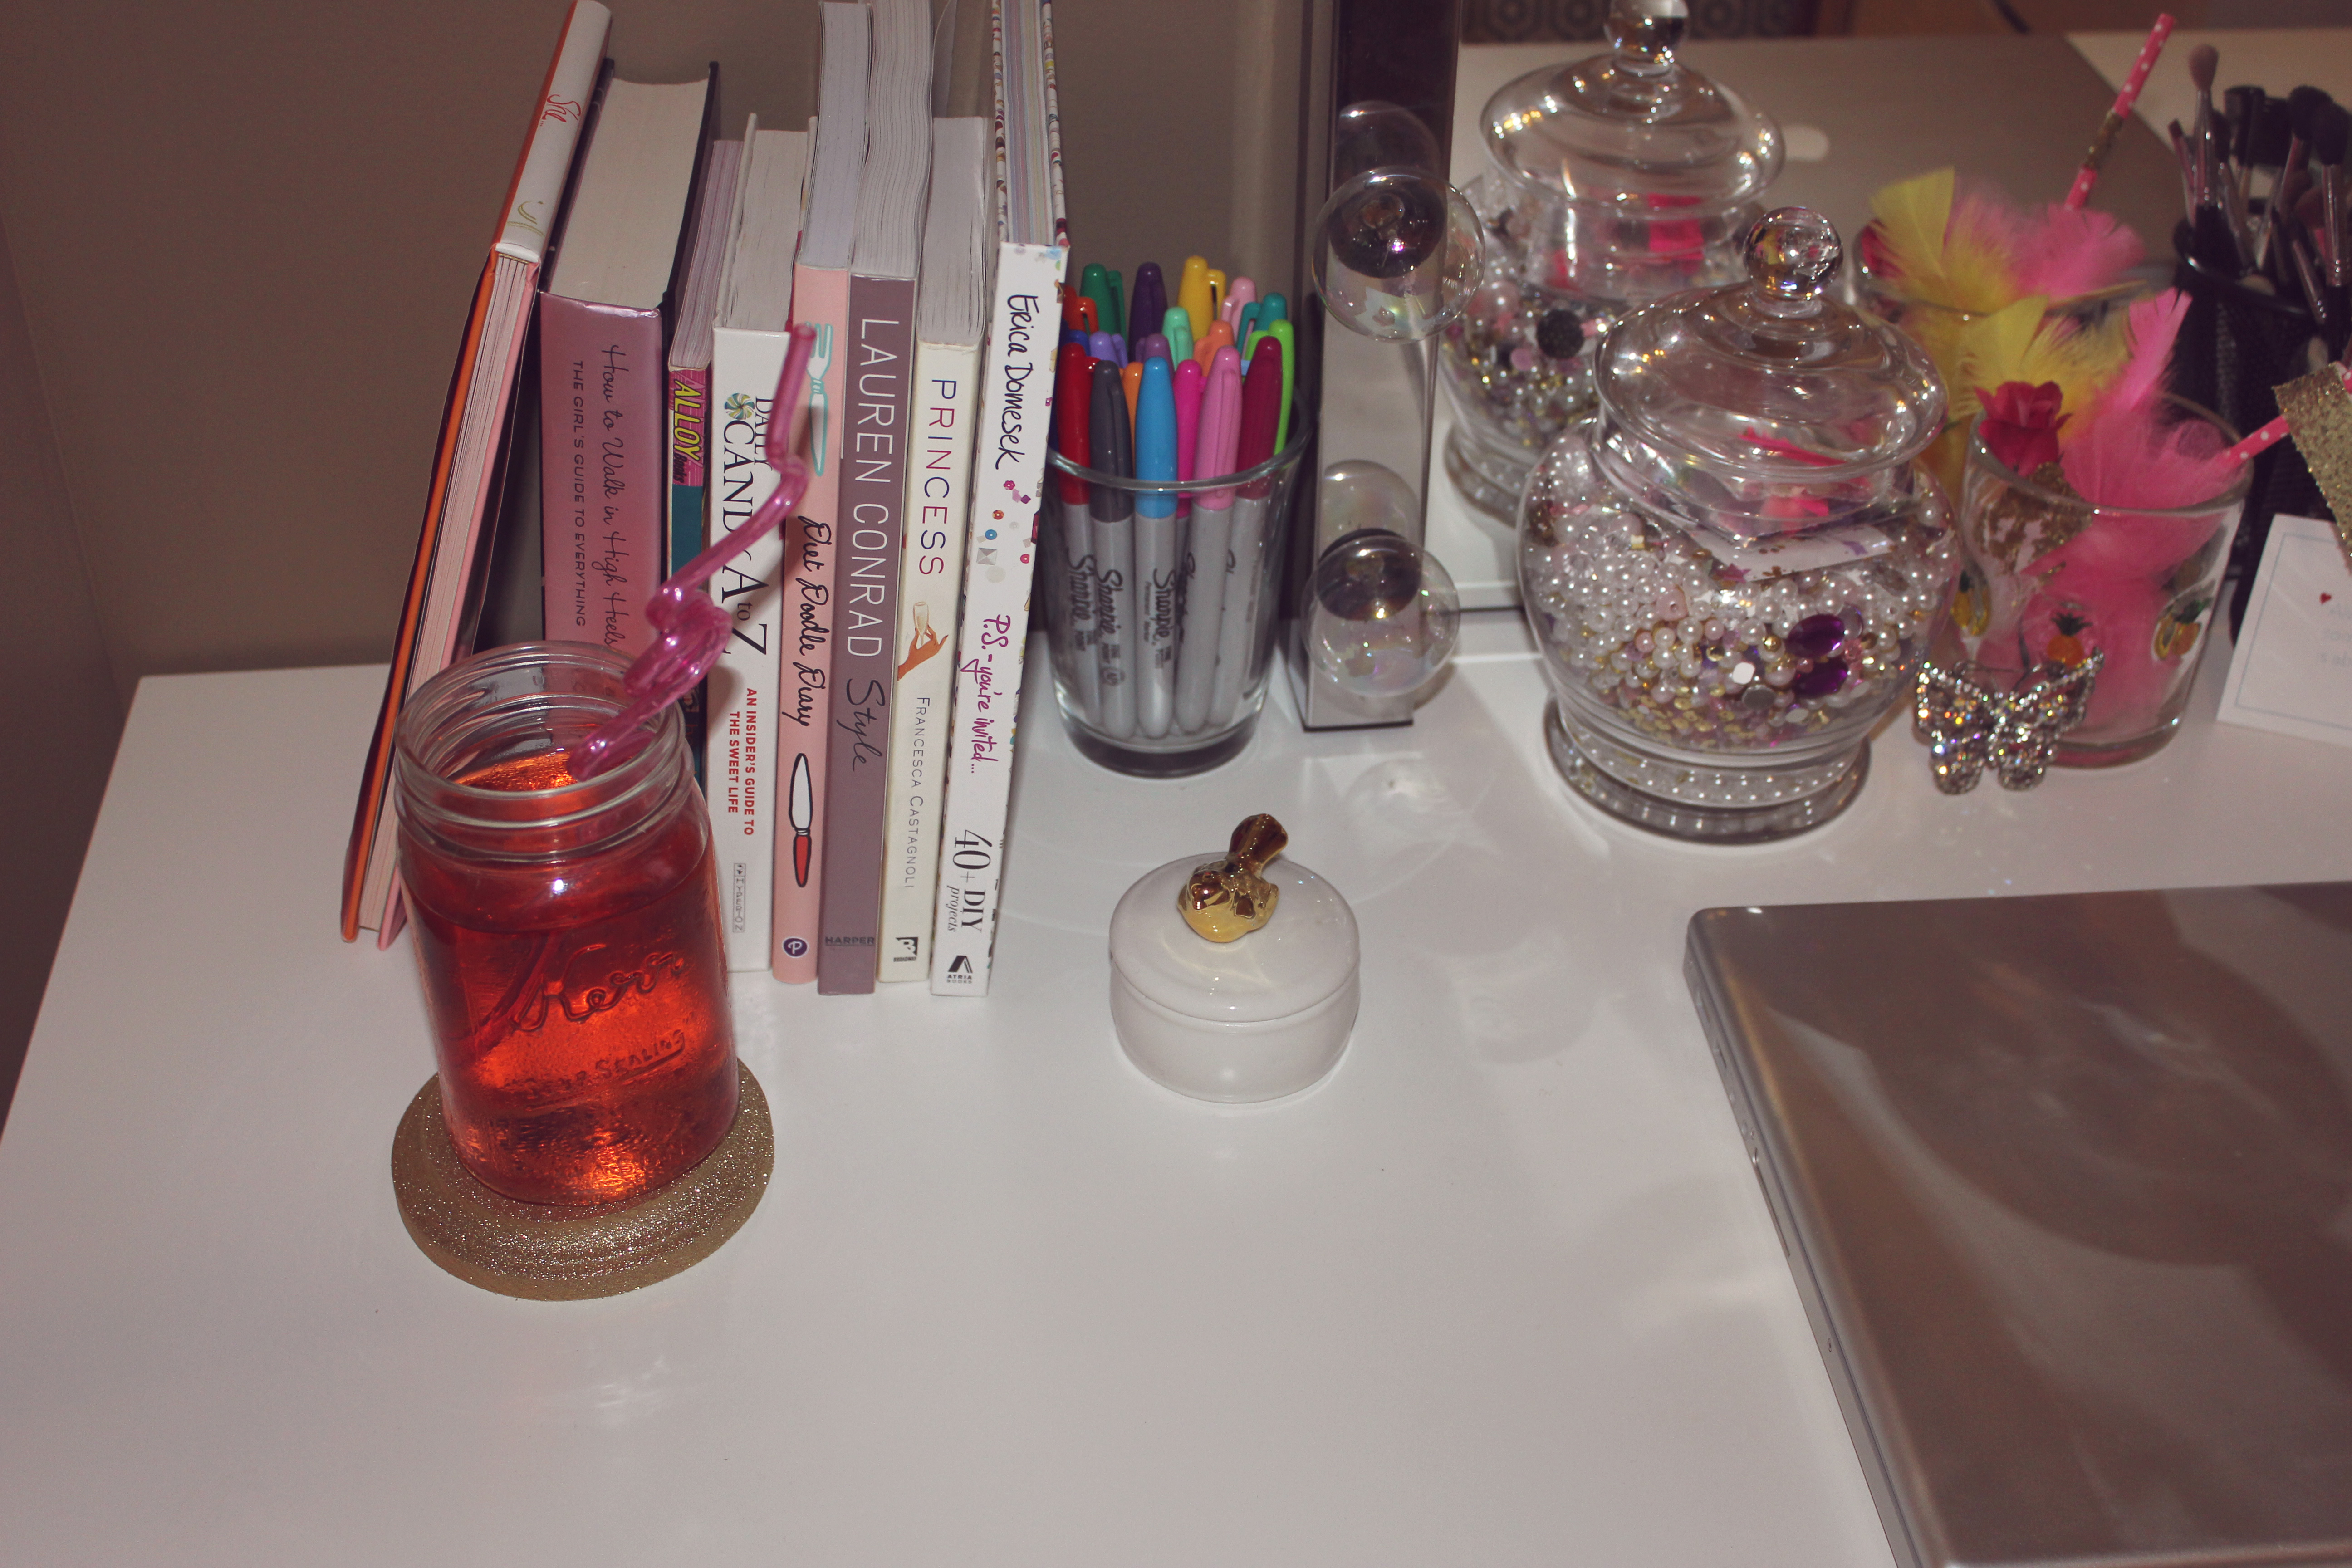
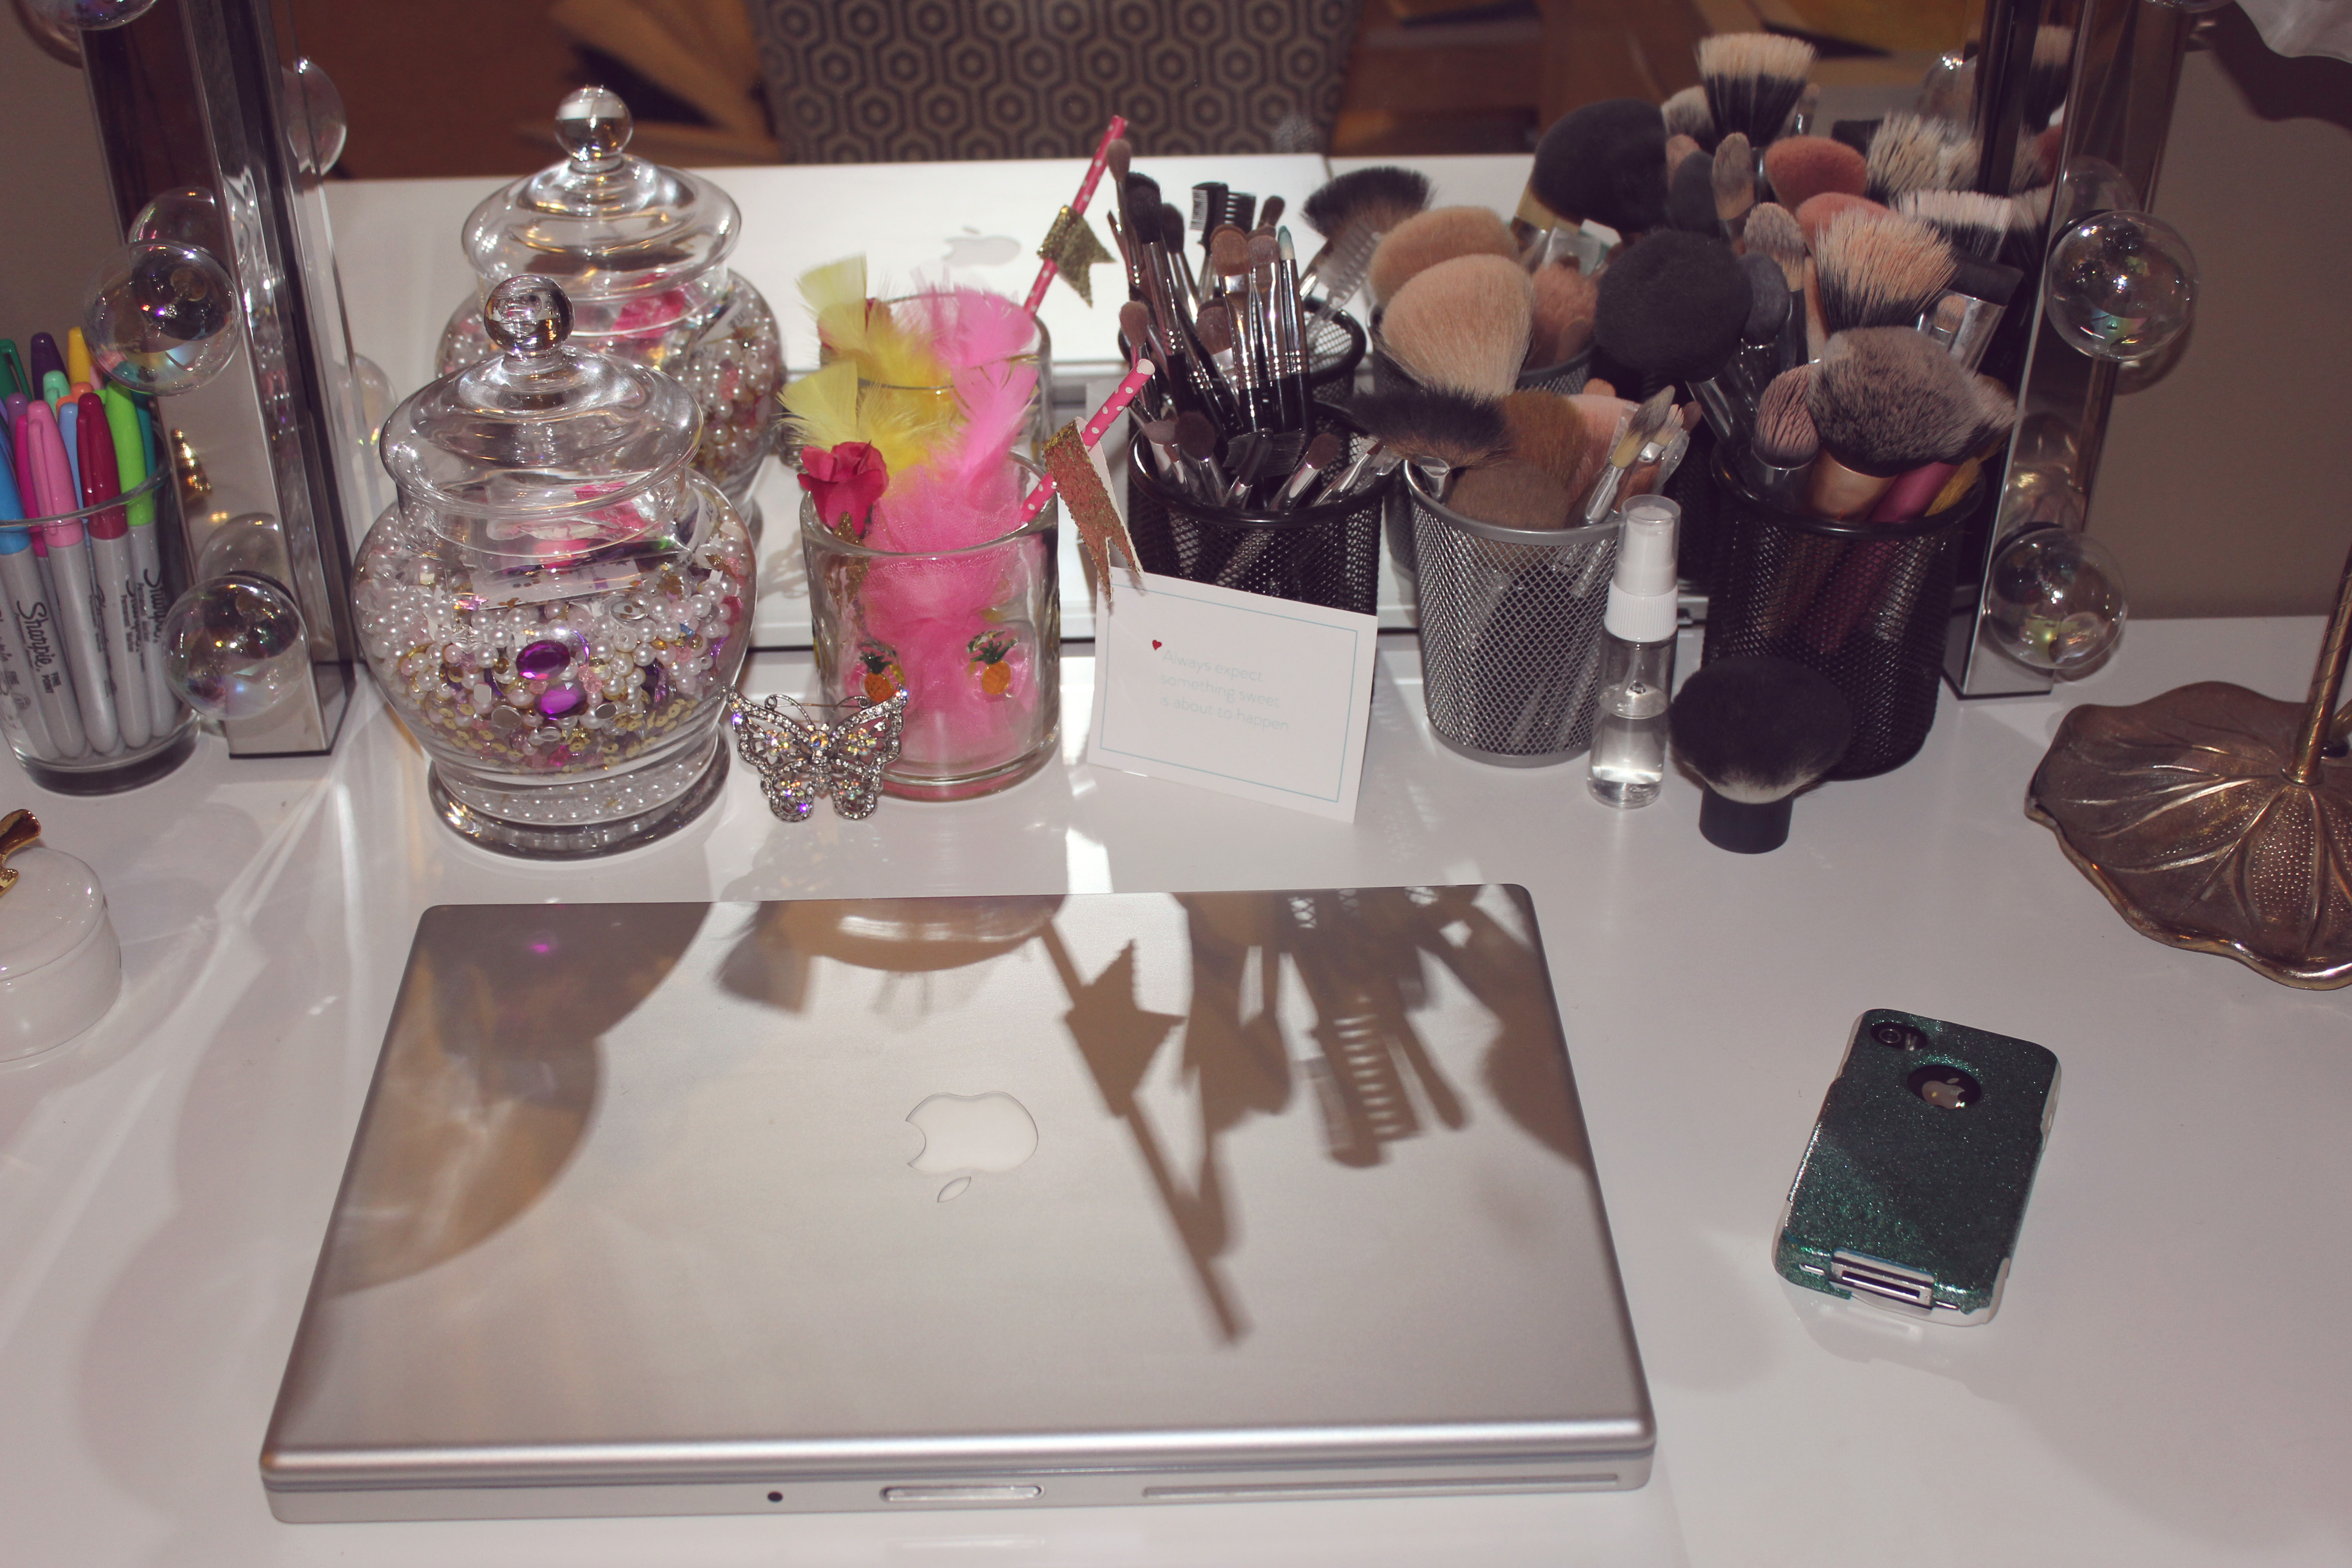
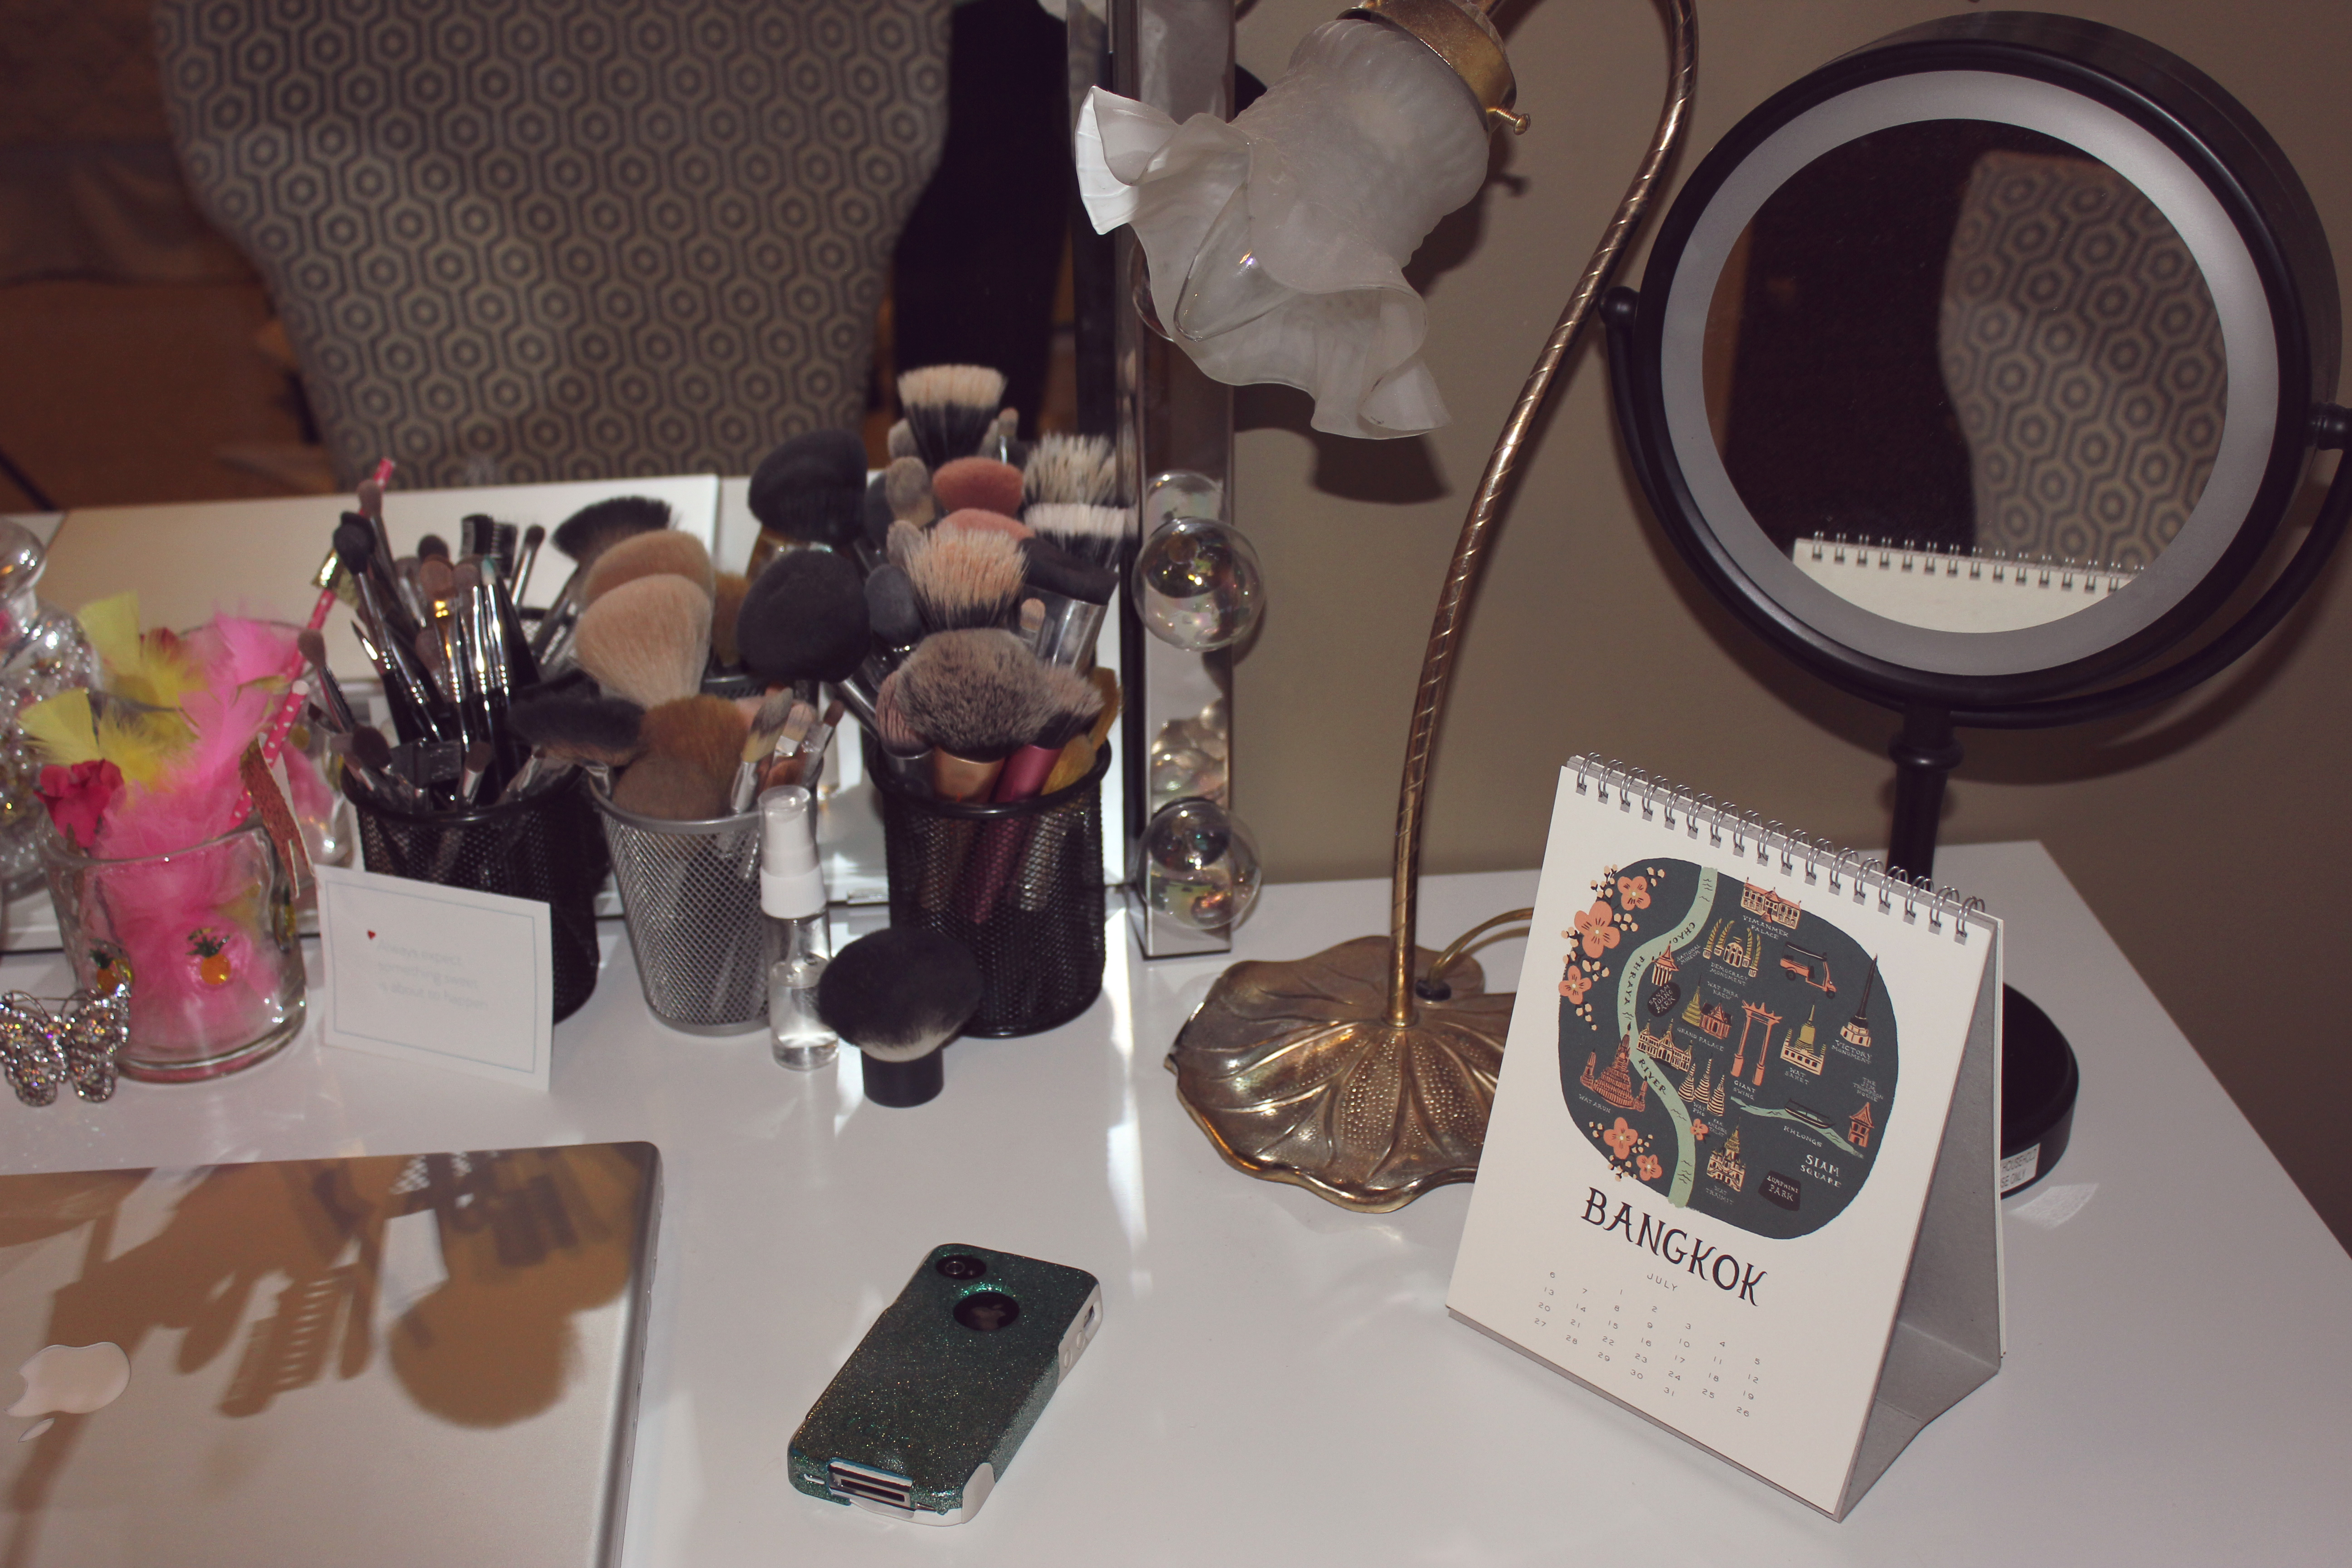
Today I want to share a tour of my gallery wall and vanity with you. Because of limited space, my desk functions as my workspace and also has my vanity mirror and makeup brushes on it. I keep all of my makeup in a seperate storage unit next to my desk and that is a post for another day! Before I launched Leah Tackles I knew that I needed a space that was filled with beautiful things that I love, with a great chair and an inspirational gallery wall where I could work…oh, and also a desk ; ) Below I will share pictures as well as websites for some of my favorites things from my gallery wall.
MY GALLERY WALL AND DESK/VANITY SET UP:
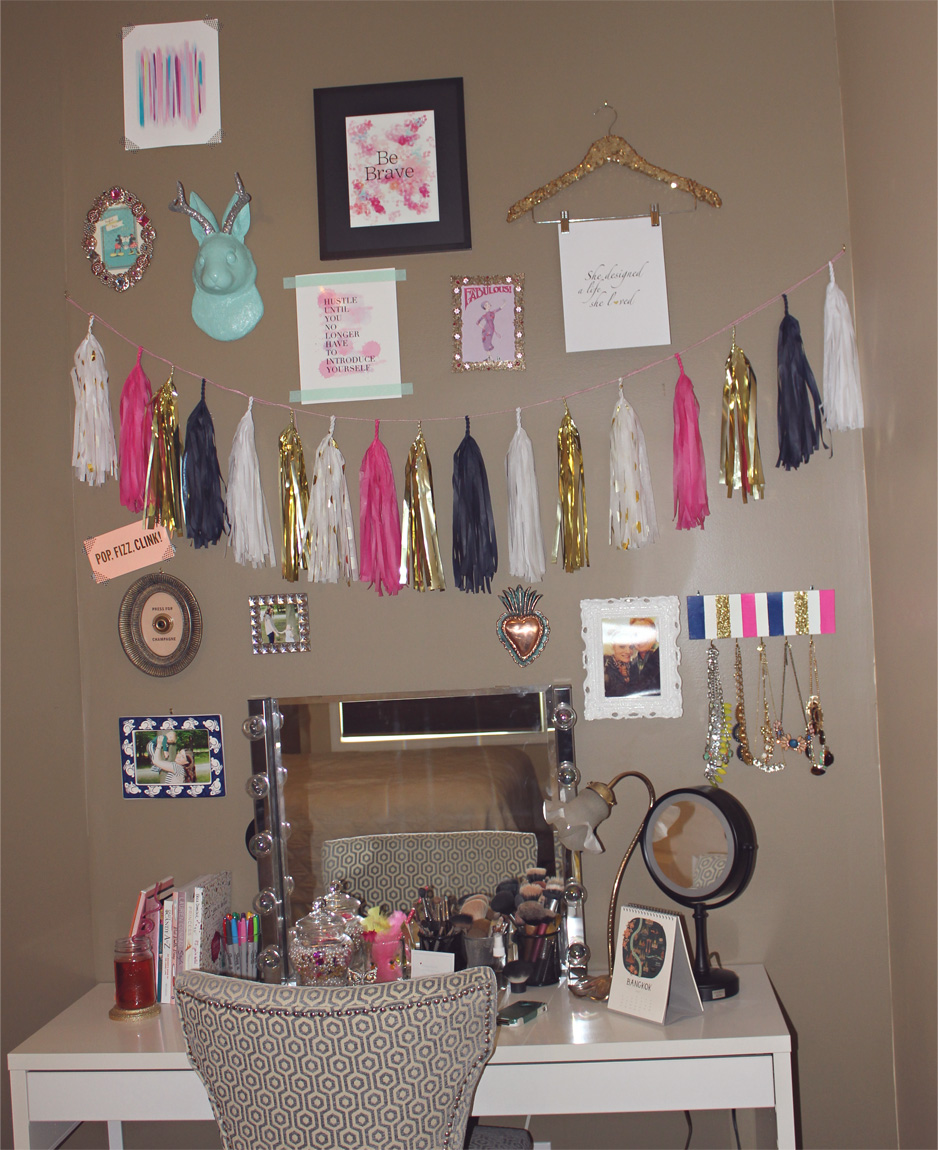

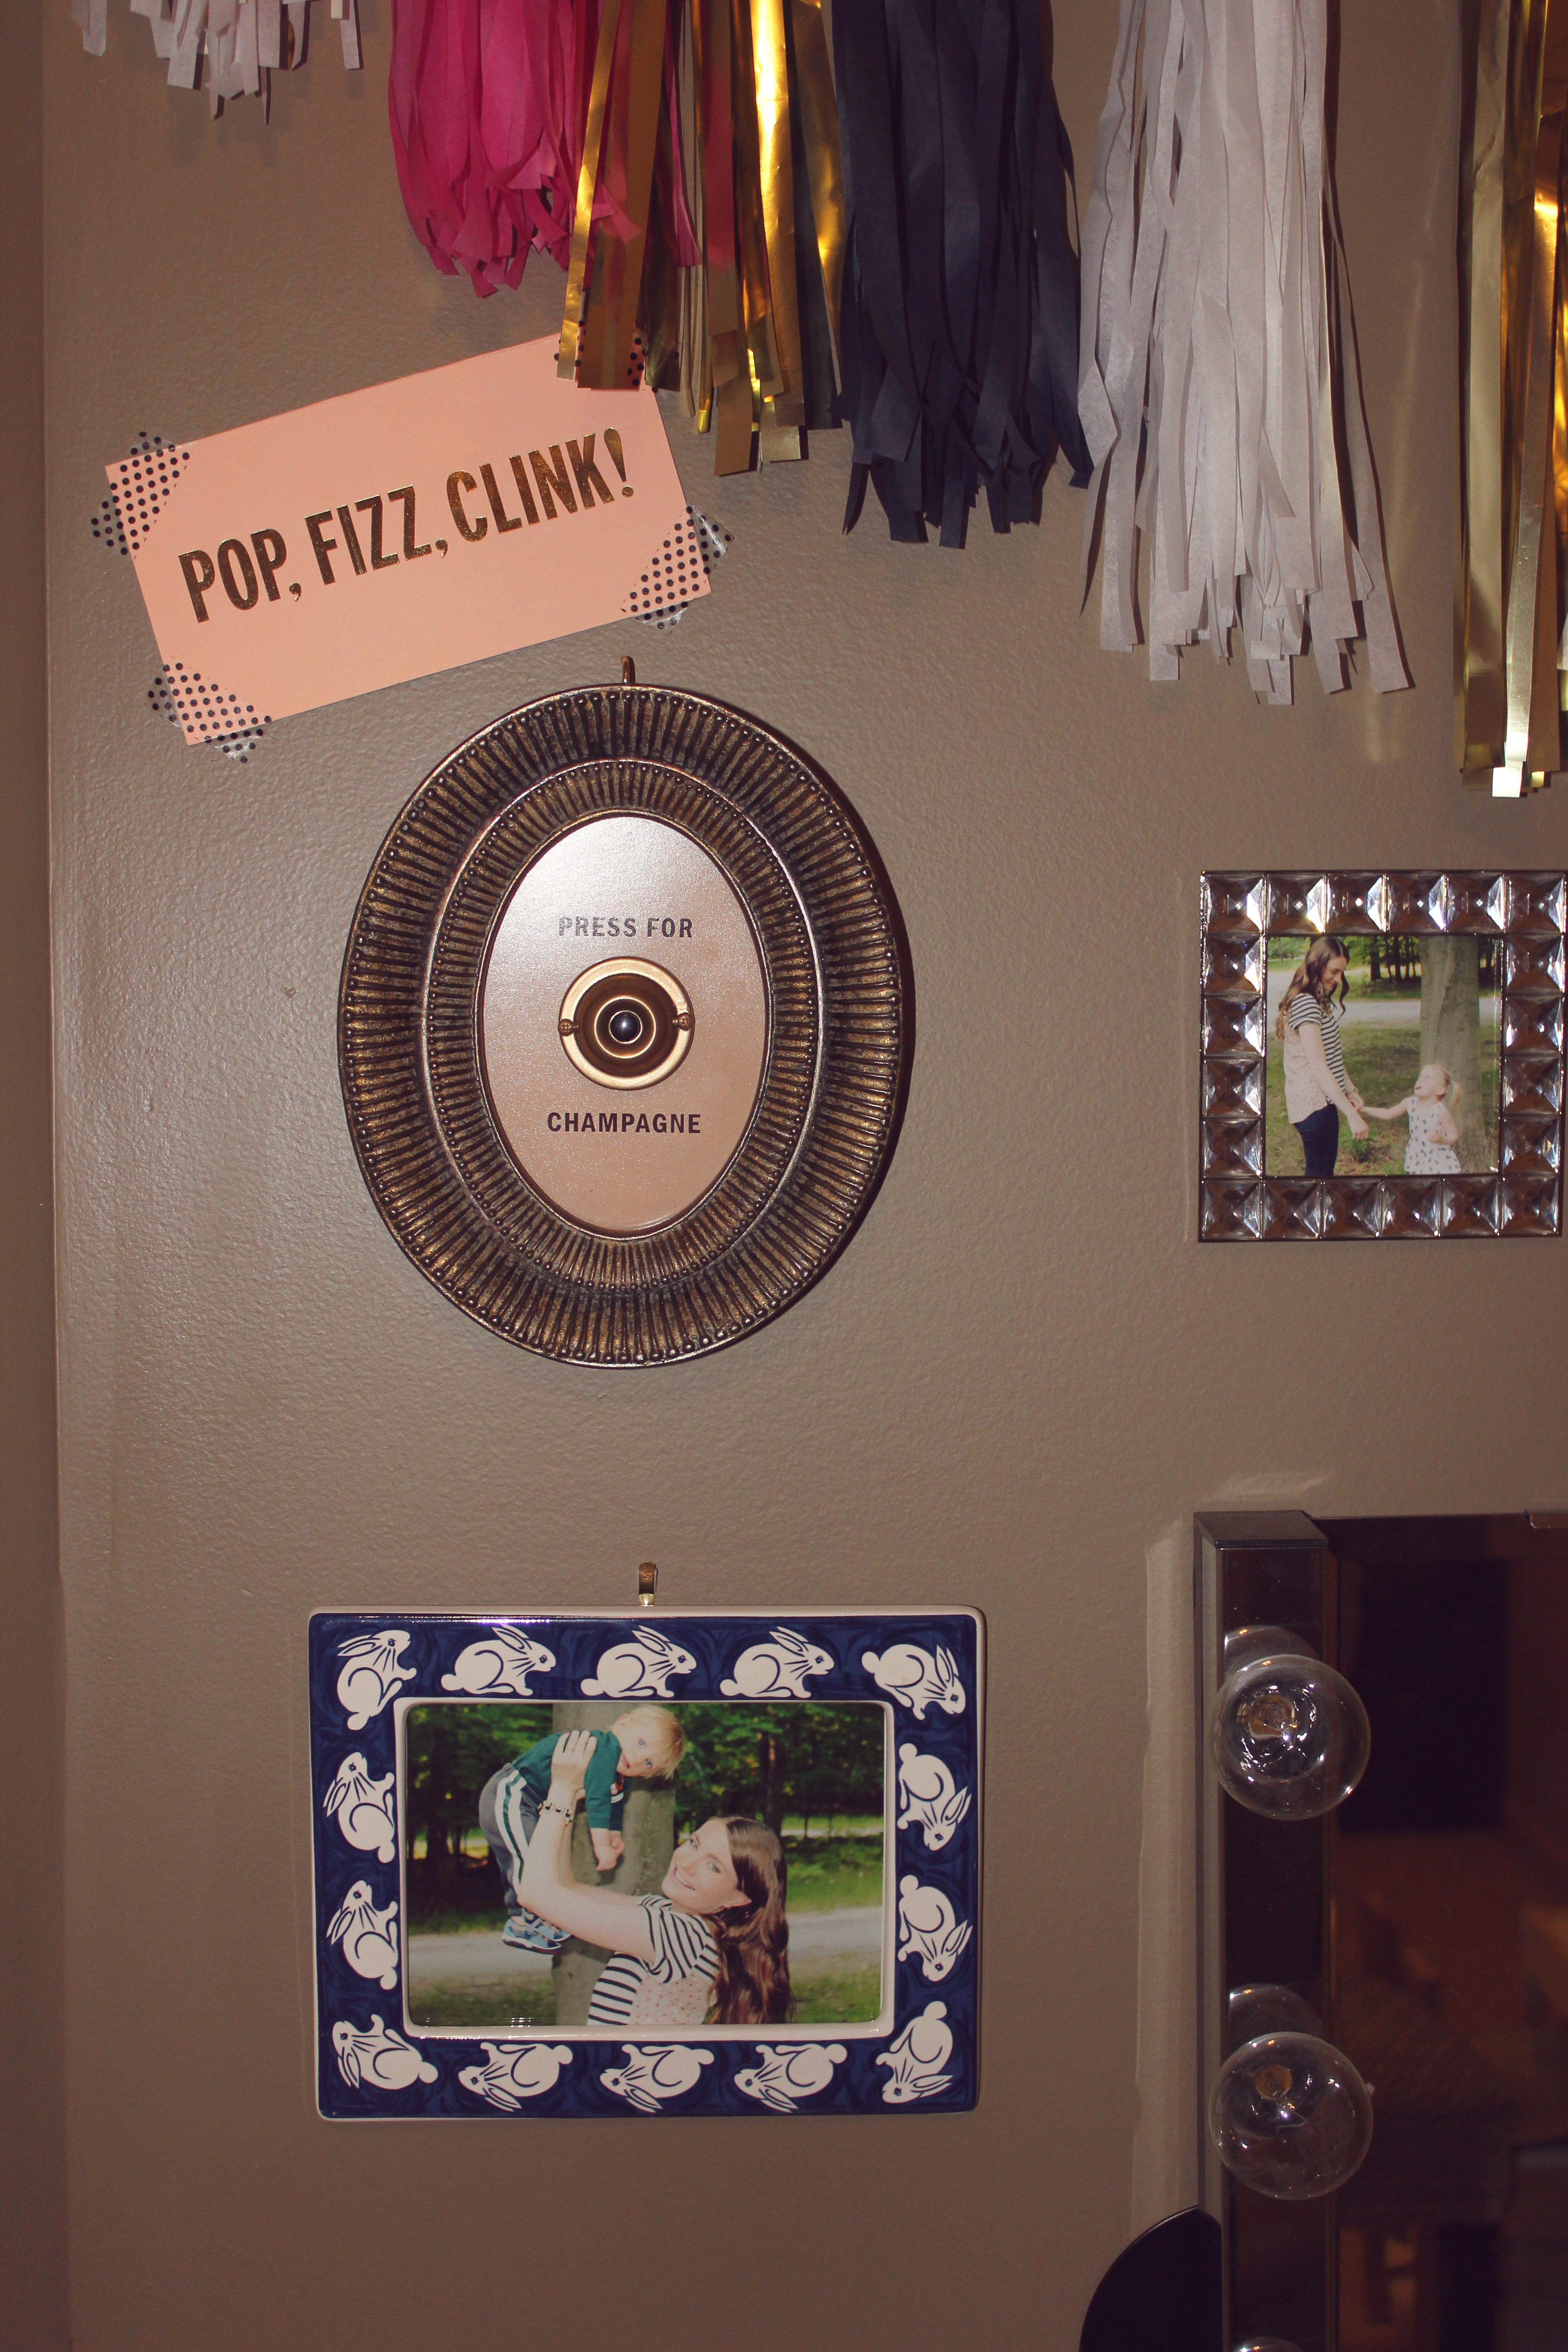
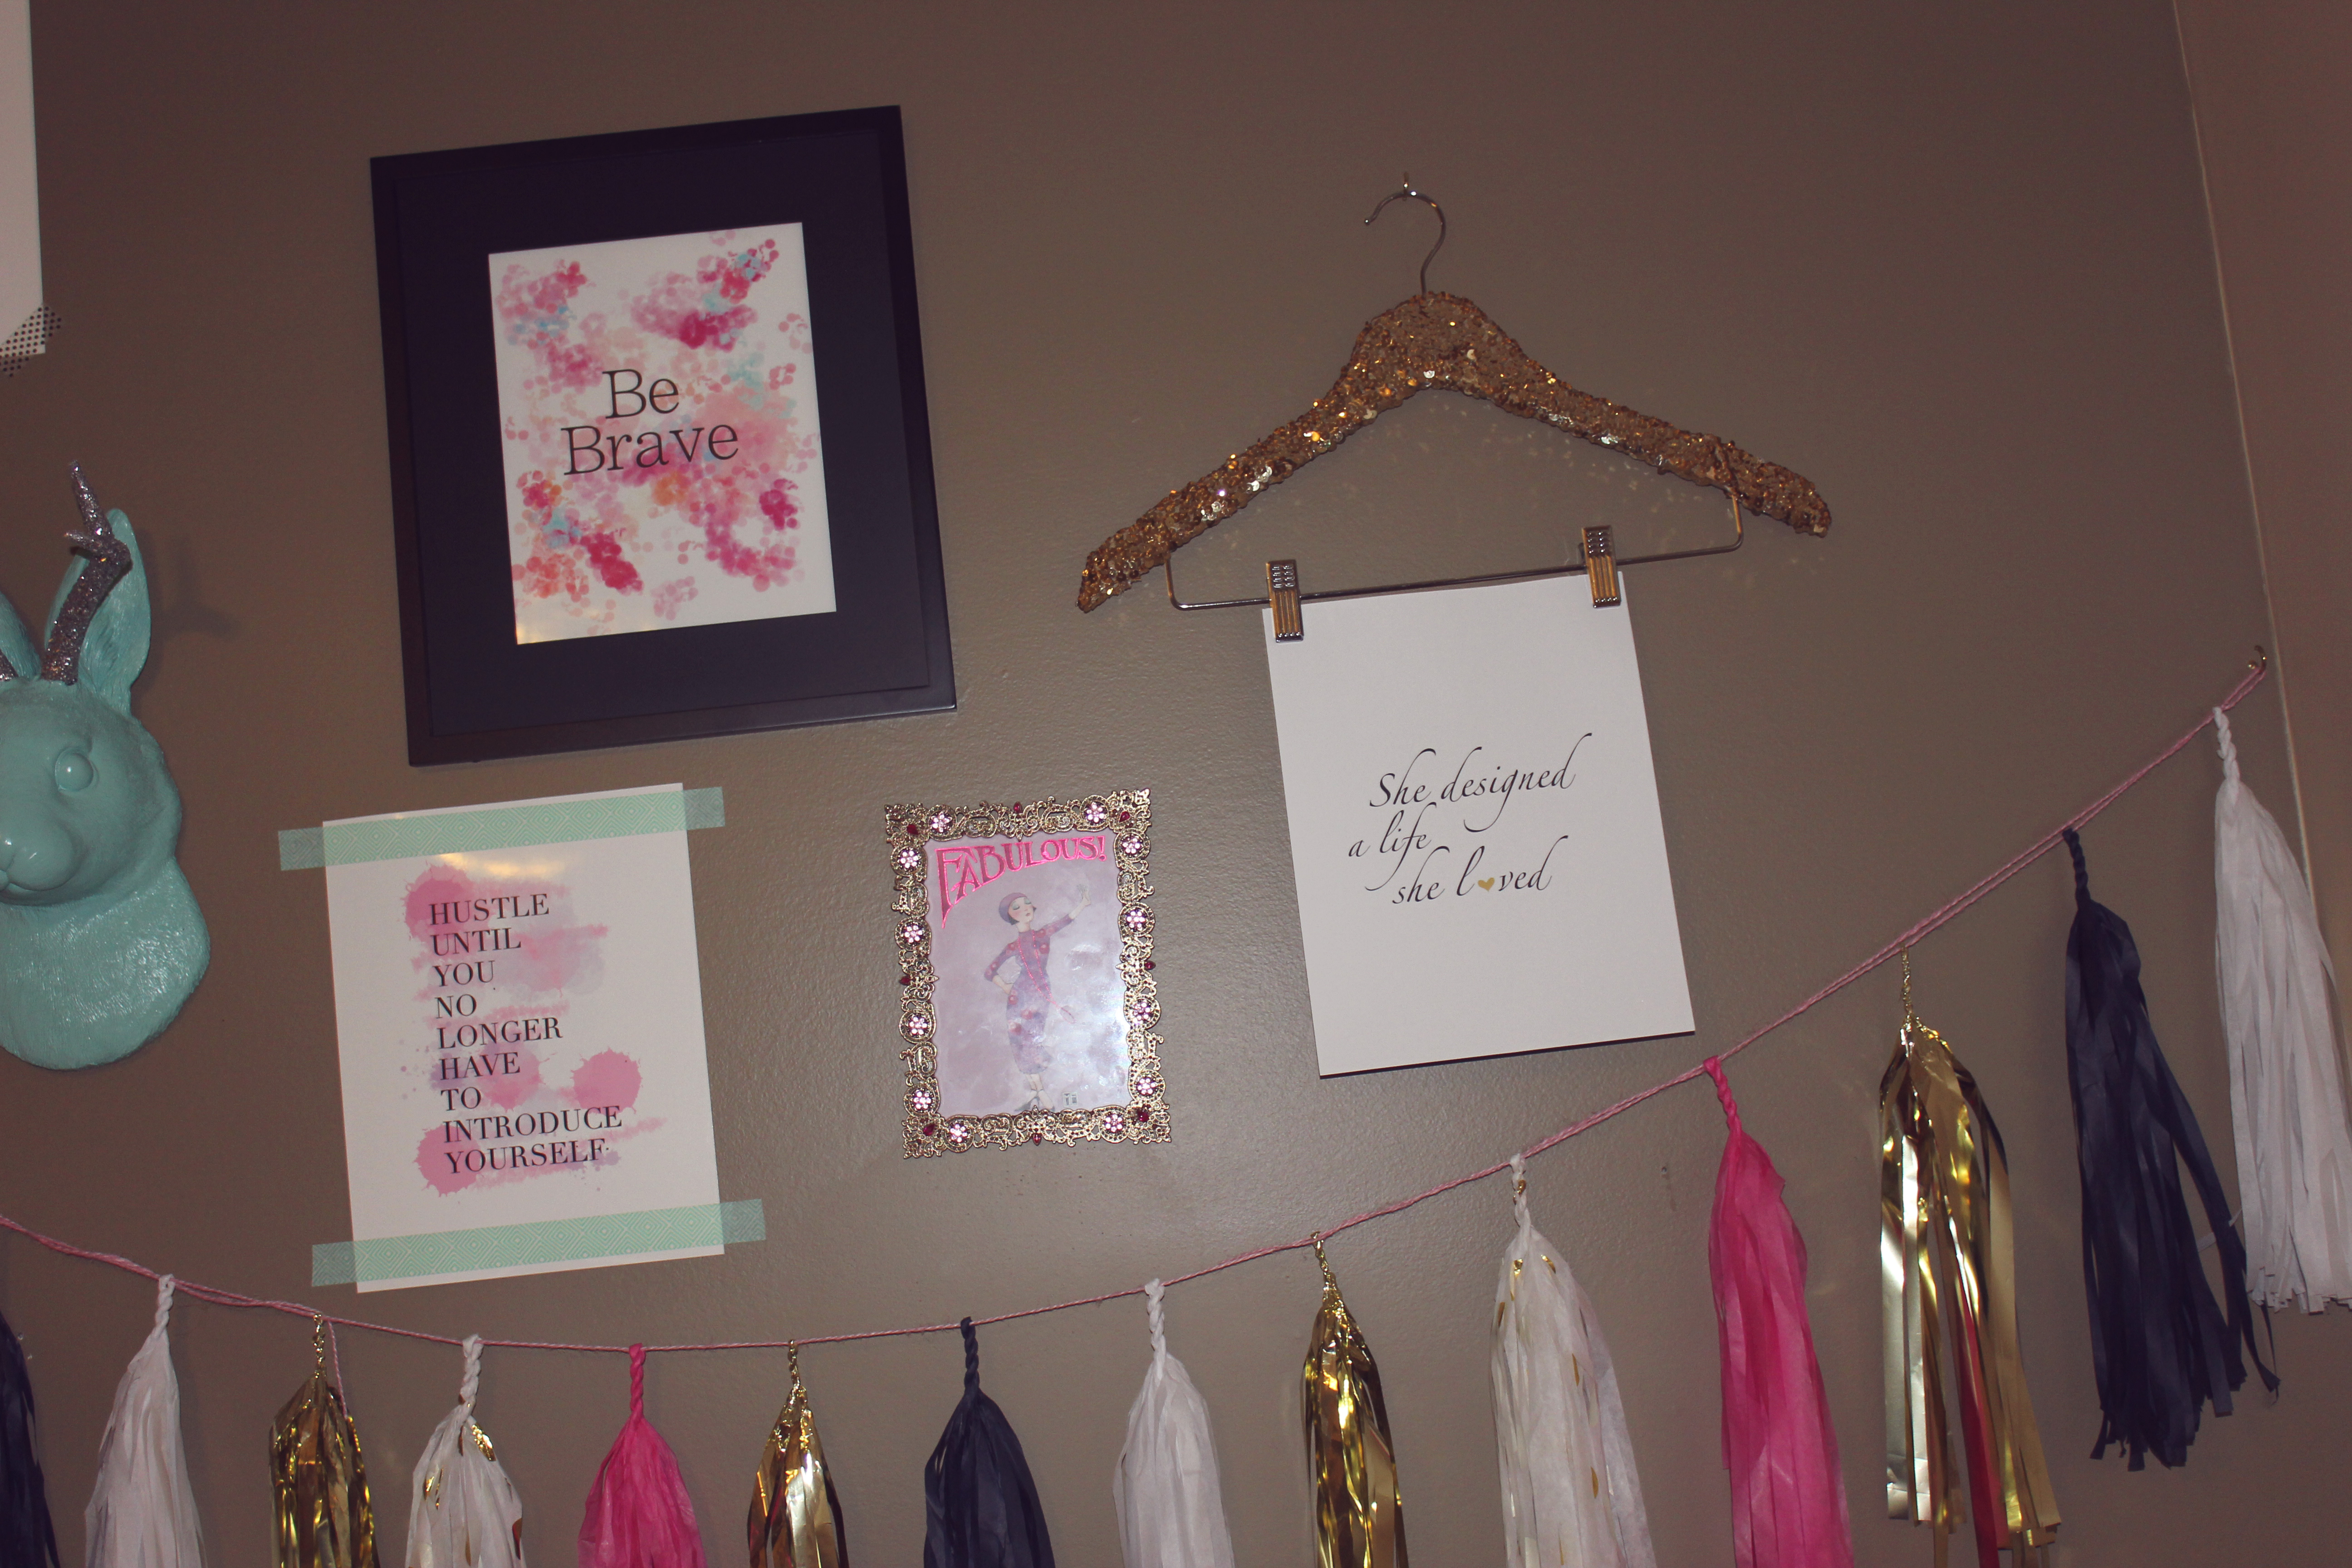
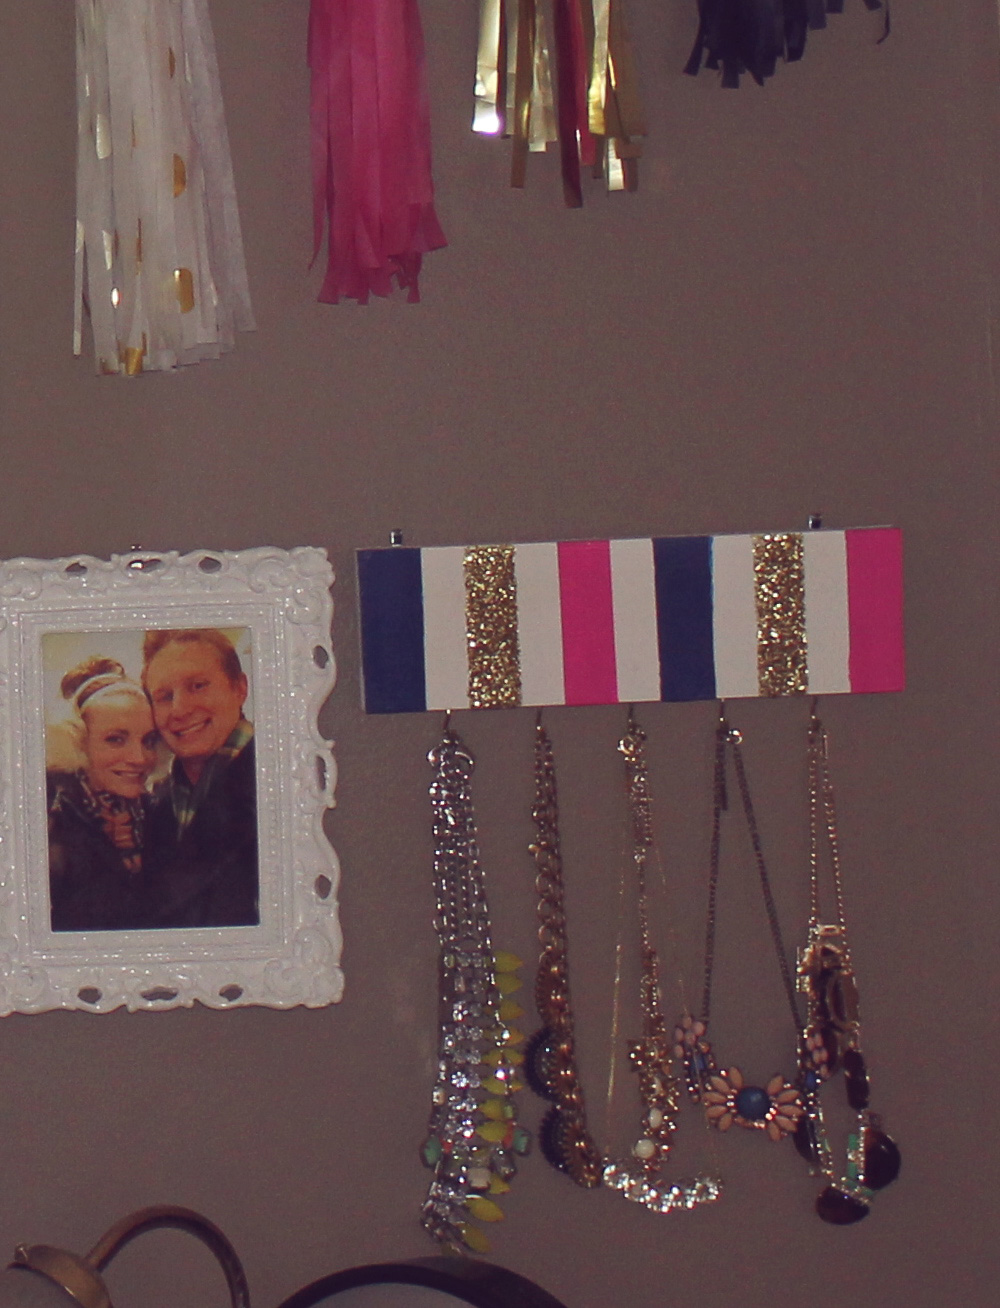
MY FAVORITE PLACES TO SHOP FOR PRETTIES FOR MY WALL:
This is where I get most of my gorgeous prints and where I get my sequin hangers!! Plus, Lauren is the sweetest : )
This is where I got my *adoreable* jackalope…isn’t she the cutest?!
How gorgeous are these tassle garlands?! I need about 10-15 more of these and then I’ll be set ; )
My “Press For Champagne” frame is one of my favorite pieces! My sweet hubs knew I was swooning over them and got me one for Mother’s Day this year : ) Thanks bugs!
If you have any questions of any of the other pieces on my wall or vanity please ask away in the comments below and I will be sure to get back to you!! To comment, just click the link by the title of this post!! It’s easy, promise : )
Hi there! Happy Monday!! Annnnd Happy PopSugar time!! This is one of my favorite posts of the month to share with all of you!!
Before we get started: Don’t forget to check out my column Leah’s Friday Five on the Pearls and Pastries Shop Blog! This past Friday was all about my favorite fall boots and where I shop for them!!
Today I am reviewing the PopSugar Must Have Box for August 2014!! The box contains full size items in all different categories:food, beauty, fashion, home, and sometimes an extra goodie too! The PopSugar box usually arrives between the 10th-15th of every month for me…it ships from California via FedEx Smart Post, which means it goes out FedEx but arrives to my P.O Box. I am really enjoing this months box so far, so let’s jump into it!
August 2014 Must Have Box:

I want to mention that I did think that the packaging was not done very well this month : / And I have heard from others that there boxes also were not packed very securely. I thought for sure one item that is made of glass would be broken, and the most delicate thing in the box had slipped out of it’s packaging and was loose : ( I have only ever had 2 boxes with a damaged item in the 20 months that I have had the subscription, and PopSugar is always great about replacing things, but I hope the packaging is back to normal next month!
Celebrate Cookie Mix from The Mason Jar Cookie Company:
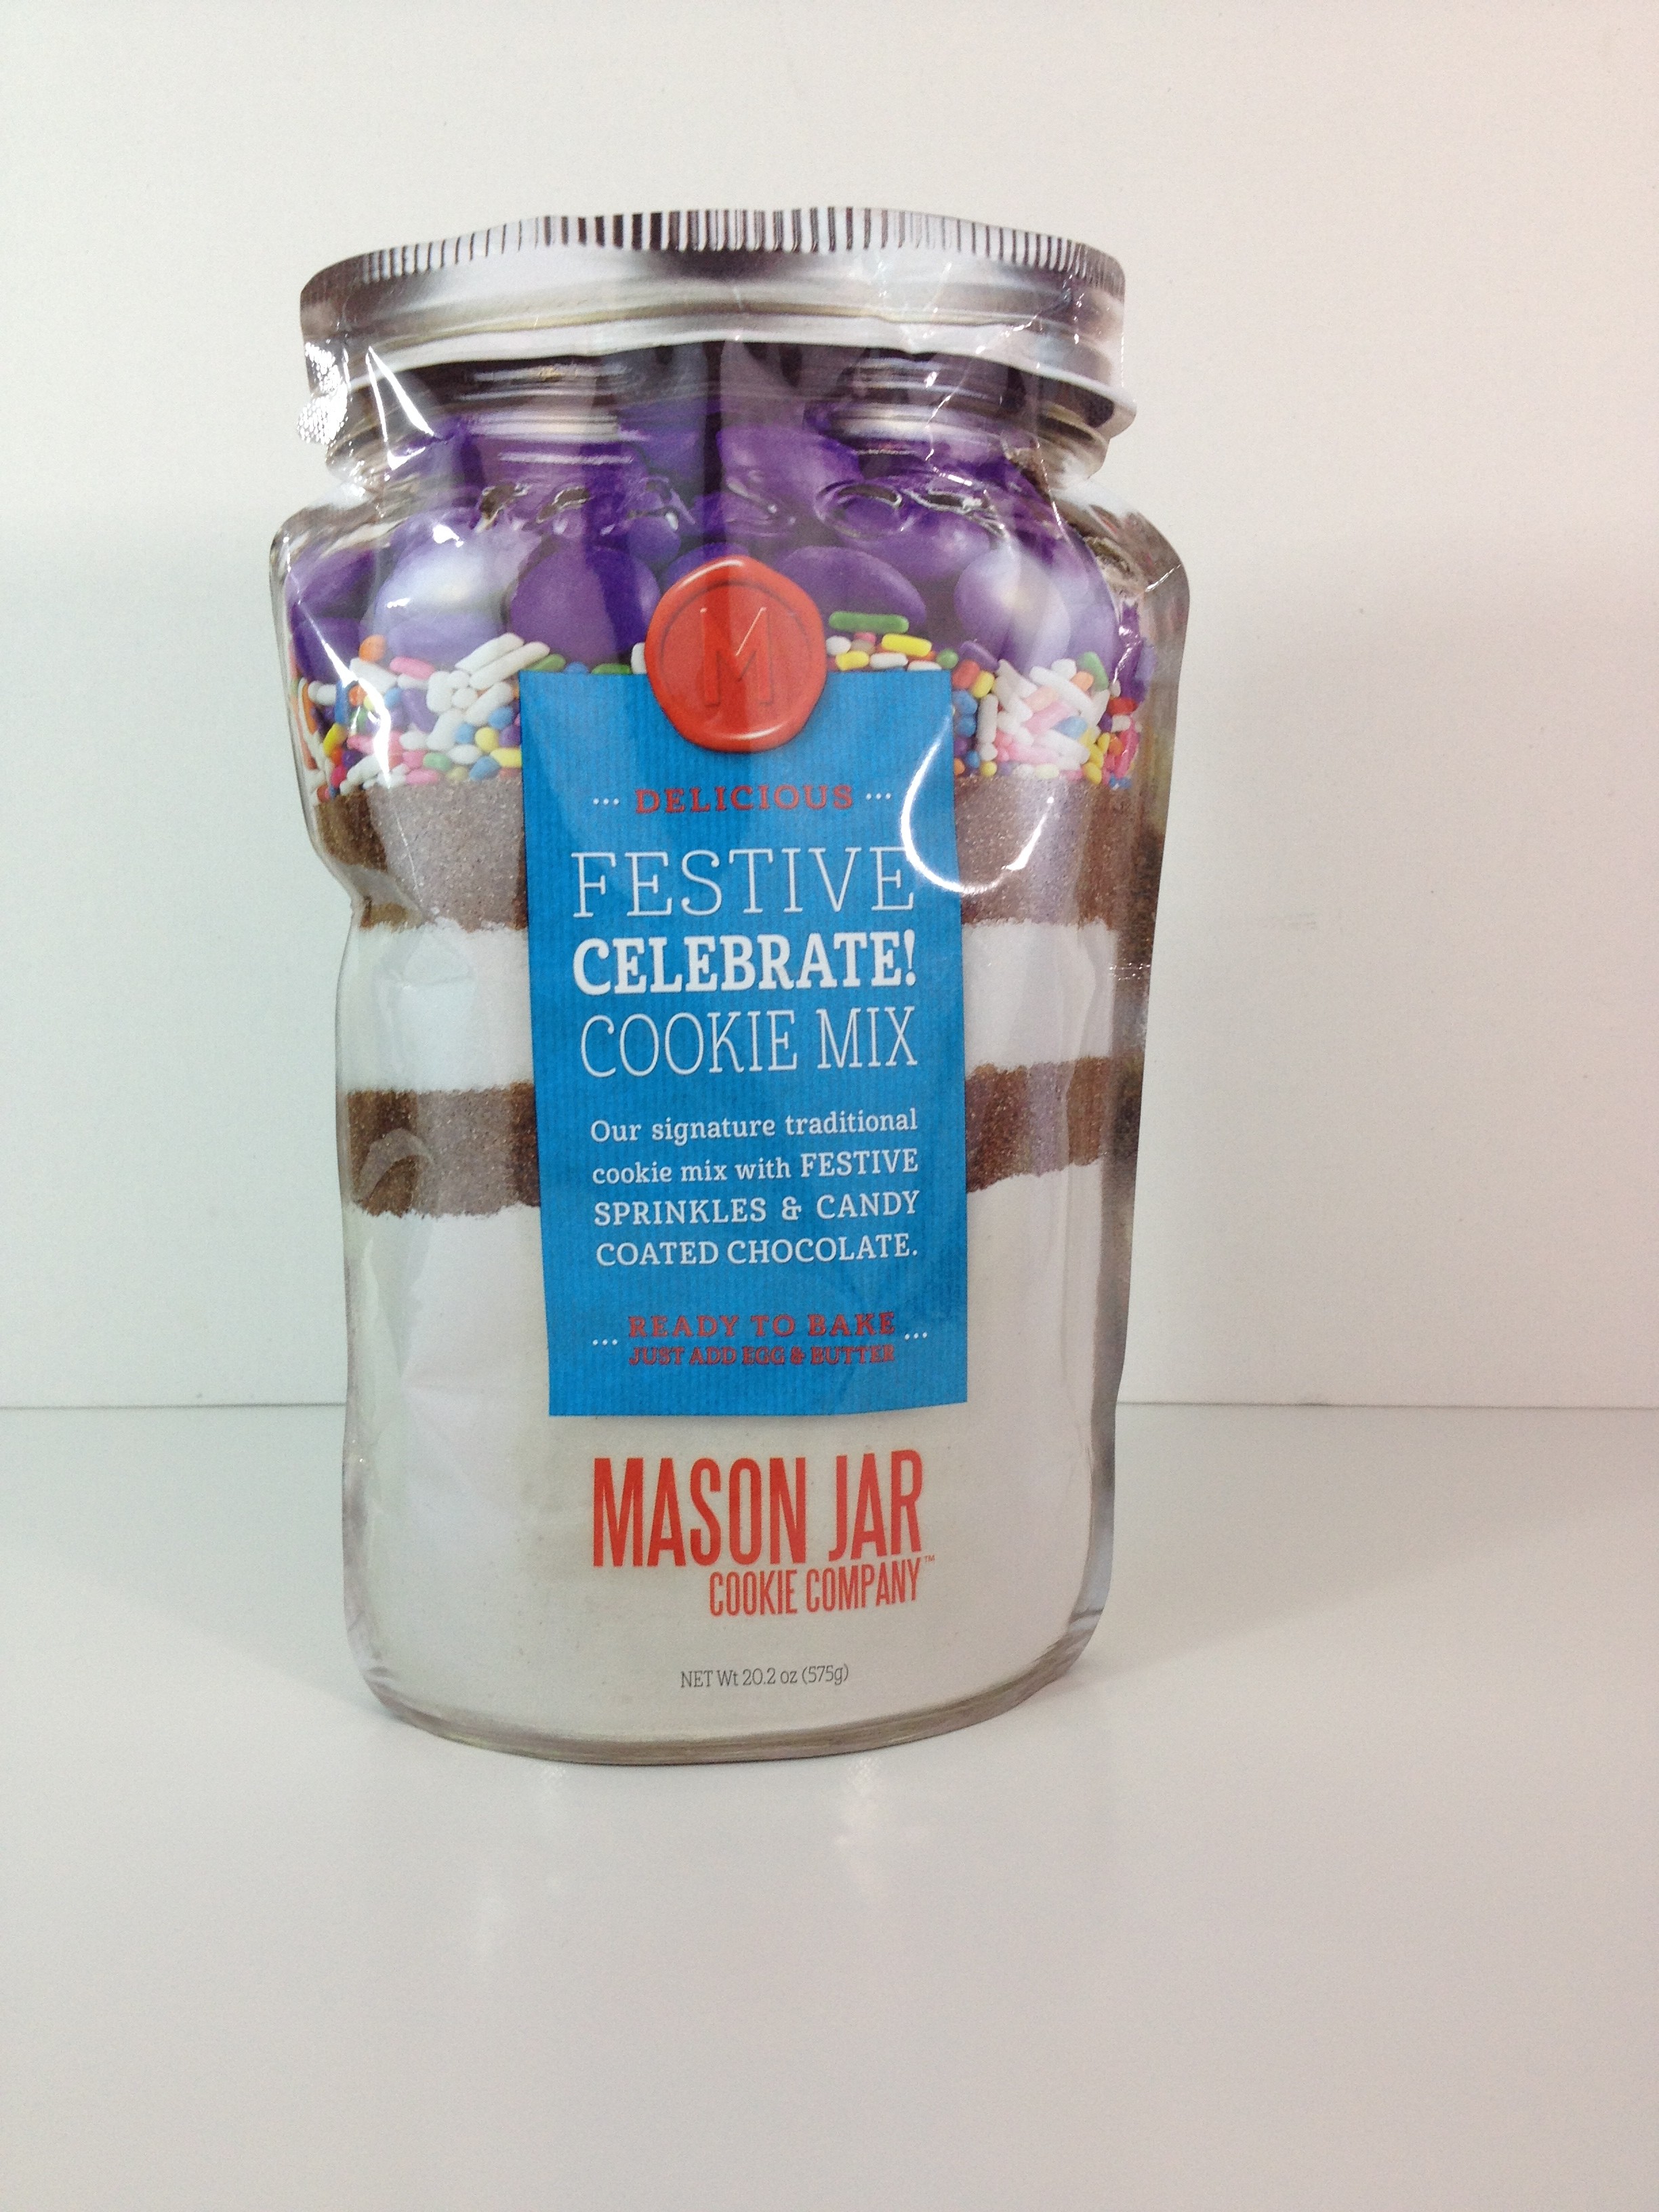
$12
My 3 year old LOVES to bake in the kitchen with me, and sometimes it is so nice to have the mix pre-made so that I save some clean up and time!! My daughter still gets the joy of mixing and working in the kitchen, so it’s a win-win! We haven’t tried this one yet, but I love the packaging and with sprinkles and chocolate what’s not to love?!
Lush Fruit Lip from Bite Beauty:
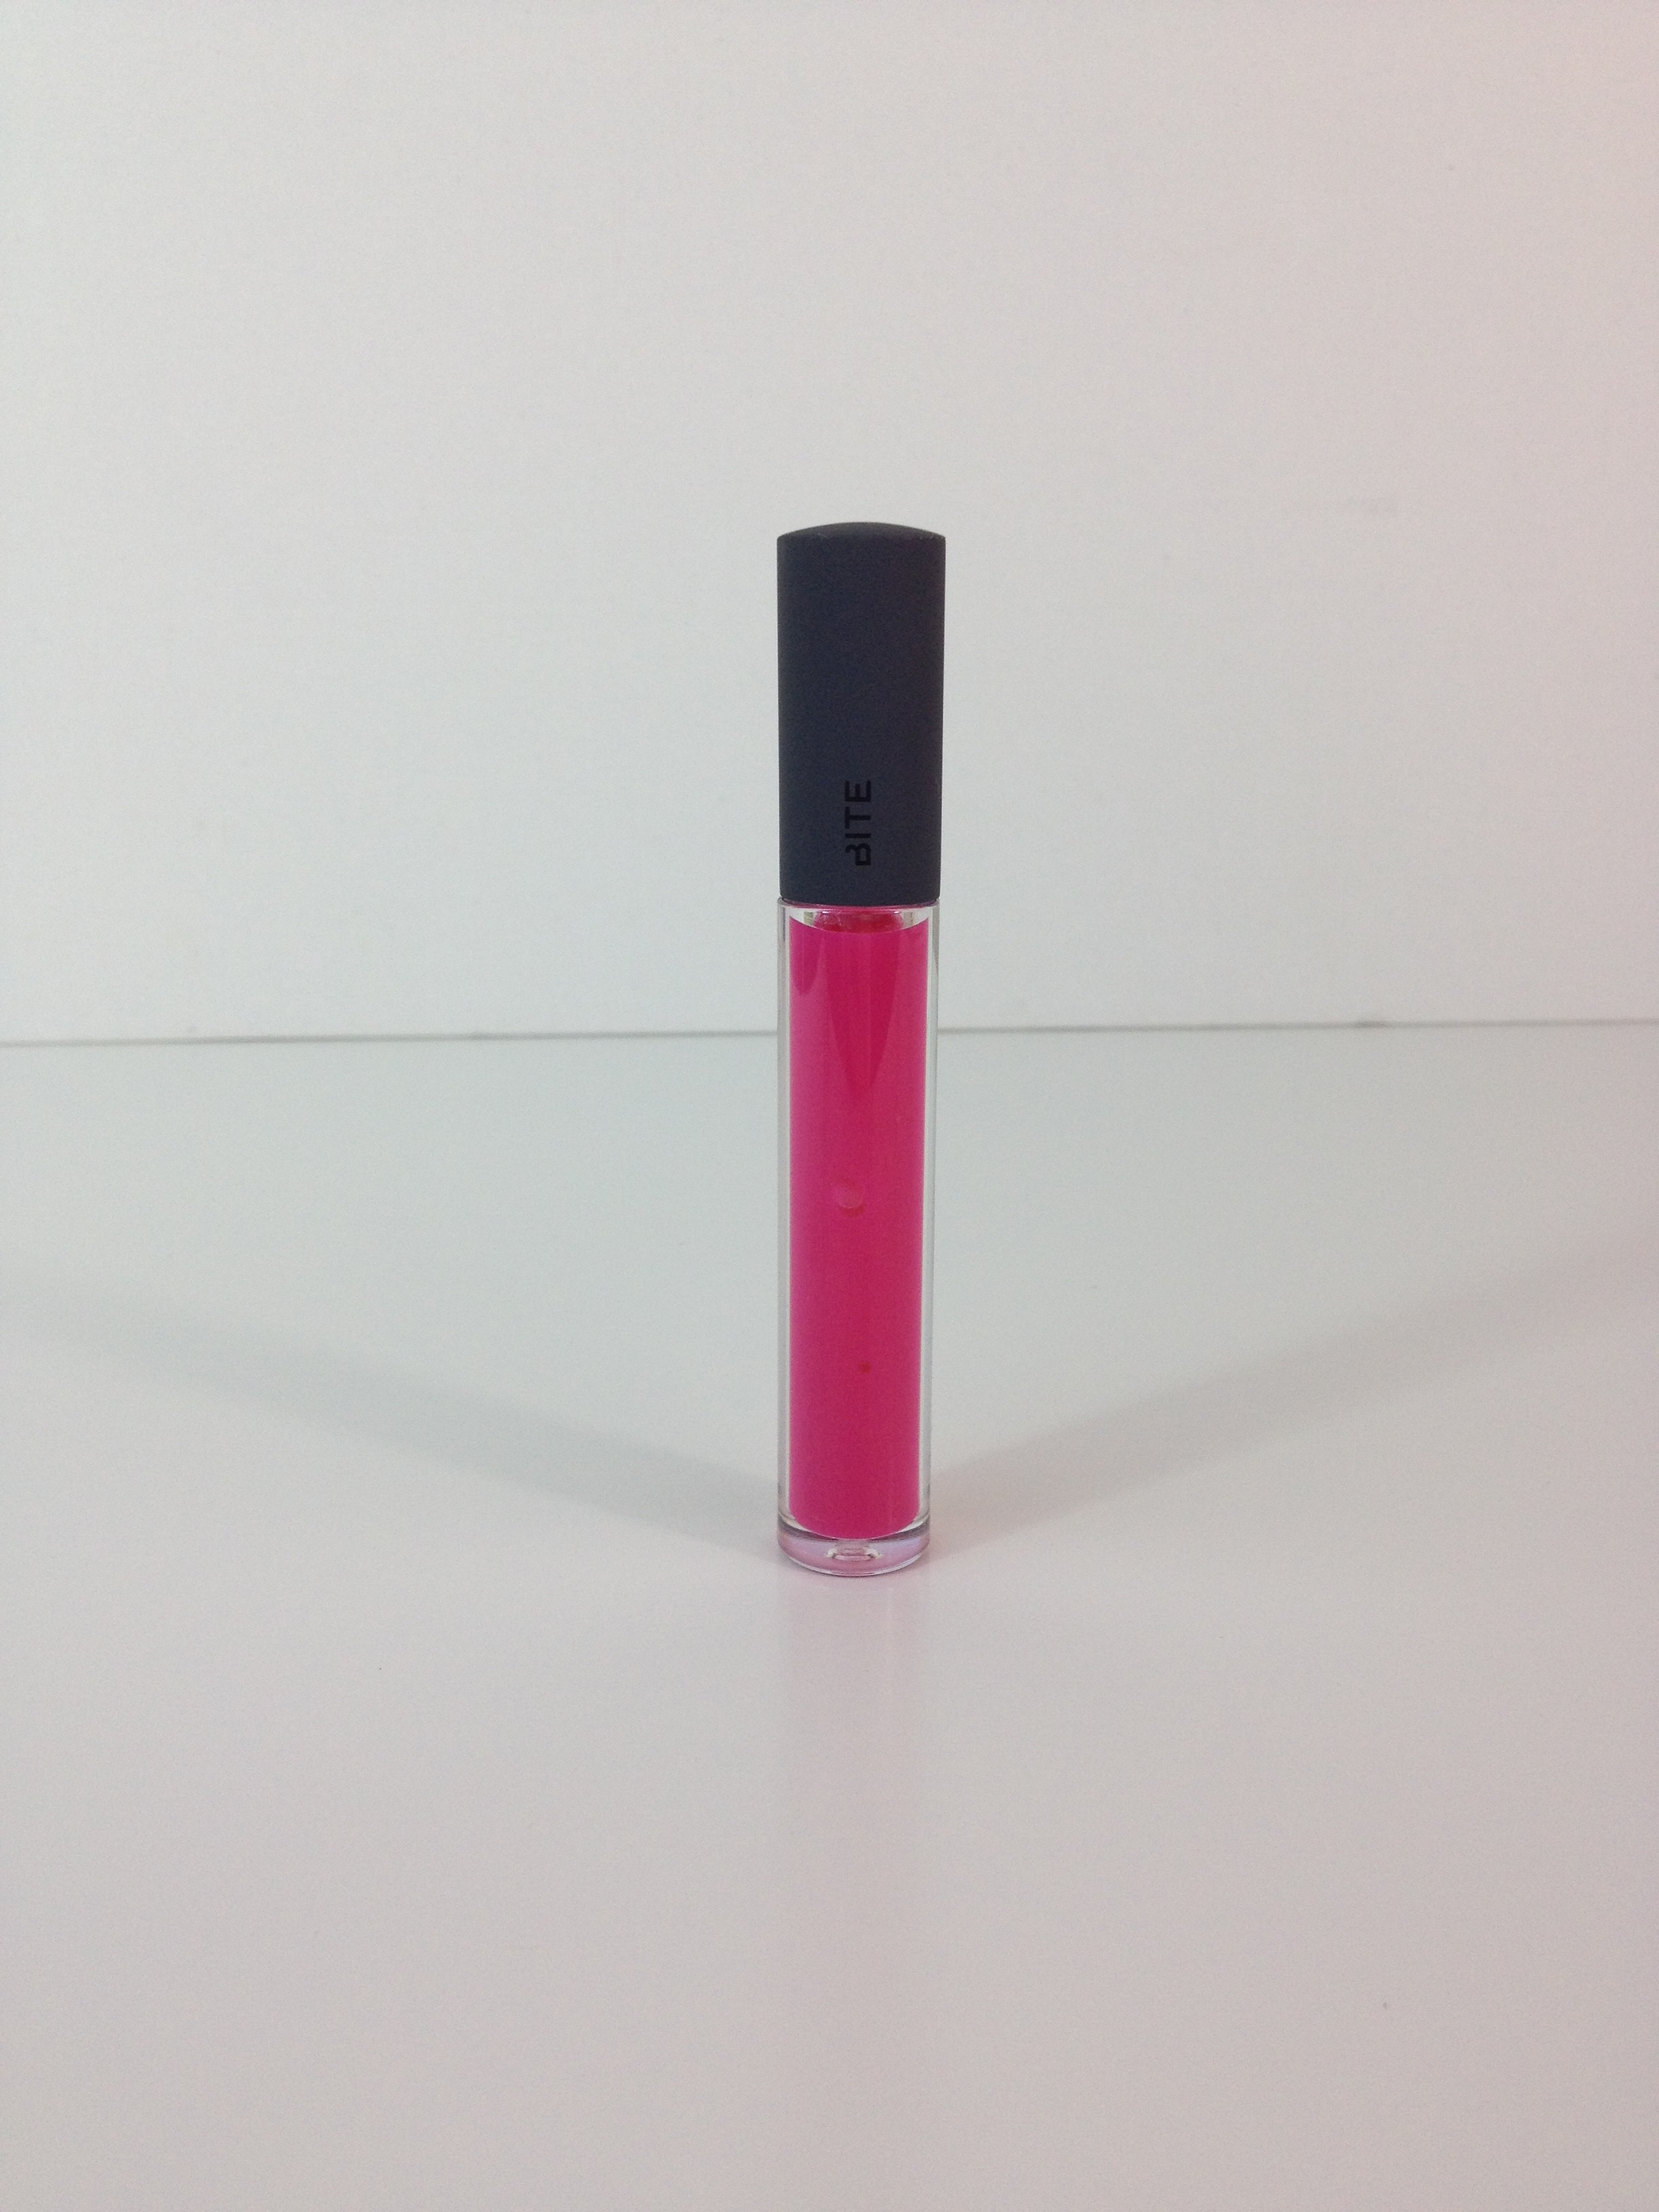
$22
I have been swooning over the Lush lipsticks for months now, so I was super excited to find this lip gloss in my box! The color was created especially for PopSugar subscribers for the 2 year anniversary of the Must Have Box. It is a nice hint of color, and it is a bit sticky but I actually like that to a point because it stays on the lips longer. I love that this lip gloss is naturally nourishing with strawberry, coconut, and avocado oils.
Purple Meal and Dipper Set from Goodbyn:
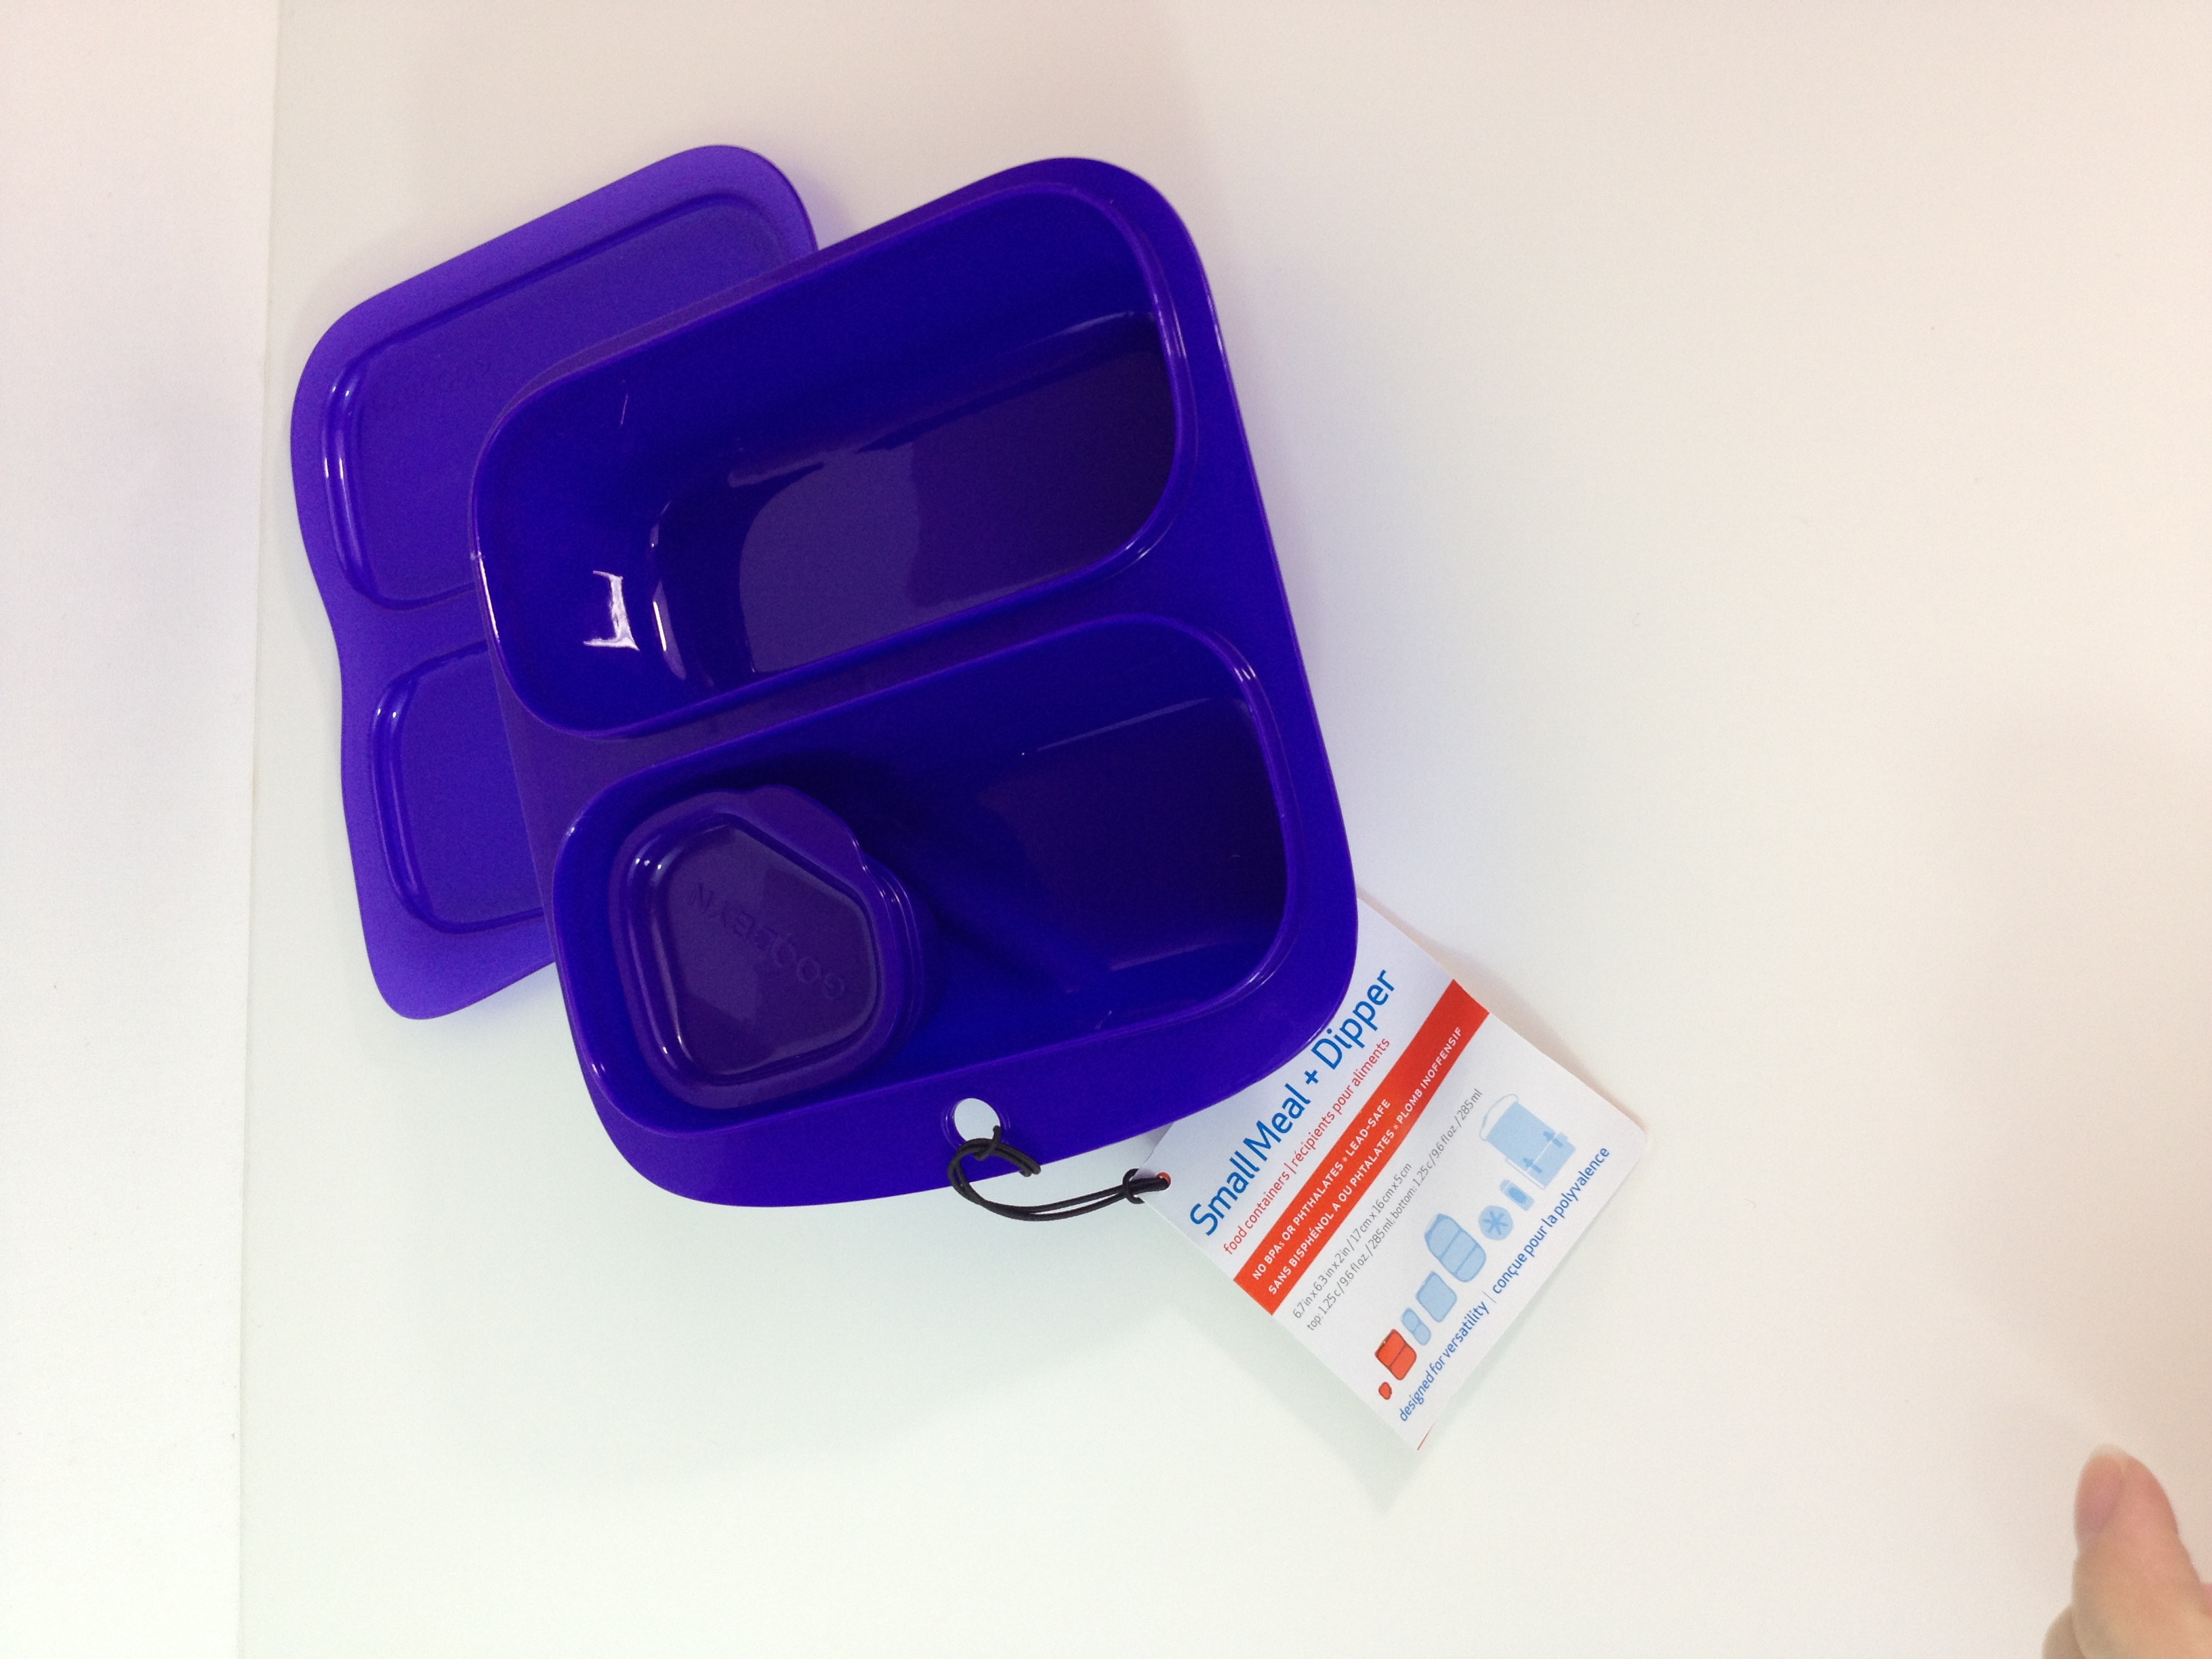
$8
We already have one of these bento style boxes, but it gets tons of use, and with my daughter starting pre-school (ah!!) soon we are happy to have another. This is dishwasher safe, and I love the seperate little compartments.
Ocean Tide + Sea Salt Mini Jar Candle from Paddywax:
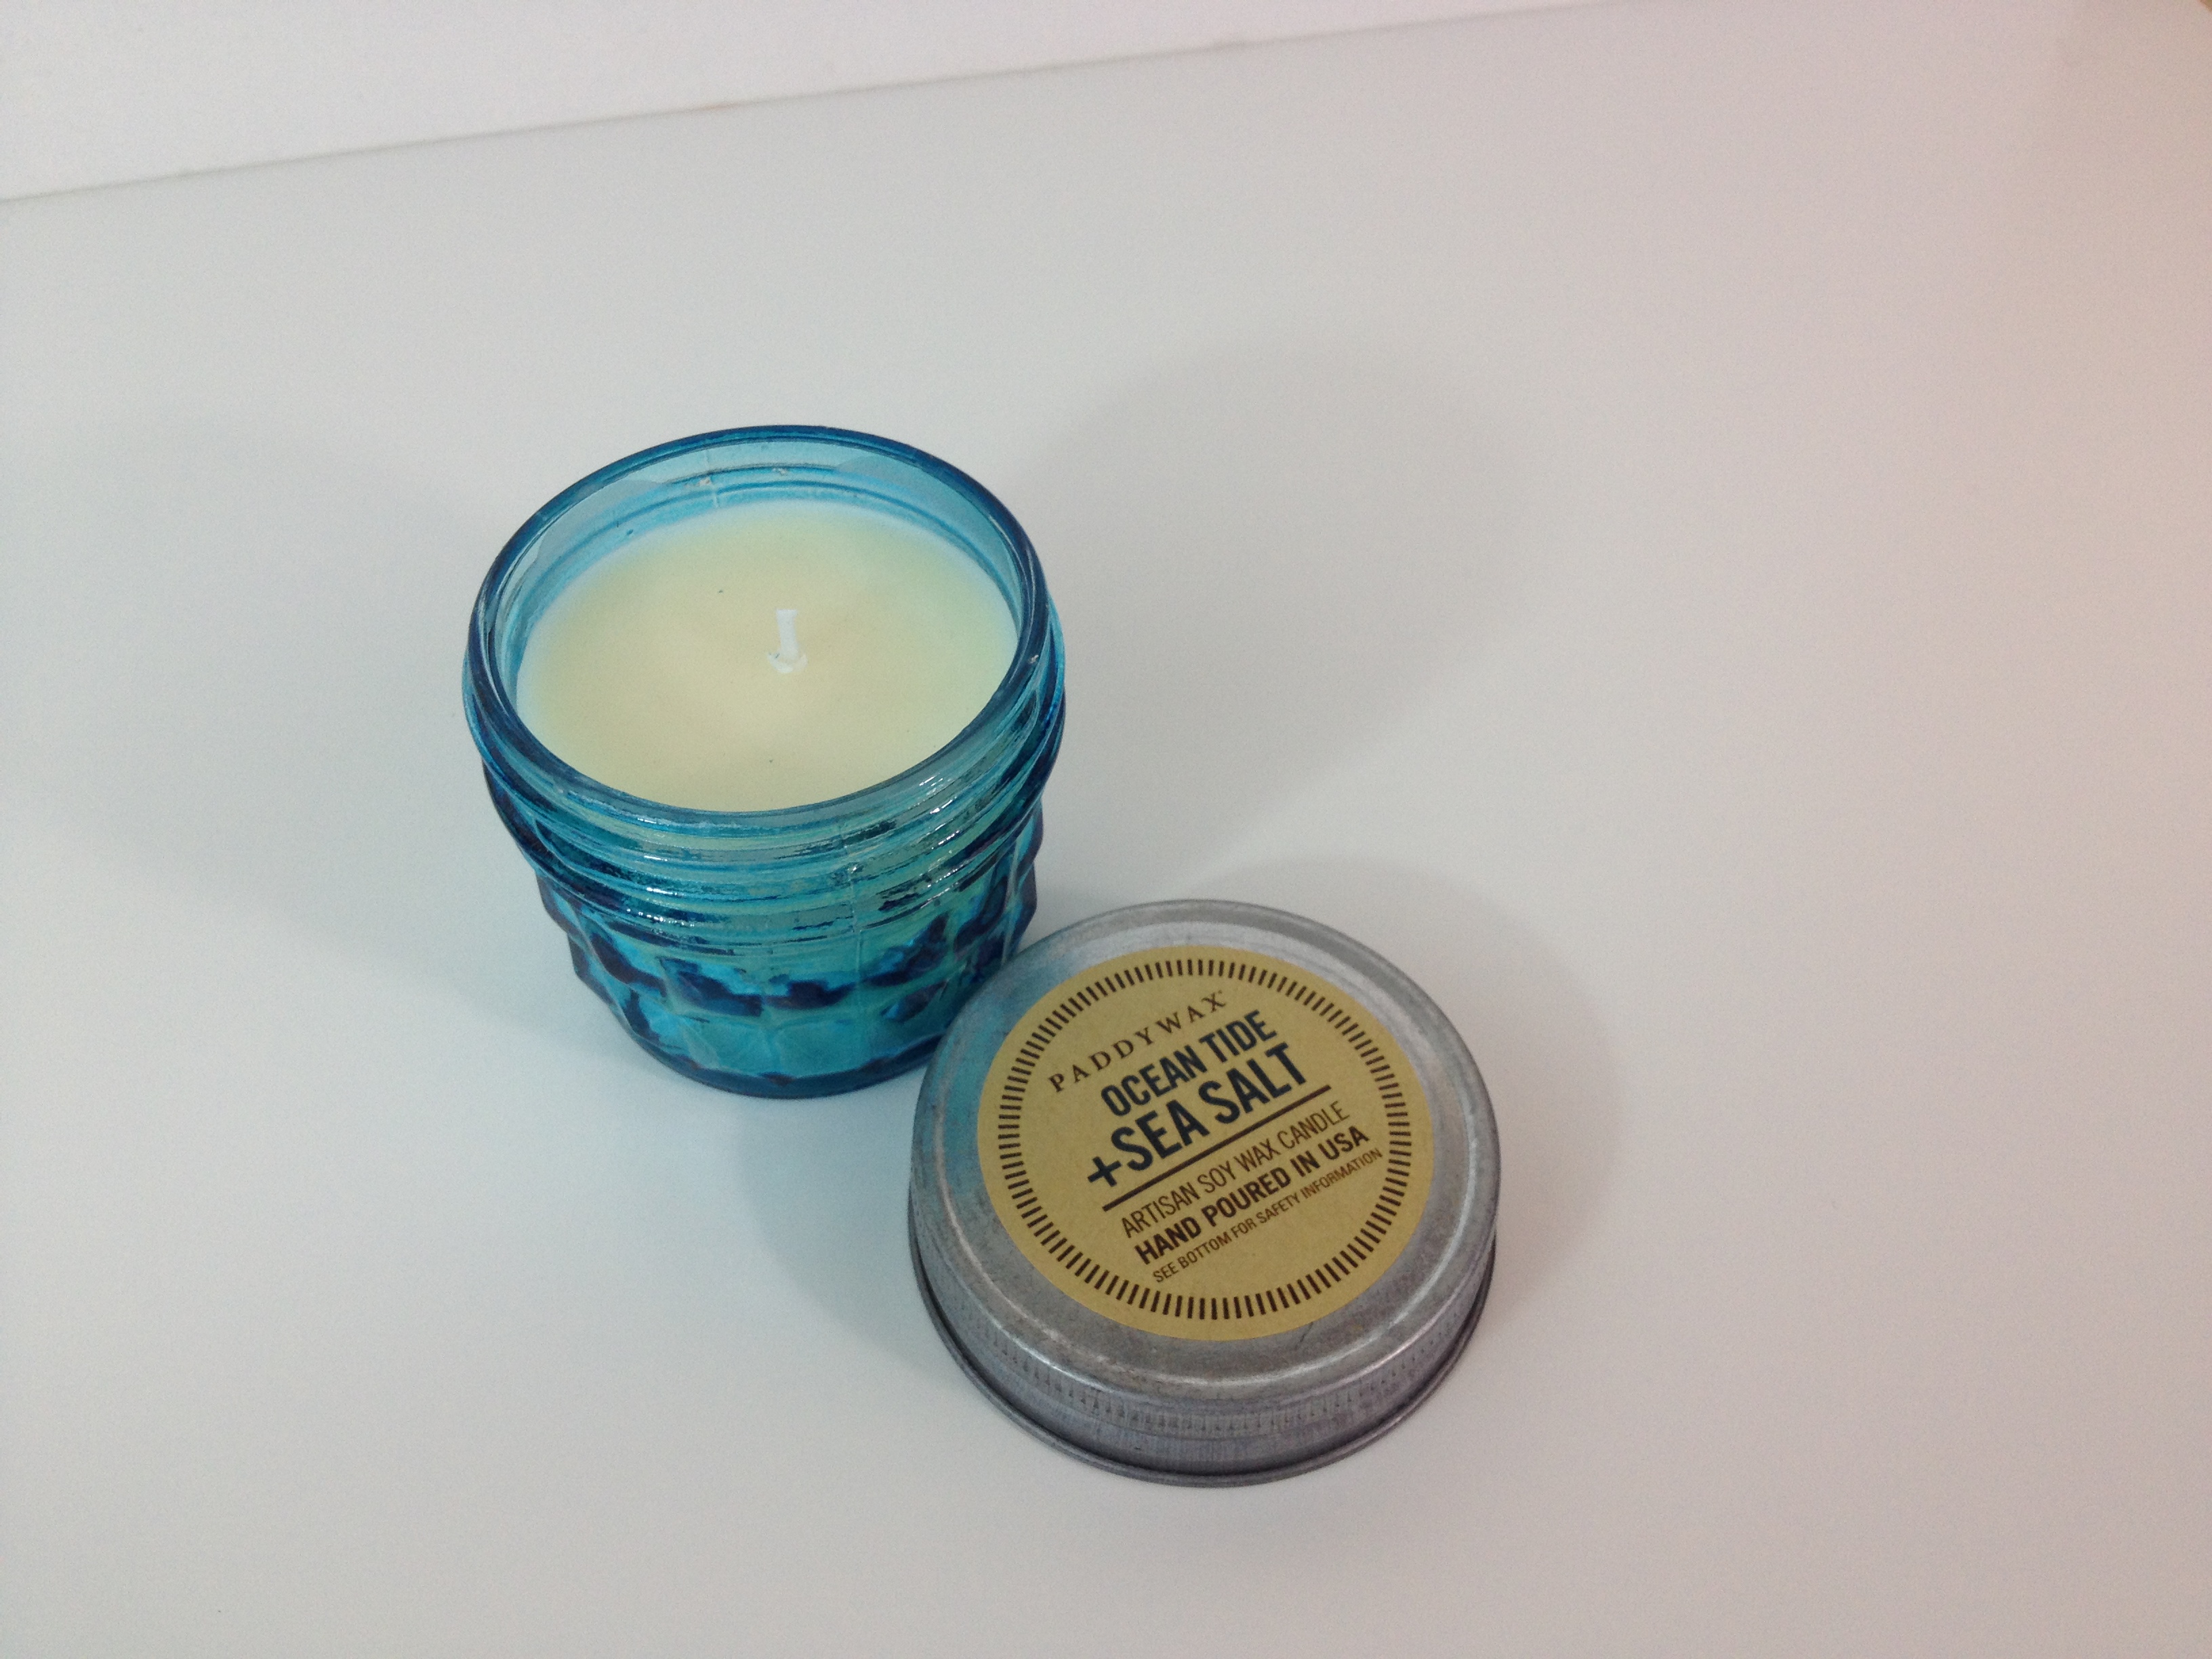
$10
I have burned this several times already and I am really impressed!! I usually gravitate towards 3 wick candles exclusively because I want a candle that will have a throw that will really fill the room, but this is a powerful little thing! It smells SO good, it’s hard to find a beachy scented candle that doesn’t overwhelm you with suncreen or coconut, and this candle is able to with the nice sea salt scent.
At Last Perfumed Shower Gel from Lollia:
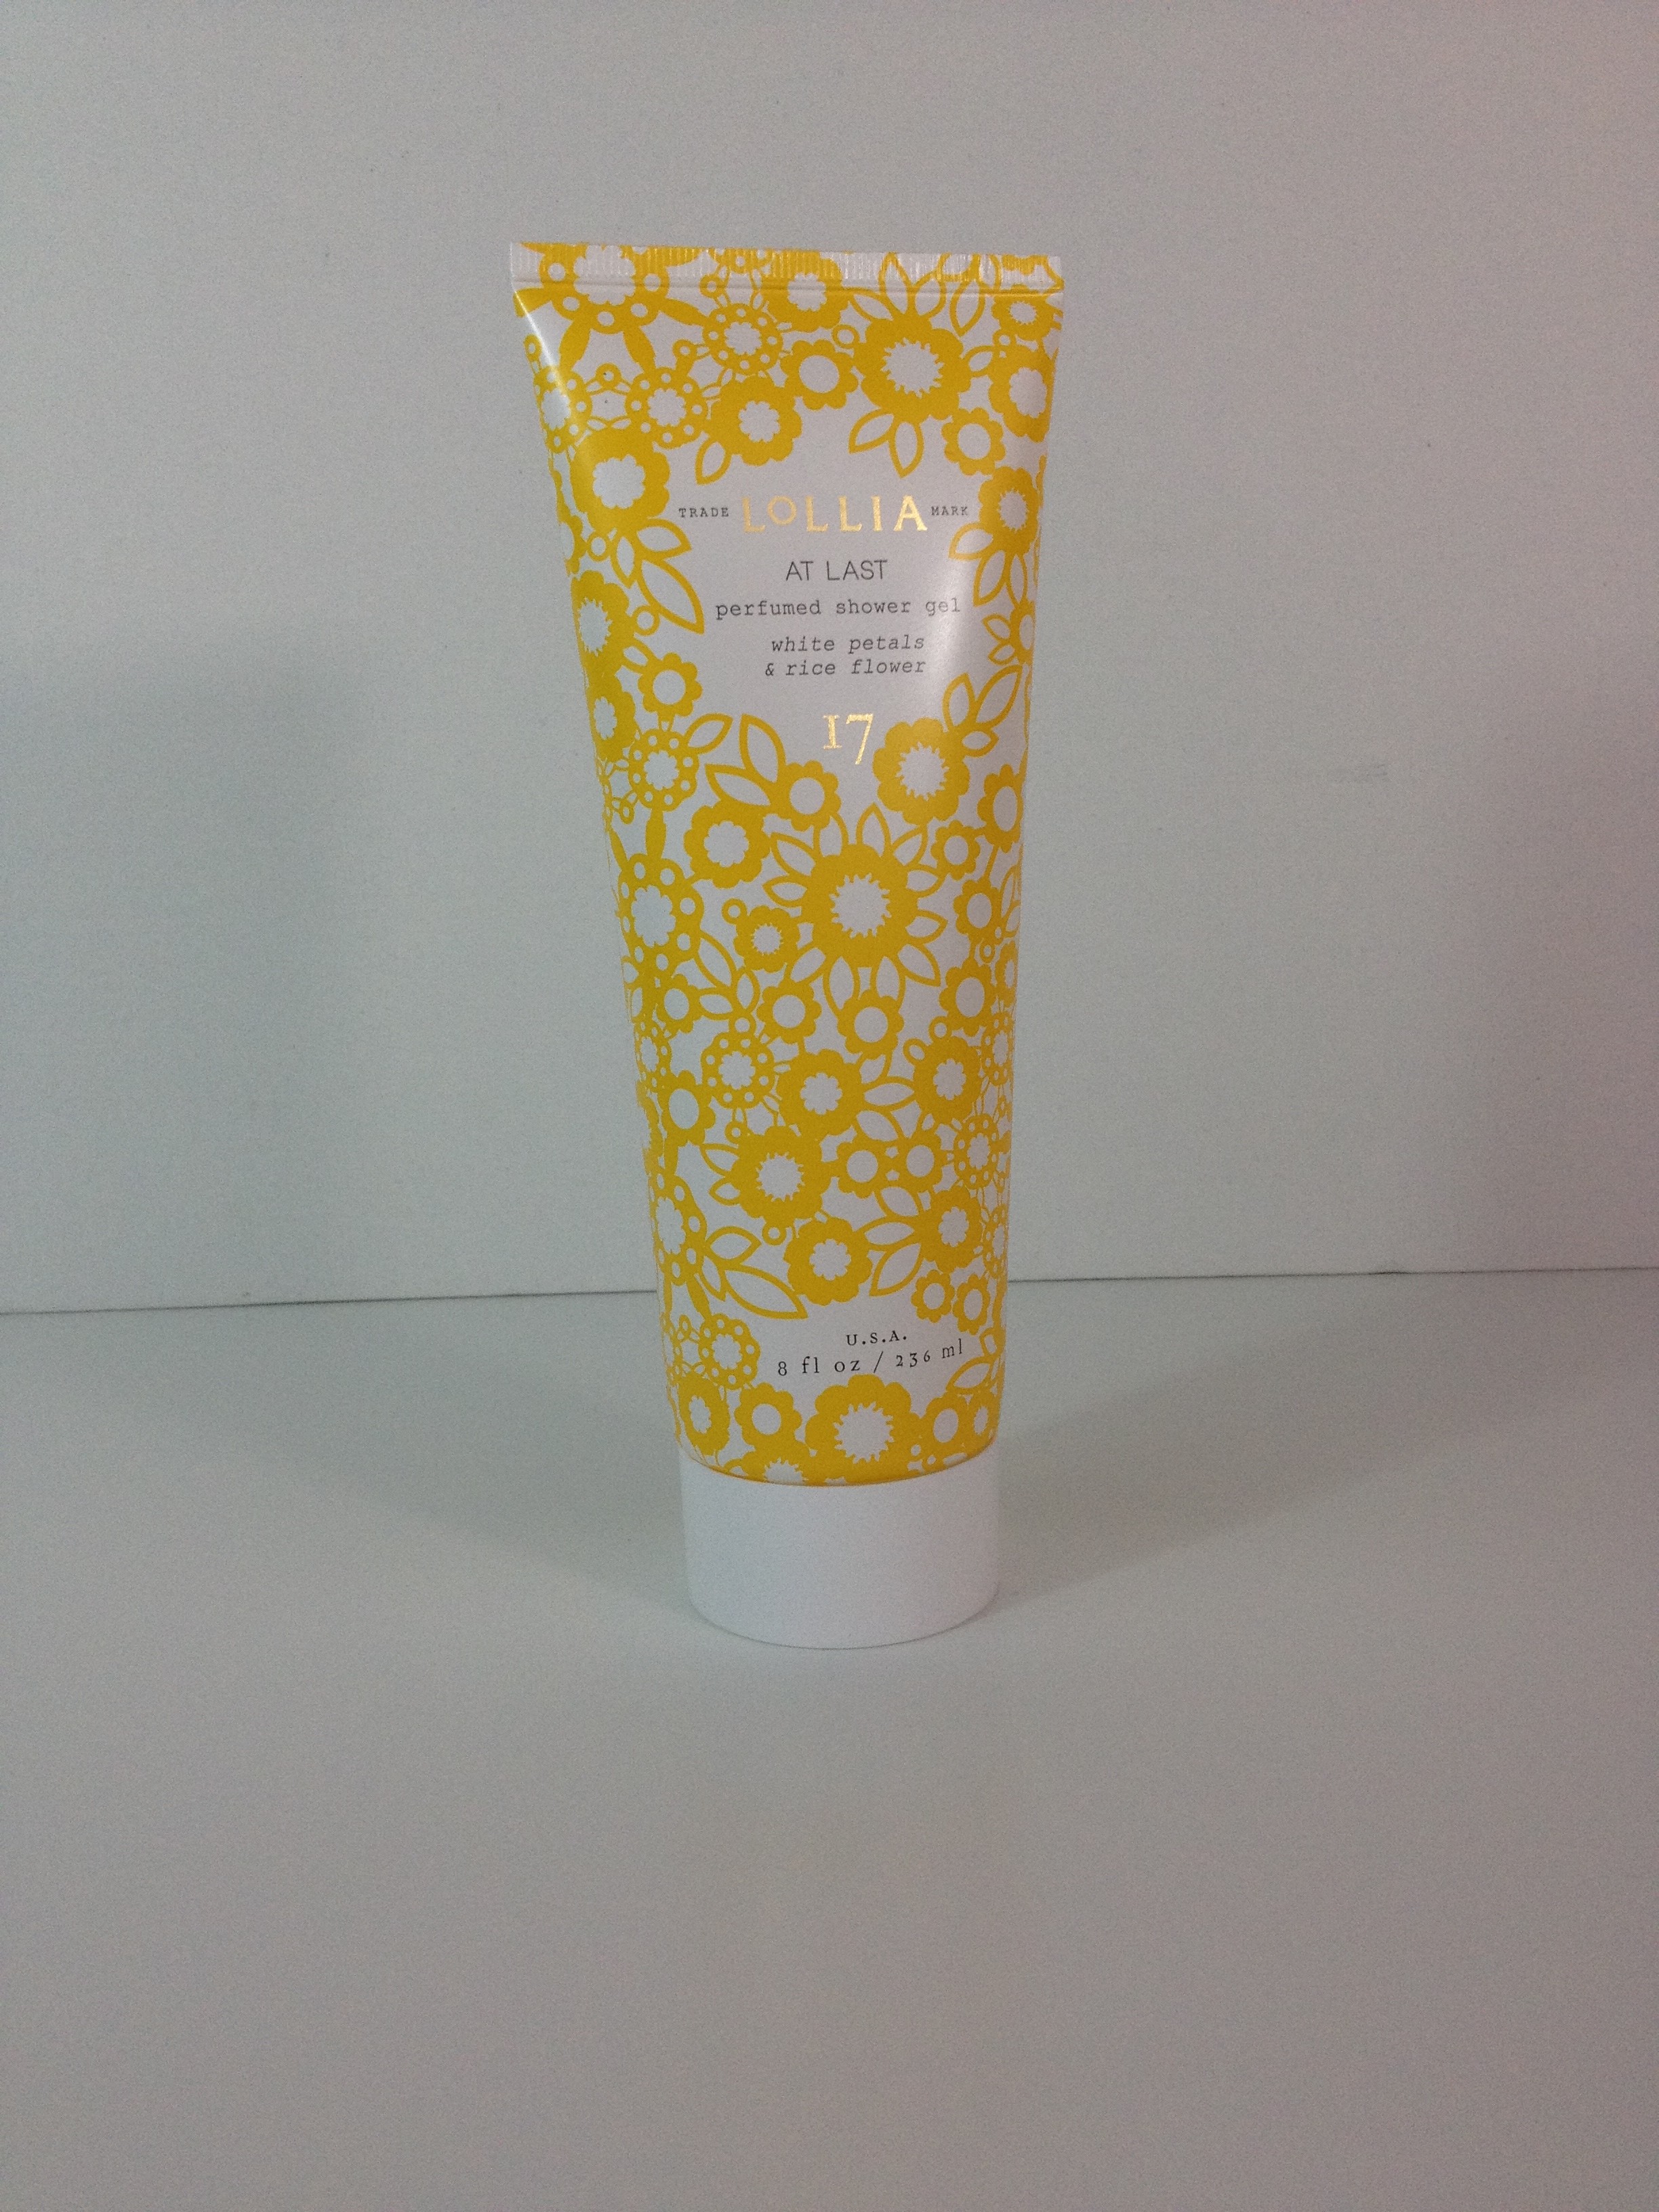
$22
I haven’t tried this yet, but I always love getting fancy bath products in my box : ) This smells nice and I am excited to try it out.
Elle Earrings in Slate from Kendra Scott:
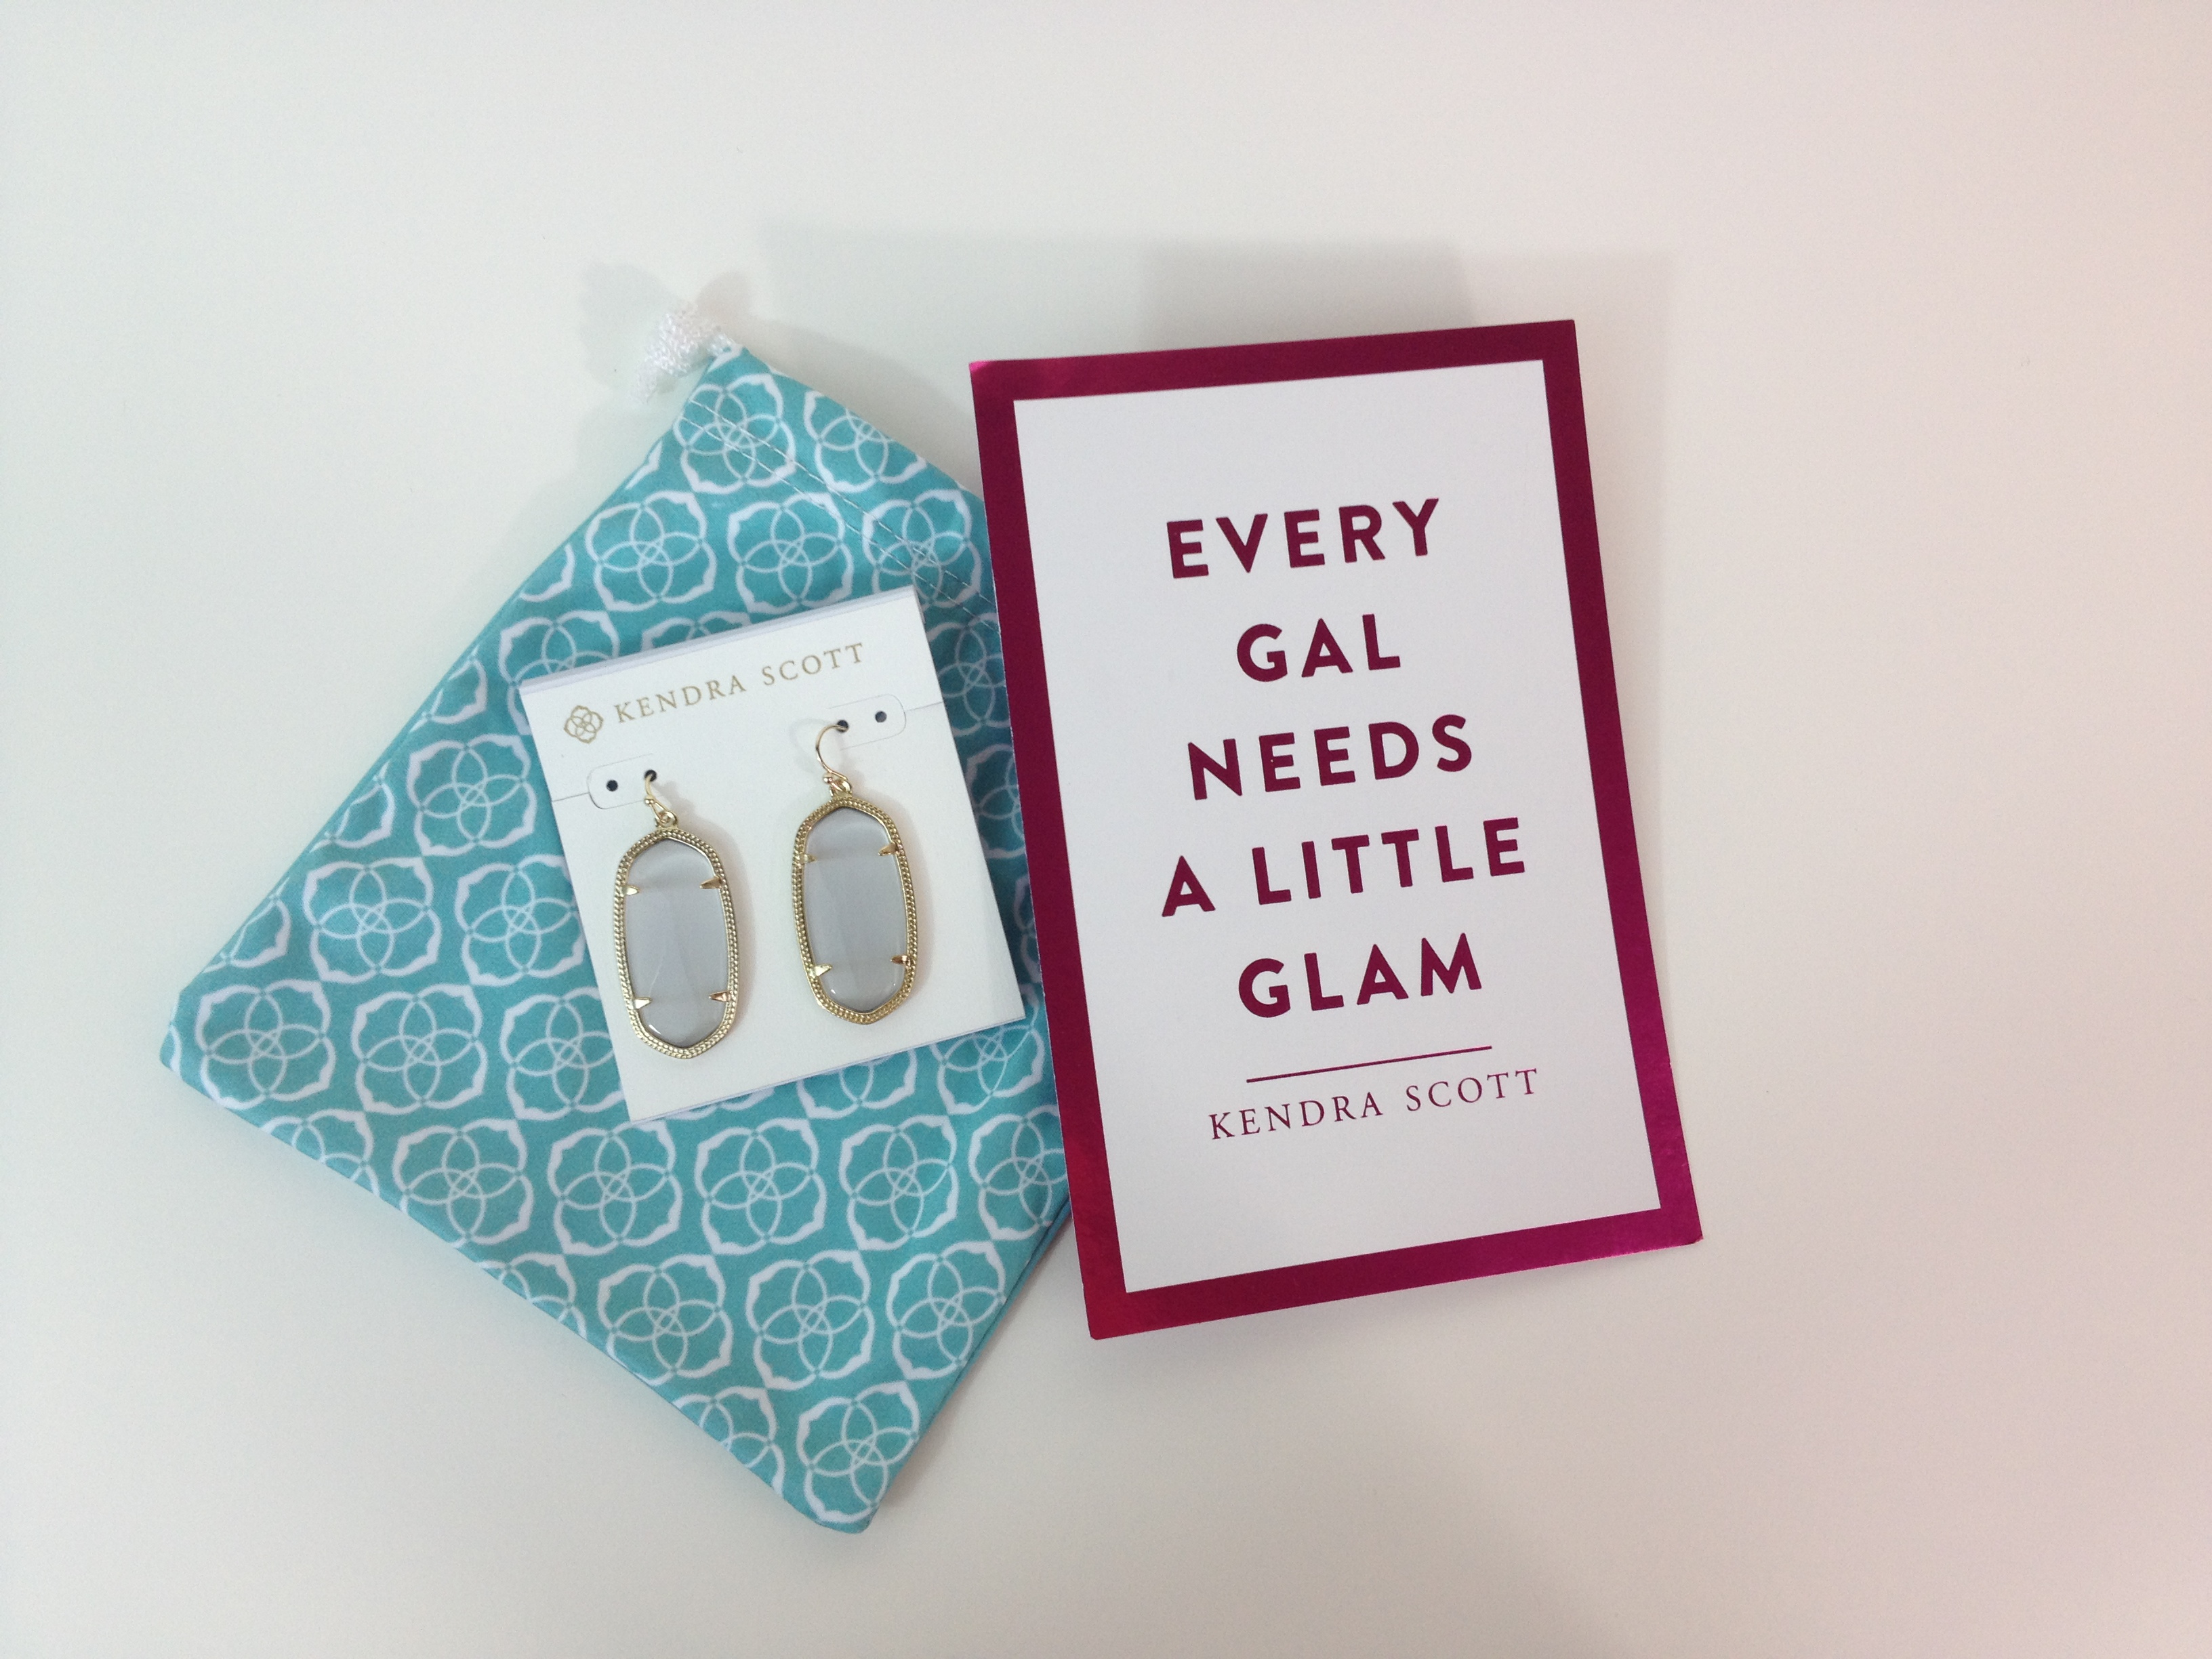
$52
This are easily my favorite item in the box which is really saying something since I rarely wear dangly earrings (2 little kiddos and another on the way…so maybe in 3-4 years I can wear them more!) but these are stunning! I think they’ll look great with so many things and can’t wait to wear them for a date night with Stephan : )
Special Extra:
Brownie Crunch High Protein Bar from thinkThin:

I originally tried a thinkThin bar because of Pop Sugar back in February of 2013, and they are a great option for a high protein bar. I haven’t tried this one yet, but I love tossing these in my bags for those “I-need-energy/food-now!” moments! Having a healthier option stops me from making a bad decision (ahhhhm candy bars!).
Overall I am really excited about this months box! I am so excited for fall this year, so I am hoping that next month has some fun things as well that are more fall geared. I was disapointed by the packaging, but the items made up for it! And as always, this box is WELL worth the $39 price point! This box totals $126 not counting the special extra.
Do you subscribe to PopSugar? What other subscription boxes do you enjoy? I love hearing what other people subscribe to and what they are loving!!
Before you go, don’t forget to enter the TWO giveaways that are currently running on the blog!!
I hope you have a wonderful start to your week!! Thank you so much for taking the time to read my blog : ) XOXO
Hi there! Happy Wednesday!
First things first, thank you all *so* much for the sweet comments from my announcement post! It means so much to both my husband and myself!! We are THRILLED and can’t wait to share our journey with you : )
Today I am soooooo excited to share my thoughts on my first (but certainly not last) Chloe + Isabel piece, and share one in a giveaway!!
When Leslie contacted me about collaborating and doing this review for my blog I was so excited! The pieces that Chloe + Isabel offer are stunning!! Plus, I love that the company is powered by ambitious young women.
MEDINA AMETHYST + TURQUOISE CUFF:
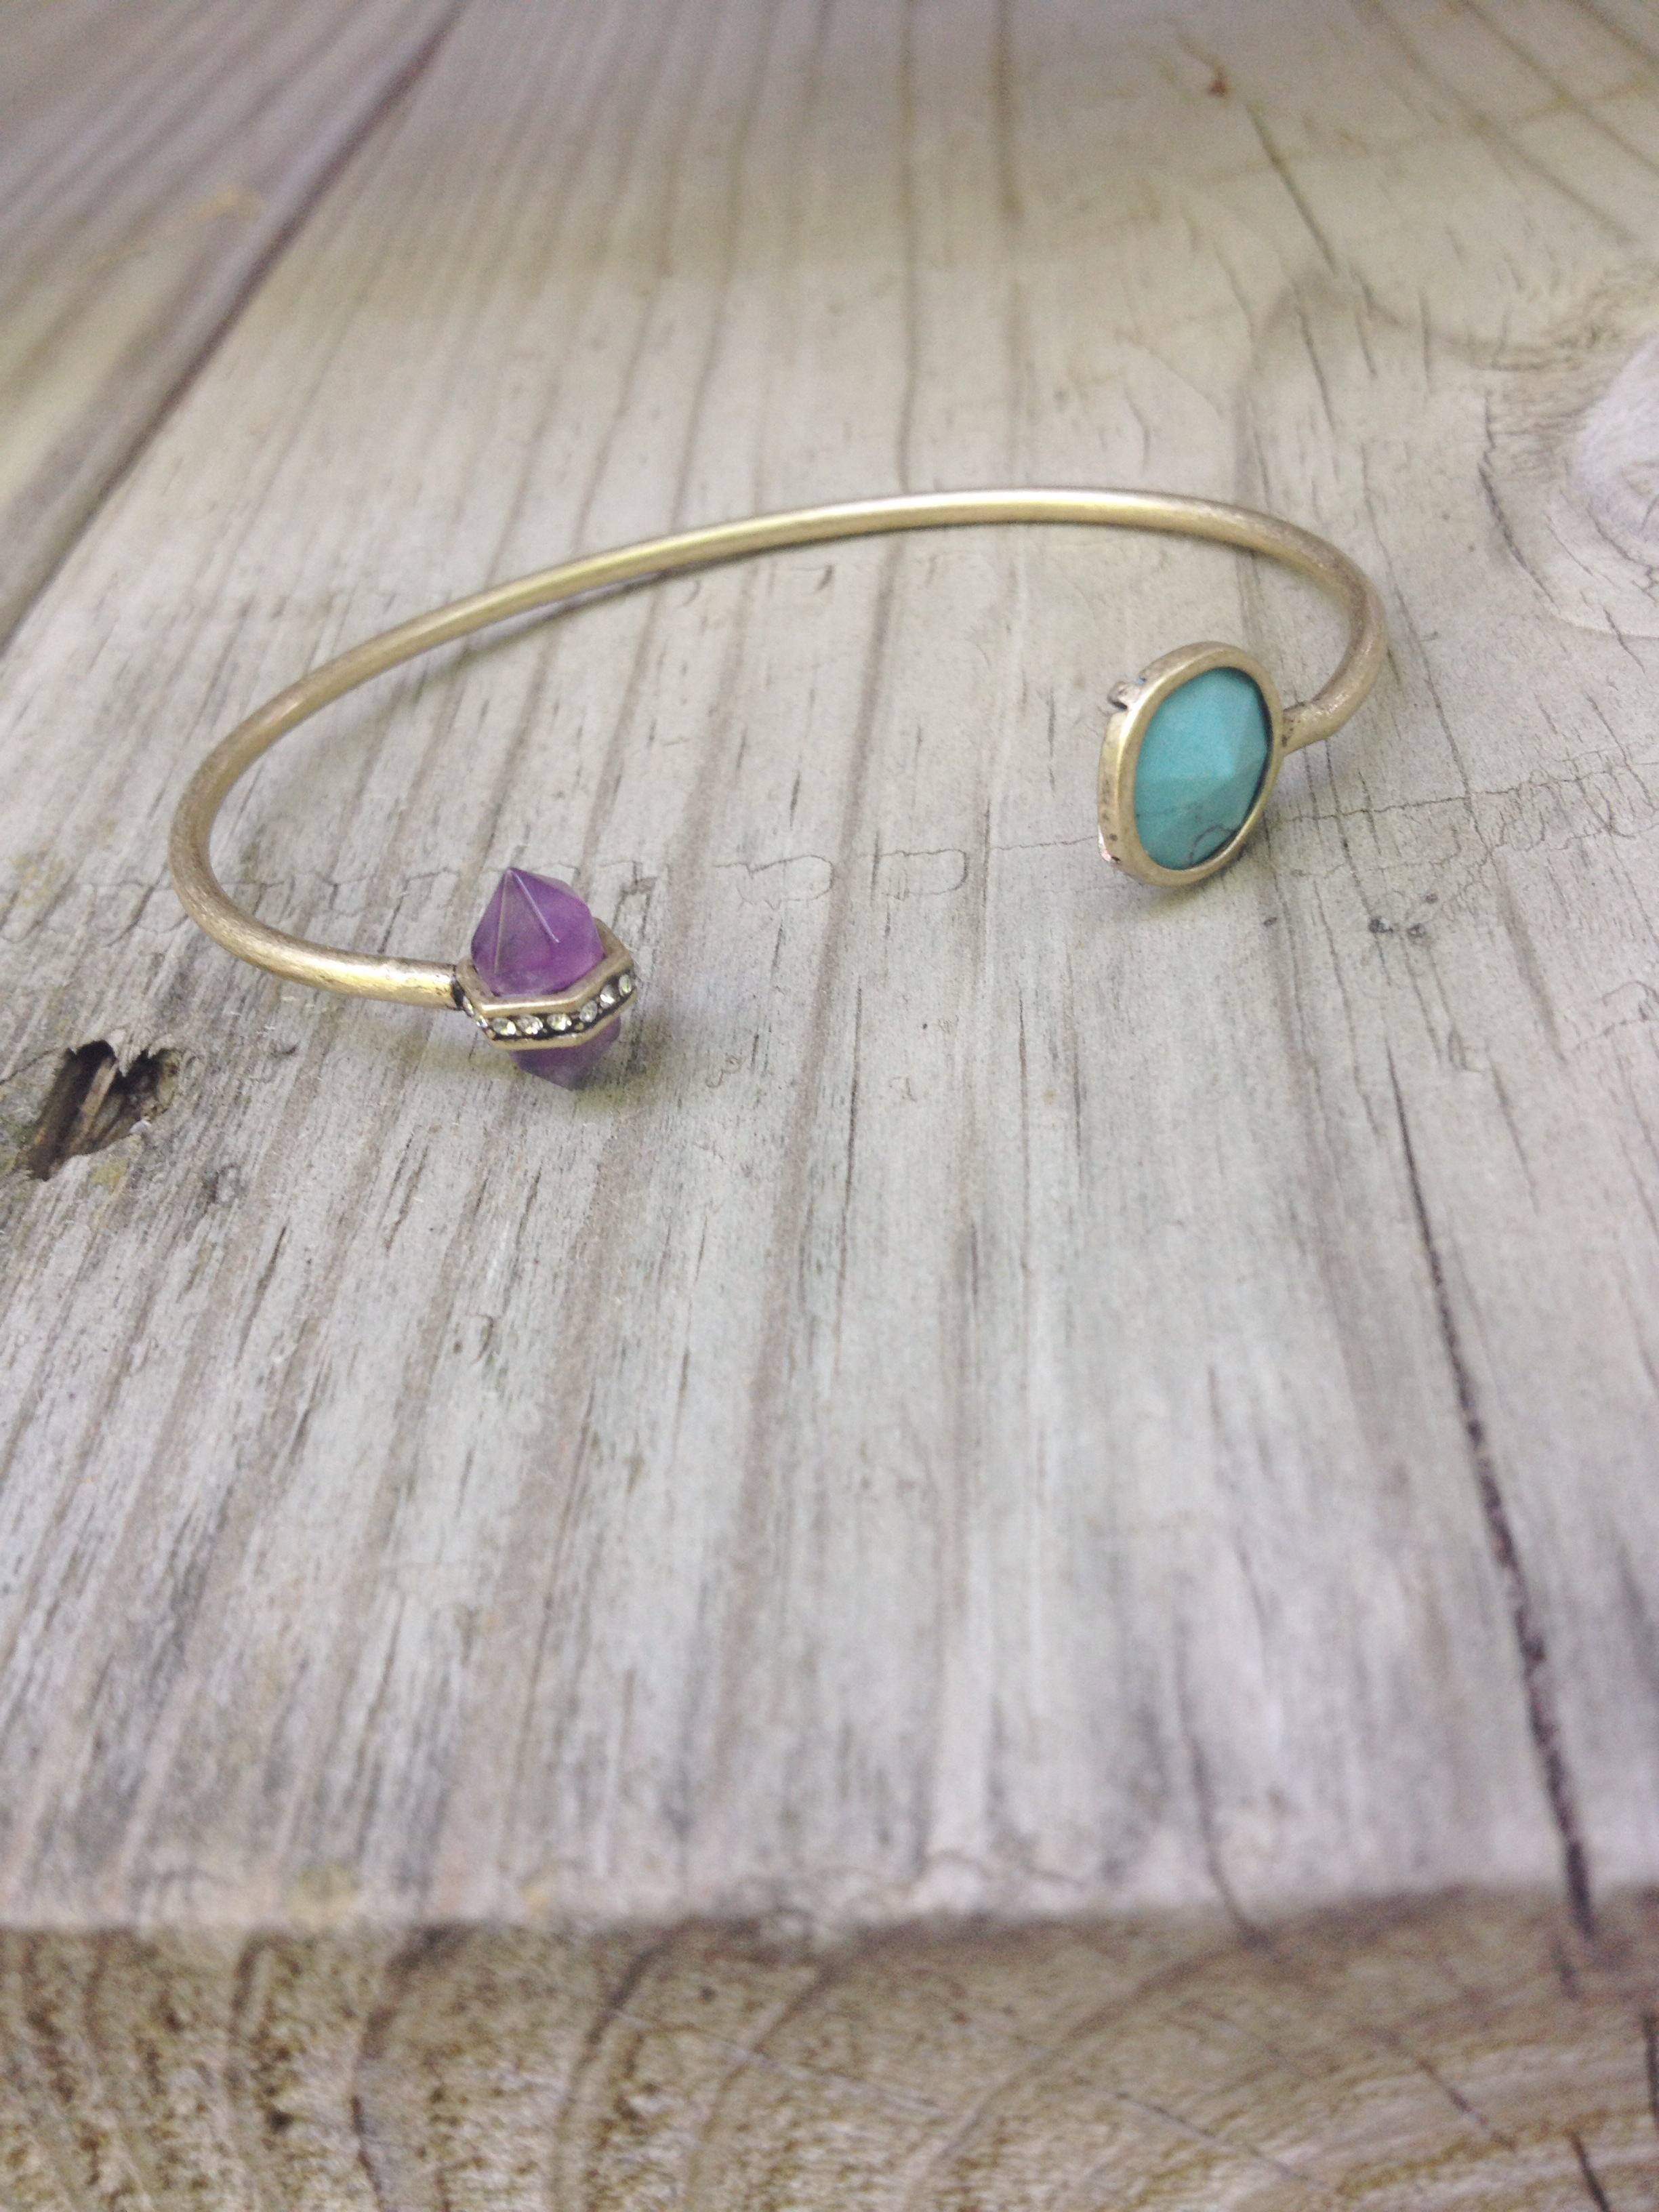
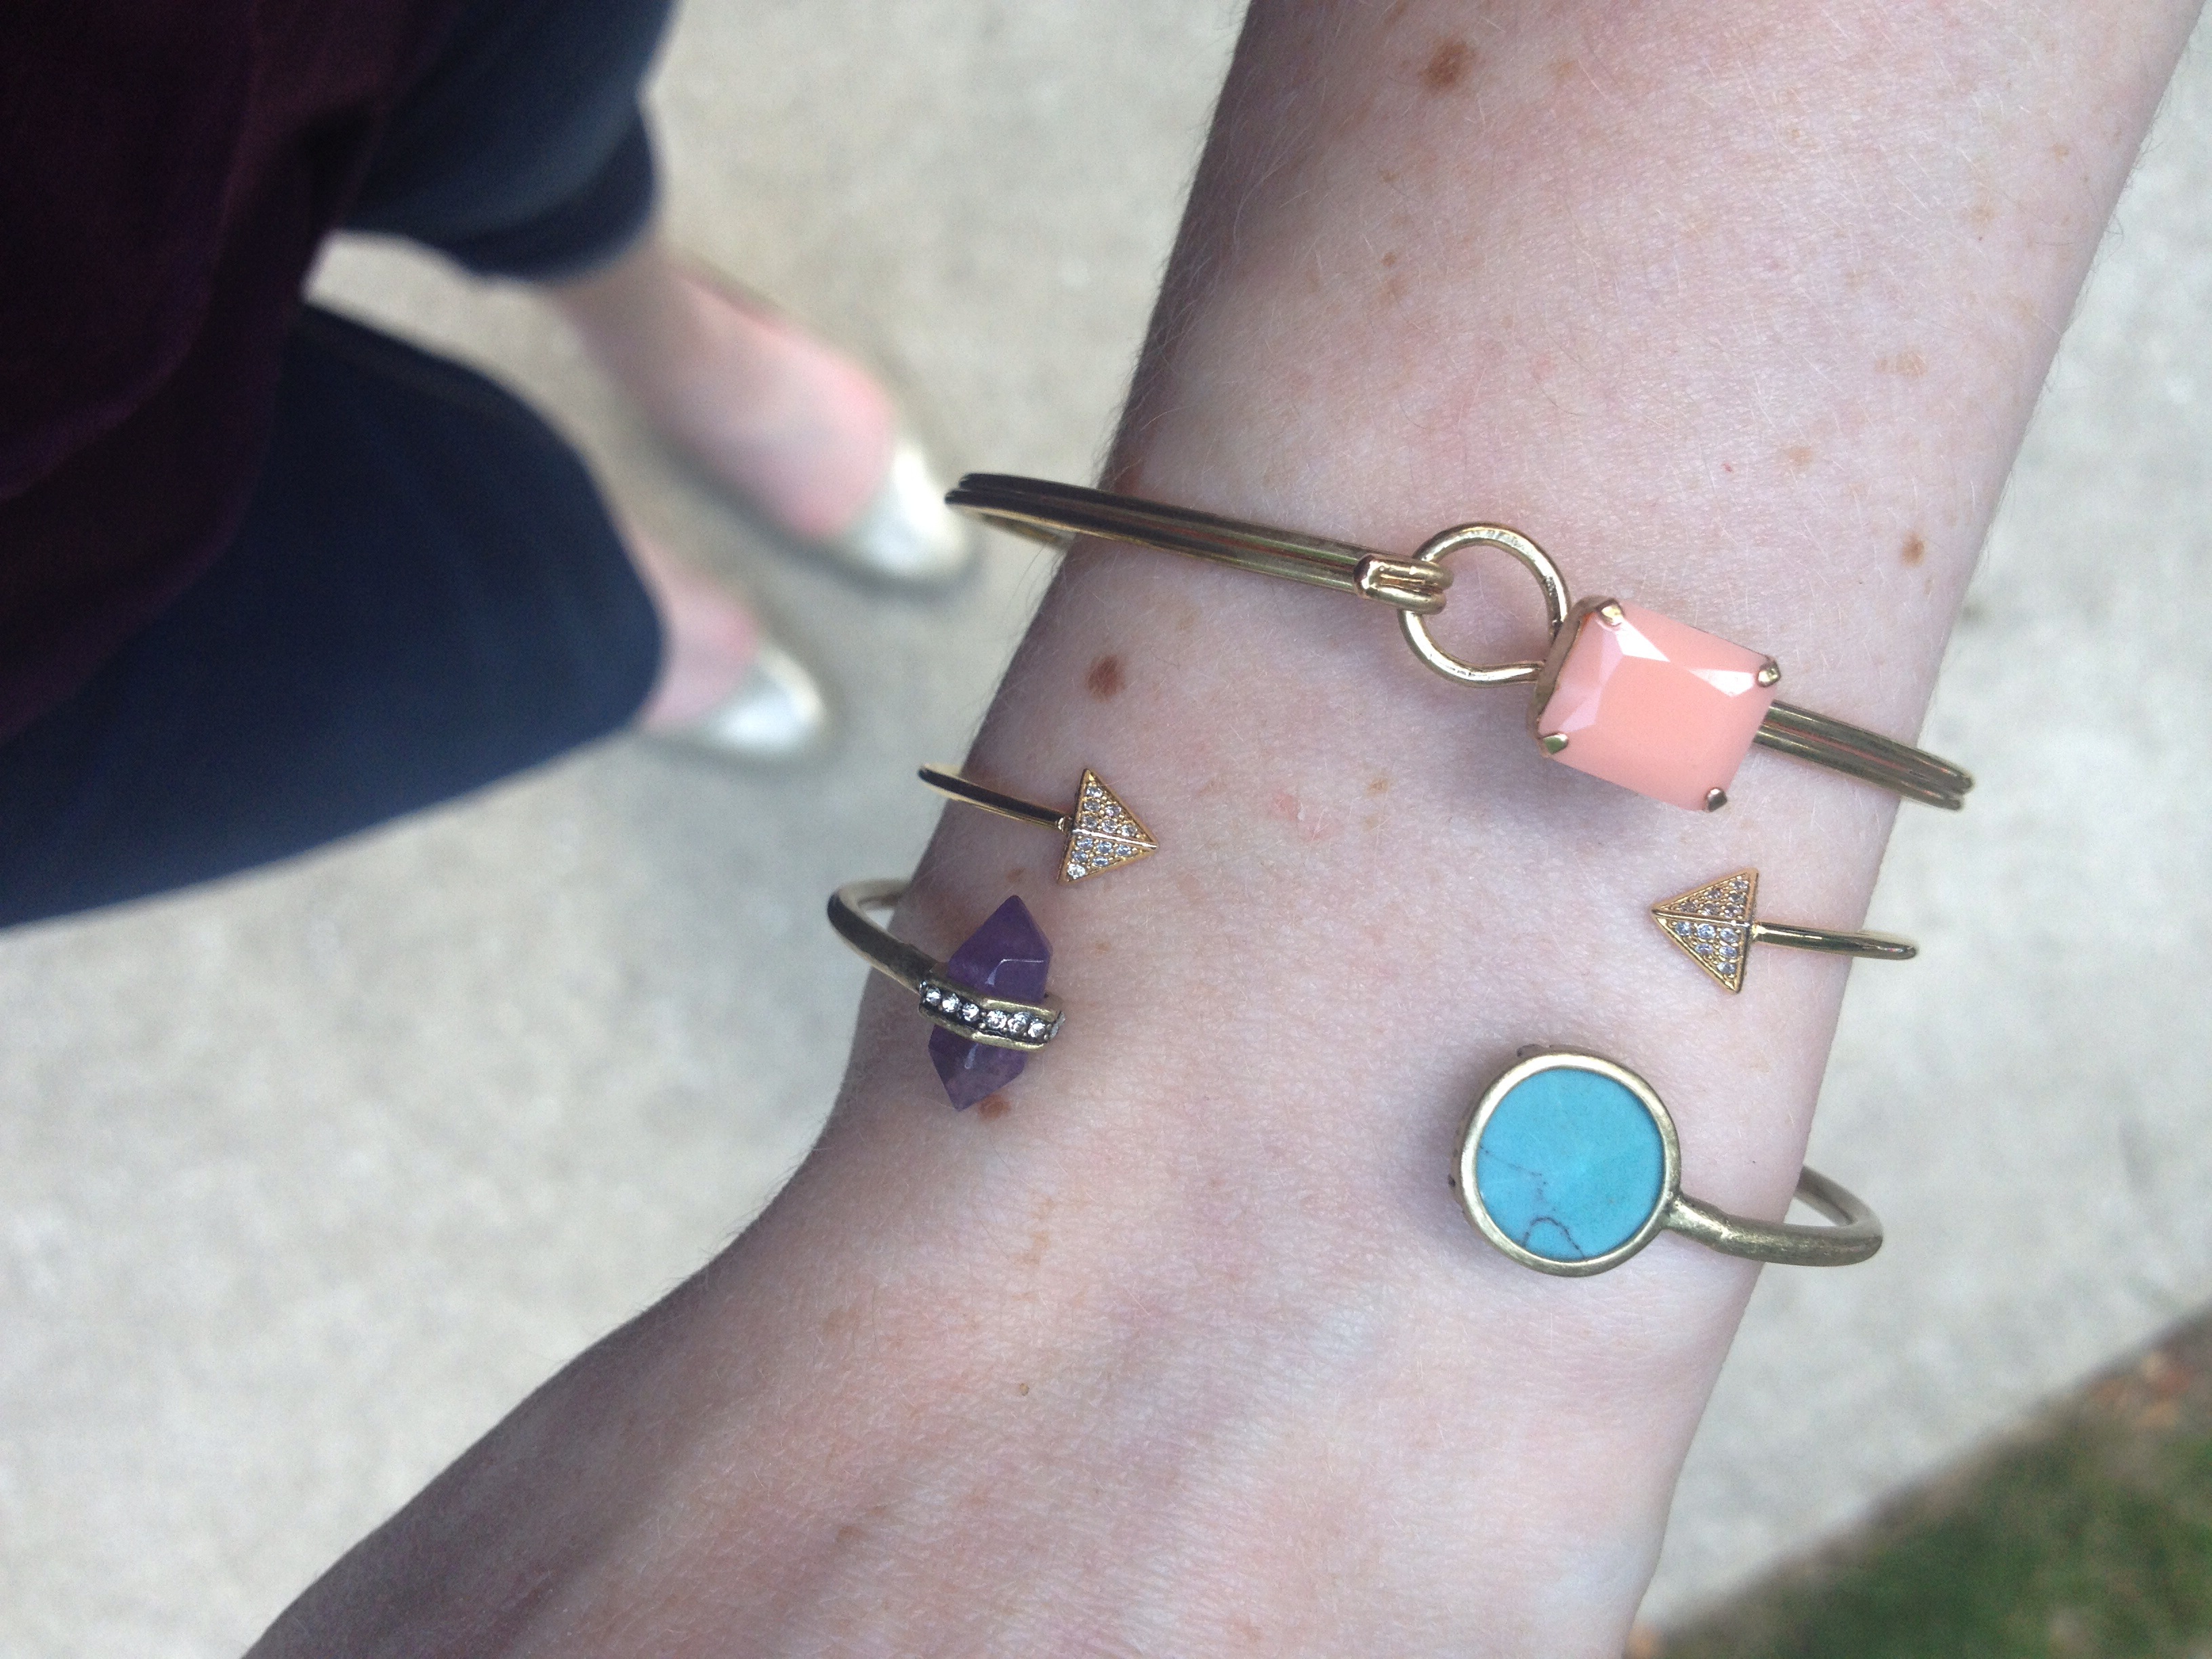
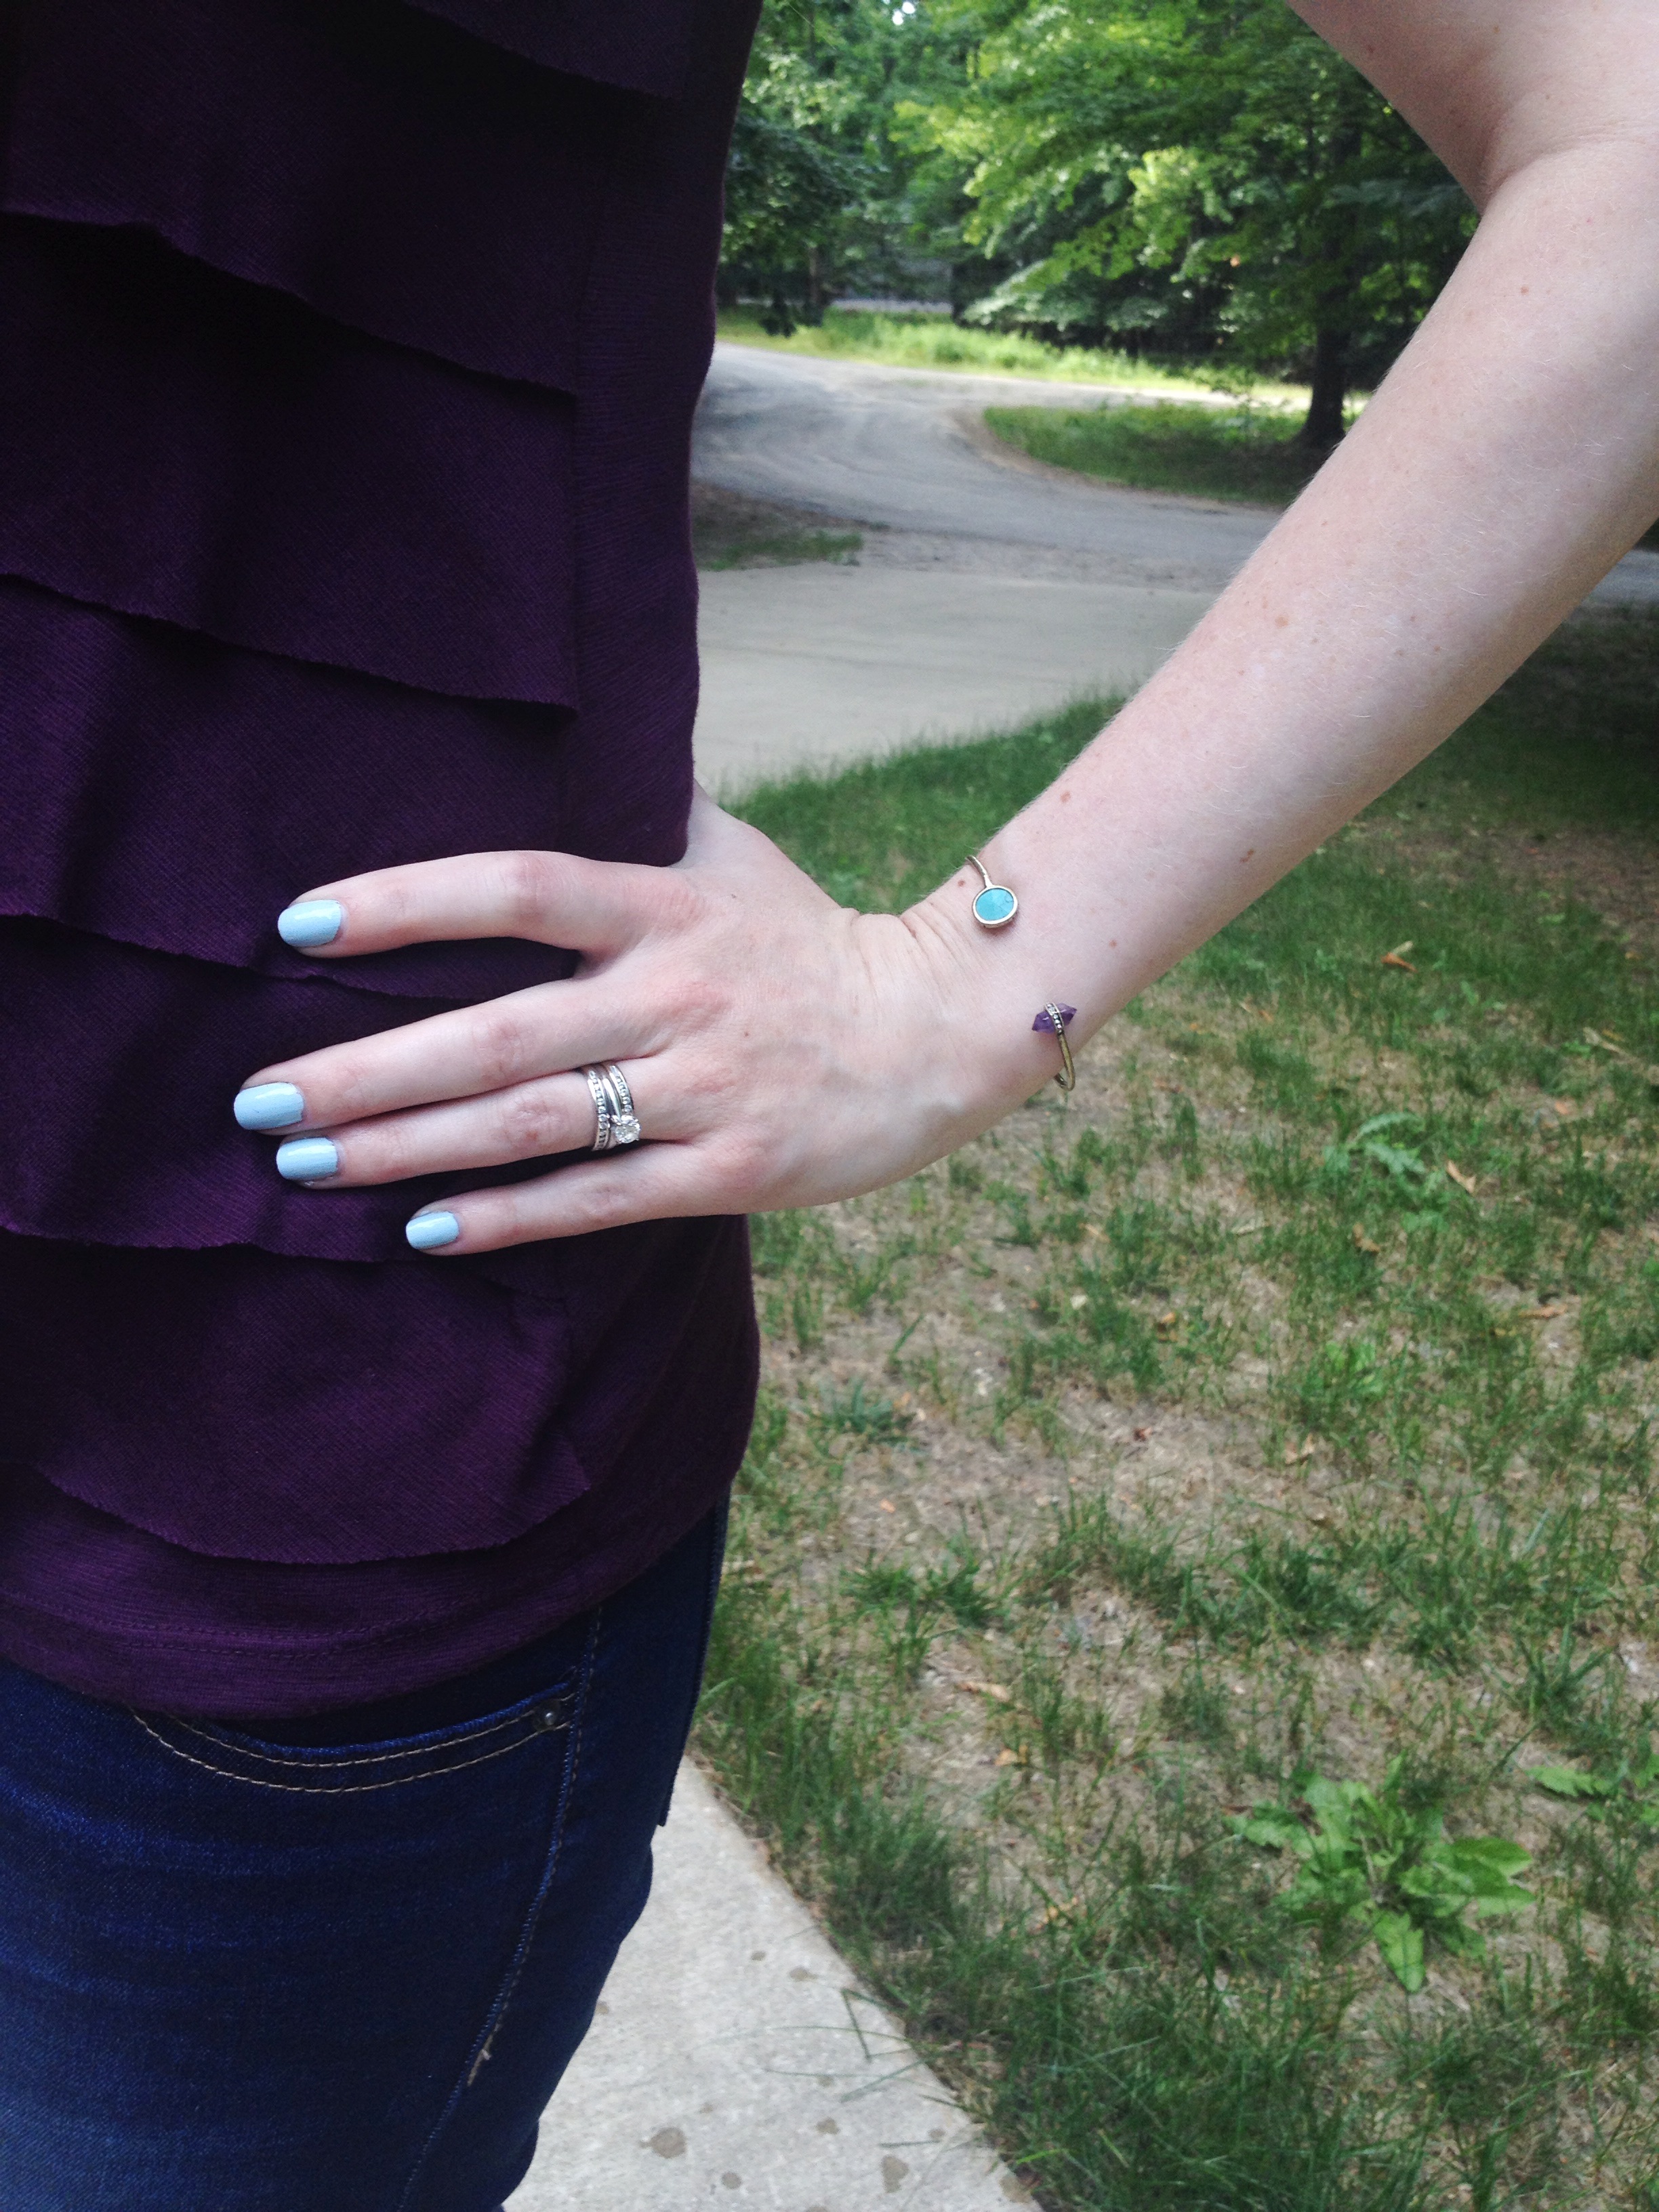
When I was looking at the website I had a hard time picking because there were SOMANYPRETTIES!! But this cuff was just calling my name…and I have no regrets! This bracelet is a beautiful gold color that is brass plated and has semi precious amethyst points that have a pretty pavé crystals seperating the two on one side, and a turquoise stone on the other side. I have been wearing this a ton lately, and think that it will also be a great transition piece into the cooler months coming up. I like wearing this both alone and stacked with other arm candy.
OTHER BEAUTIFUL CHLOE + ISABEL JEWELRY:
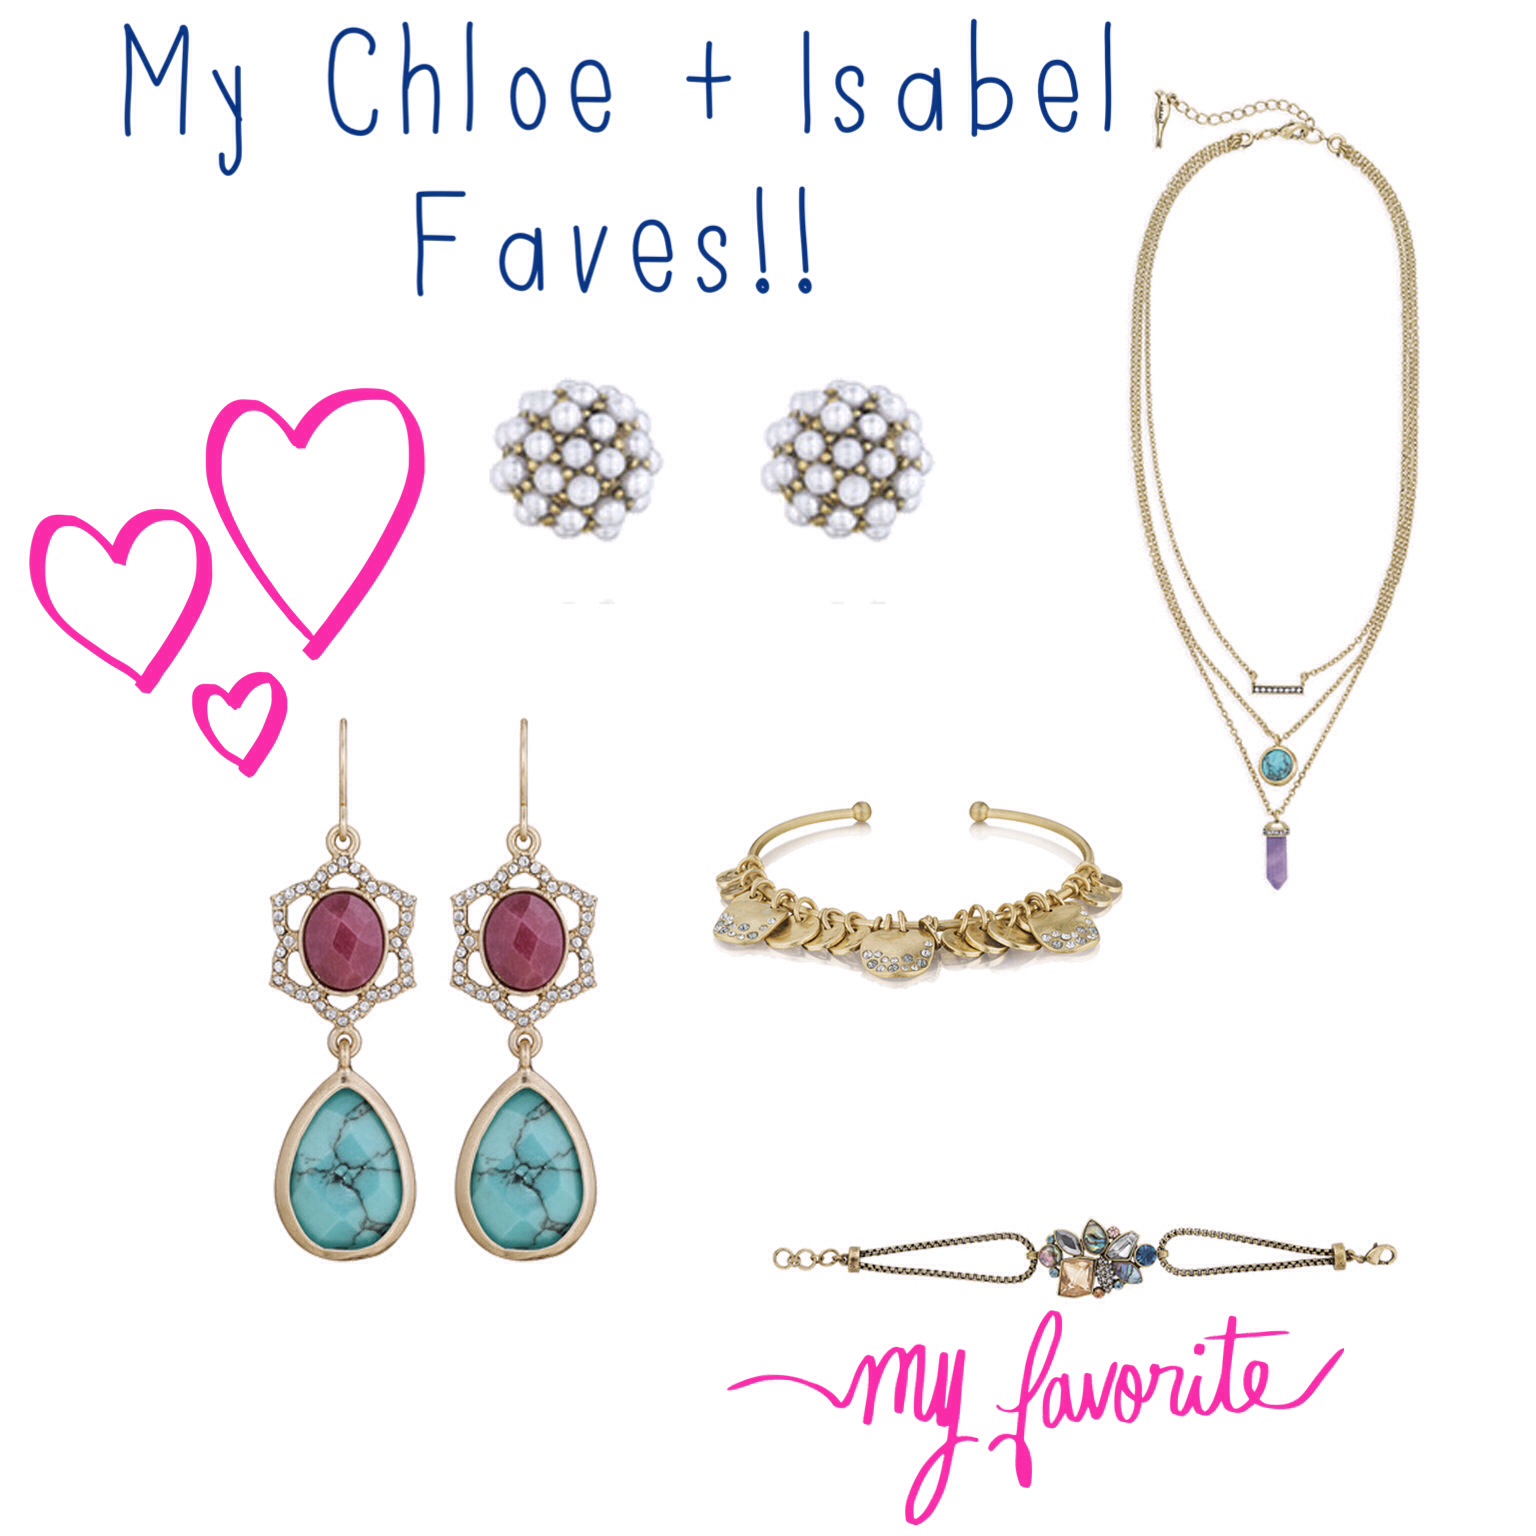
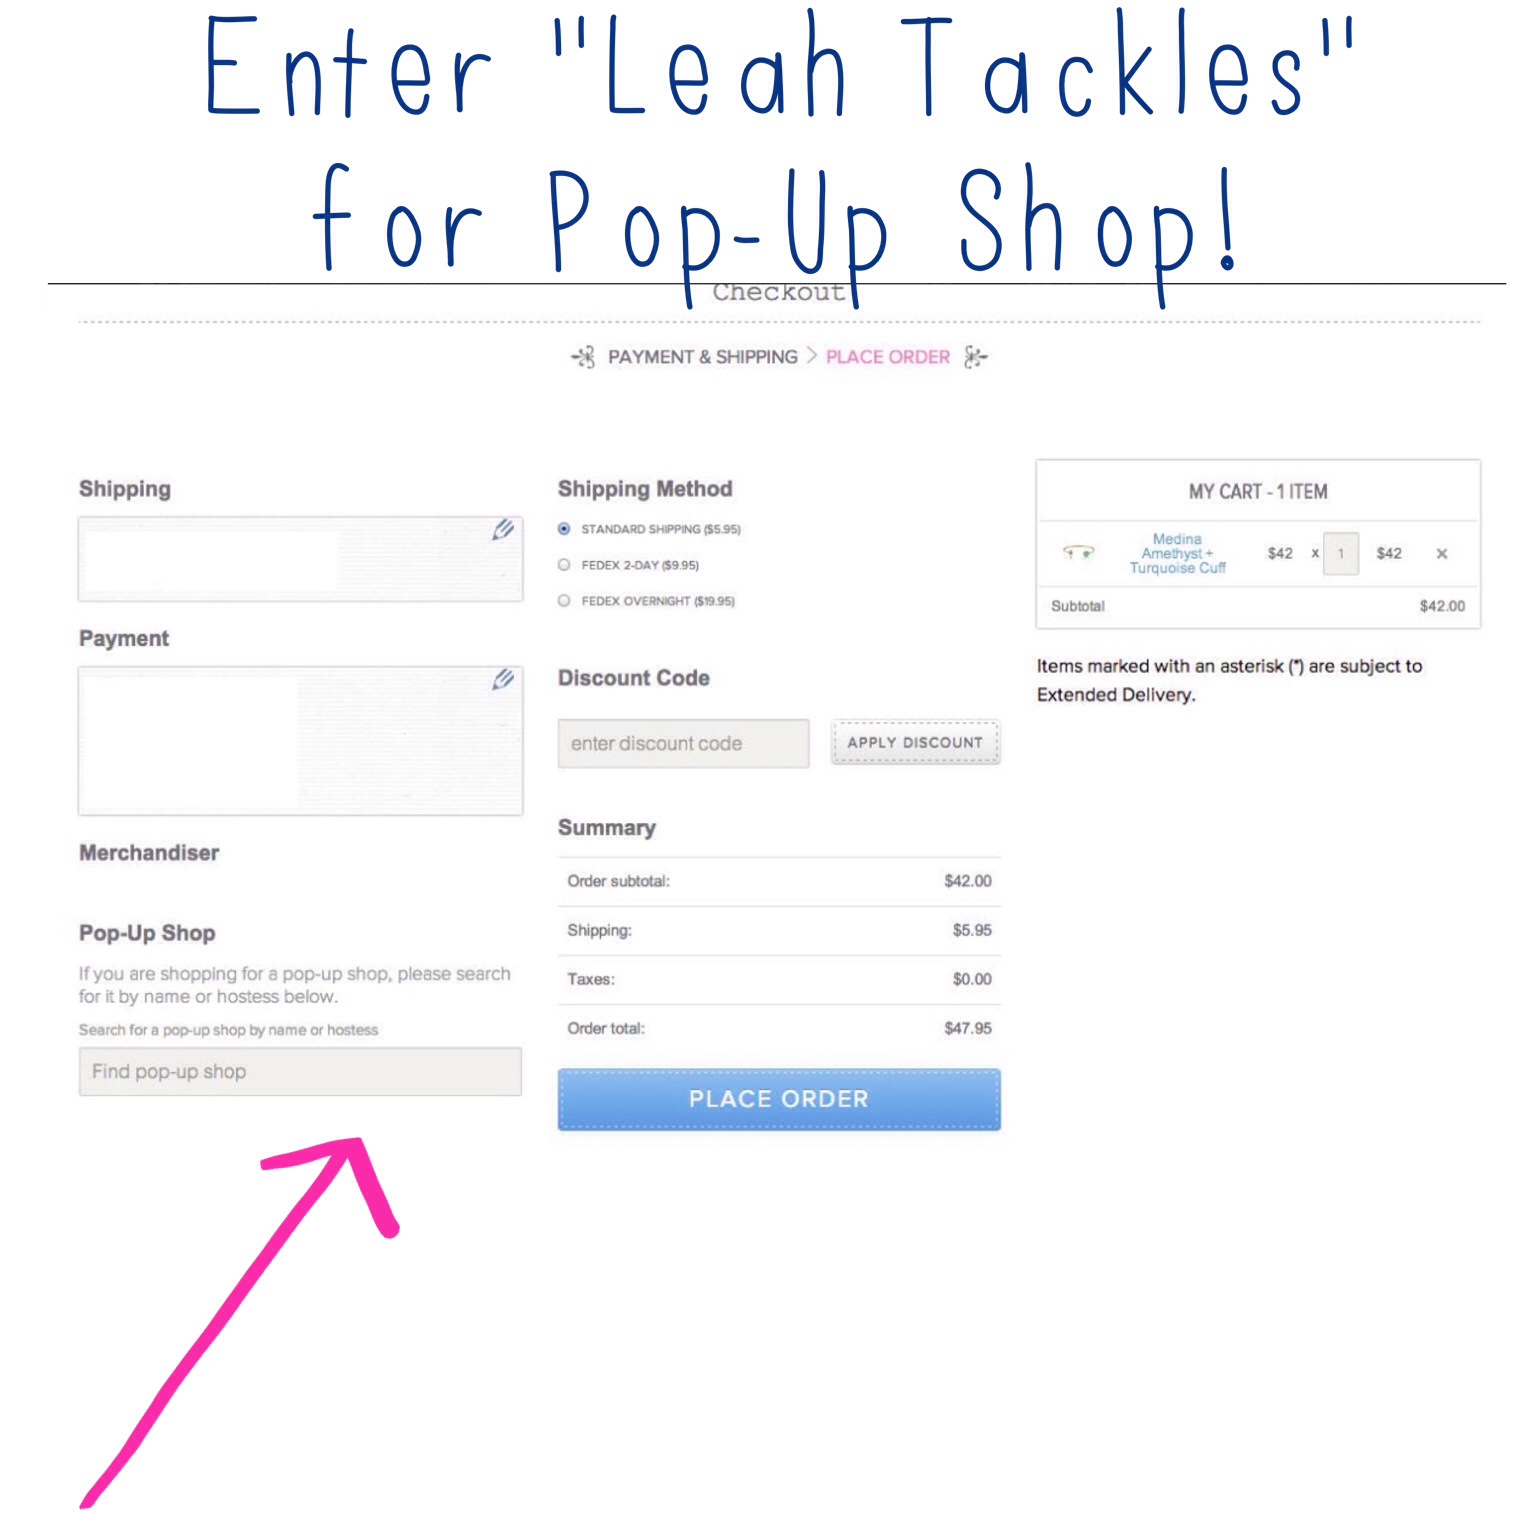
If you are interested in looking at any other pieces or want to purchase, please go to www.savvistar.com and enter “Leah Tackles” for the hostess/pop-up right before checkout! I have included a picture below so you know exactly where to enter “Leah Tackles” because if you spend over $75 you will also recieve a FREE pair of studs earrings (*if you shop under the “Leah Tackles” pop-up)!!
GIVEAWAY:
1) Comment on this blog post and tell me your favorite jewelry item of the moment!! Commenting is *easy* promise! Just click the link by the title of this post and you enter your first name, email, and comment : )
2) You *MUST* be subscribed to my blog! To subscribe enter your email into the subscription box on the right side of the page! You will then get an email that asks you to confirm that you subscribed and that’s it! You’ll just get emails when I post something new.
EXTRA ENTRY OPPORTUNITY:
If you purchase anything from the website www.savvistar.com using “Leah Tackles” as the hostess/pop-up right before checkout (this is explained and shown in a picture above) you will automatically get *TWO(!!)* extra entries into the giveaway!!
If you’d like to gain extra enteries you can 1) Share this post on your Facebook, 2) Share this post on your Twitter, 3) Follow me on a social media platform you are not yet following me on and you will get an entry for each new like or follow (Instagram, Facebook, Twitter, Luvocracy, Pinterest), and 4) “Like” Leslie “Savvi Star” on Facebook!
The support means a lot to us and it’ll get you extra entries : ) That is up to 7 extra entries for participating on social media, and 9 if you also buy something from www.savvistar.com using “Leah Tackles” as the pop-up! Good luck!!
RULES:
1) This giveaway is limited to those in the United States and Canada, but eventually giveaways will be opening up to subscribers everywhere!
2) If you are under 18 years old just ask permission from your parents to enter the giveaway!
3) A random selection website will determine the winner to keep things fair.
4) Once the winner is contacted by email they will have 48 hours to respond and after that I will select another winner.
5) This giveaway will end in two weeks!!
If you have any questions please reach out to me and I would be happy to help!! I hope that you are having a wonderful week so far : )
Hi there! Happy Monday!!

We feel so blessed, nervous, and excited to welcome our third child in early 2015!! If there is interest in maternity fashion, baby hauls, etc… please let me know and I will be happy to include some posts as we prepare for our little miracle. I do plan on having a gender reveal blog post coming up soon ; ) For those who want to stick with the regular posts, no worries becasue those posts will continue to be the focus of Leah Tackles!! Let me know your thoughts in the comments!!