Leah Tackles

  • Home
  • About
  • Policy
  • Beauty
  • Fashion
  • Cooking
  • Exercise
  • DIY Projects
  • Decor
  • Book Club
  • Family

HOW TO FIX BROKEN EYE SHADOW! QUICK TUTORIAL!

April 28, 2014 & Leave a Comment

Hi There! Happy Monday!

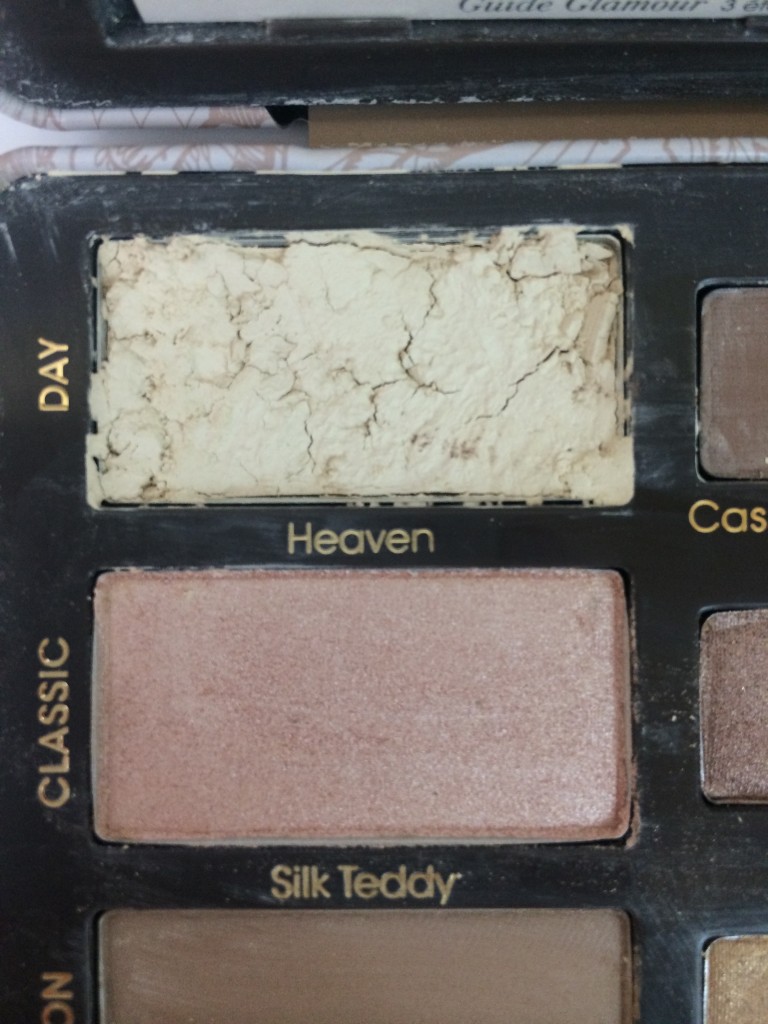
I hope that you had a wonderful weekend! Our daughter turned 3 on Saturday, and we celebrated with family and friends! It was a great party, and we were so happy that she had fun : ) In my April PopSugar Must Have Box my Too Faced eye shadow palette arrived with one of the shadows broken, PopSugar replaced it, but I wanted to repair my broken one too. Today I thought that I would show you a quick tutorial on how to repair broken eye shadow, blush, bronzer, or most powder makeup products. There are several ways to do this, and I have pinned several different techniques on my Pinterest, but I am going to show you my favorite method.


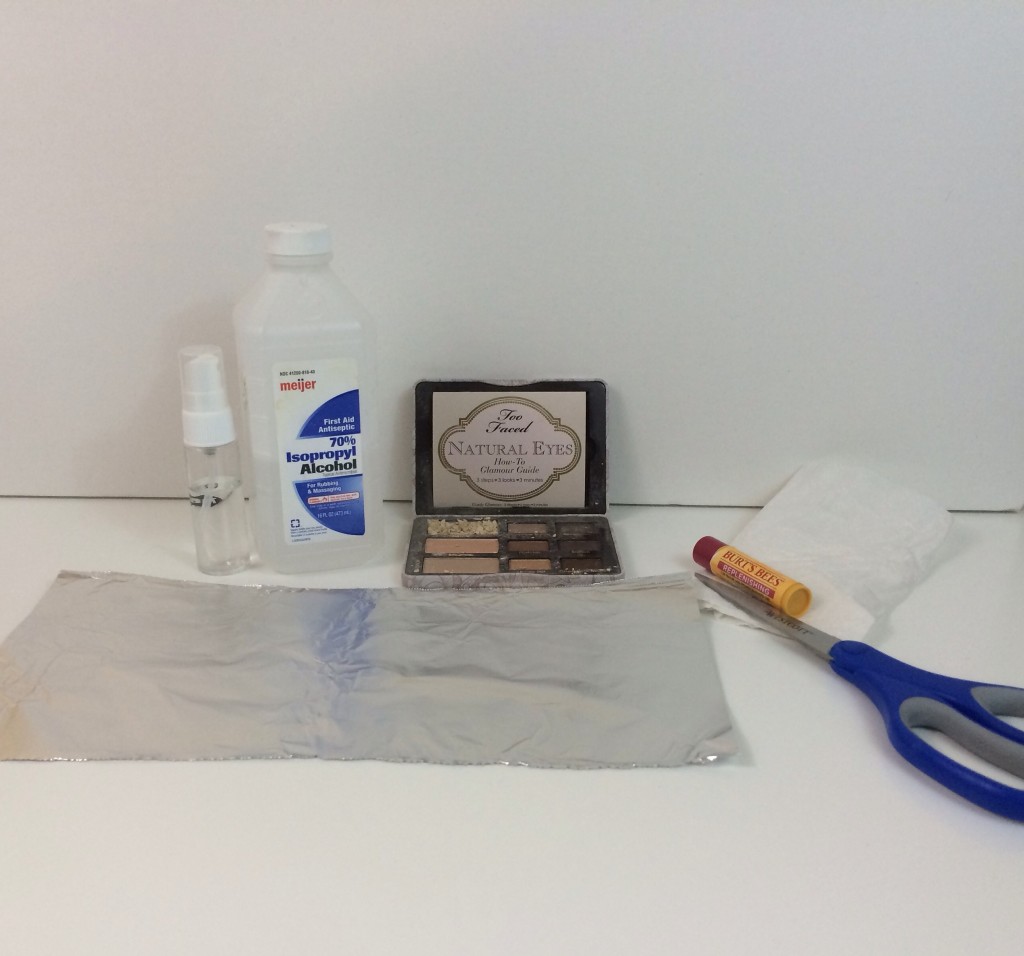
WHAT YOU’LL NEED:


How-to-fix-broke-eye-shadow.jpeg


Broken eye shadow or other powder product ; )

A pen

Aluminum foil

Scissors

Rubbing alcohol in a small spray bottle

Paper towel

Chapstick tube


STEP 1:

This step is only needed if your eye shadow is in a palette with other shadows. Use the aluminum foil to cover up the shadows that are not broken.


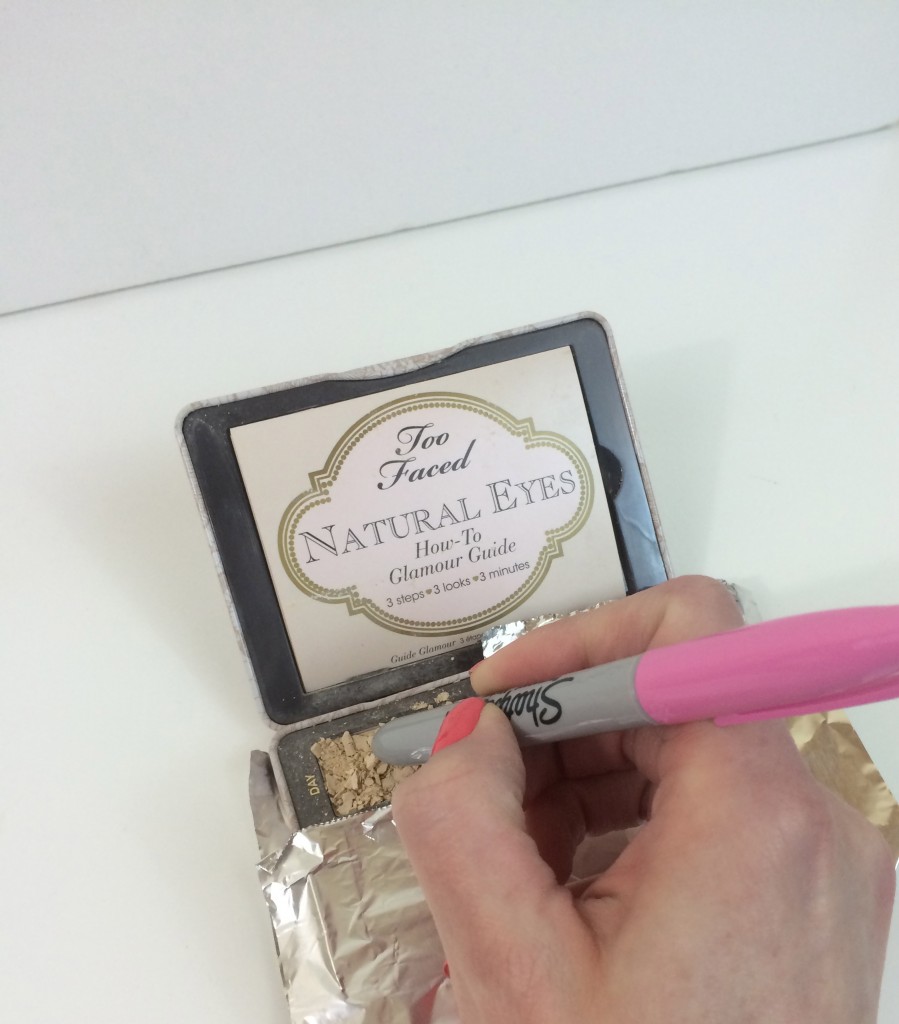
STEP 2:

Use the pen to smash the broken pieces powder until it looks like a finely milled loose powder.


how-to-fix-eye-shadow.jpeg


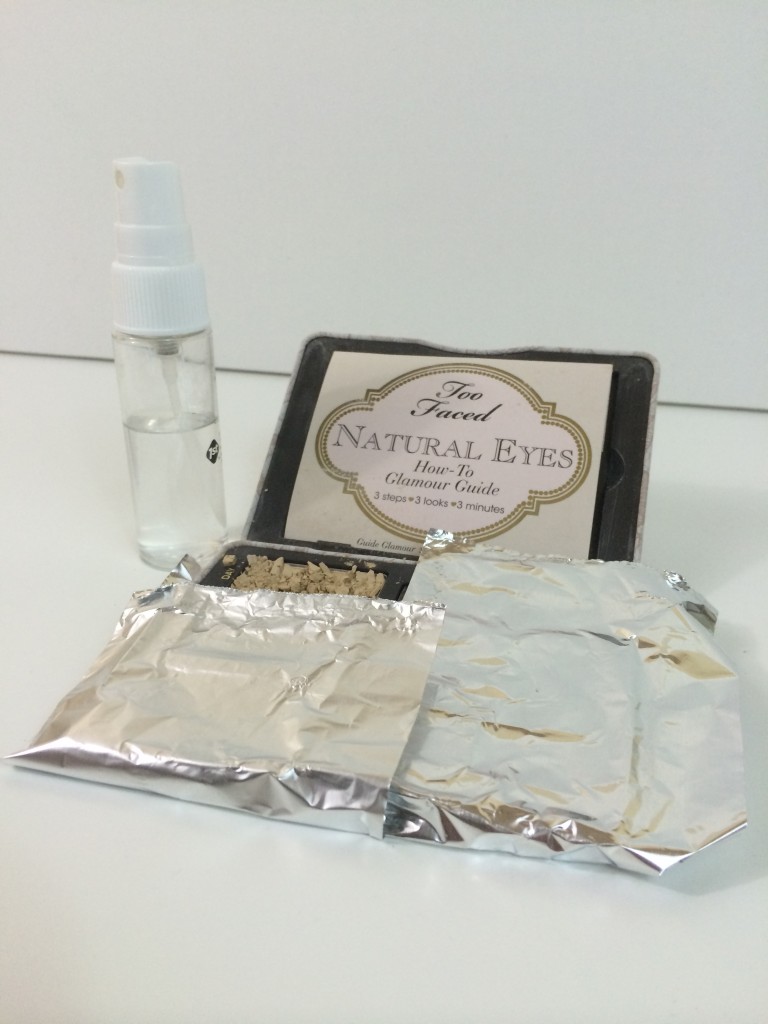
STEP 3:

Spray fairly heavily with rubbing alcohol.


how-to-fix-eye-shadow-tutorial-leahtackles.jpeg


STEP 4:

Wrap your chapstick tube in paper towel and press down onto the broken powder.


broken-eye-shadow-leahtackles.jpeg


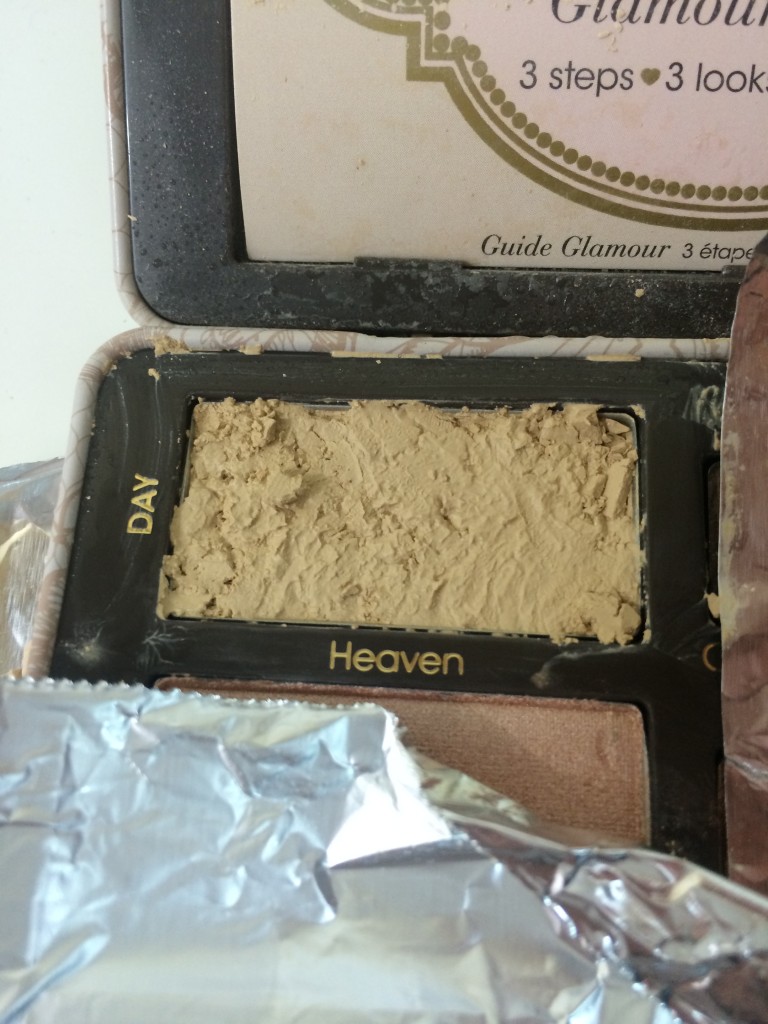
STEP 5:

Allow to dry for several hours and Ta-Da! Your powder may not be as pretty as before it broke, but it should work just as well and be all in one piece!


tutorial-leahtackles.jpeg


I hope that this was helpful for you! Please feel free to pin this onto your Pinterest account by clicking the pink “pin” button that shows up when you scroll over any of the pictures. If you have any questions or comments, let me know by commenting (click on the link by the title of this post) or find me on Facebook, Twitter, or Instagram! Thank you so much for taking the time out of your day to read this, and I hope you have a wonderful week! Don’t forget to subscribe! : )

FacebookTwitterEmailPinterestShare

Filed Under: Beauty, DIY Projects Tagged With: beauty blog, beauty tips, beauty tutorial, eye shadow, fix eye shadow, how to fix makeup, how-to fix broken eye shadow, leah tackles, leahtackles, make up, makeup, makeup tips, makeup tutorial, Pop Sugar Must Have, quick makeup tip, too faced, tutorial

DIY LIPSTICK HOLDER AND ORGANIZER!

April 23, 2014 & Leave a Comment

Hi there! Happy Wednesday!

I love lip products, and even though I have large makeup storage drawers, my lip products are always sliding around and unorganized which I hate! I absolutely love the look of the acrylic lipstick holders that you can buy on amazon or other websites, and I will probably eventually get one of those to display my most used lipsticks on my vanity, but I needed something for all my other lip products. I recently came across a video tutorial from ItsKeerstin where she recreated and modified a super inexpensive and practical way to organize all of her lipsticks…it’s awesome and I wanted to share my own version as well! ItsKeerstin is  hilarious and I really enjoy her videos!! You can easily decorate it to make it fit your style, or keep it pretty simple like I chose to do since I will be keeping it in a drawer. If you like today’s tutorial, please considering hovering over any of the pictures until you see the pink “pin” button and pinning it to your Pinterest account… I appreciate it!!


SUPPLIES:


DIY-Lipstick-Holder.jpeg


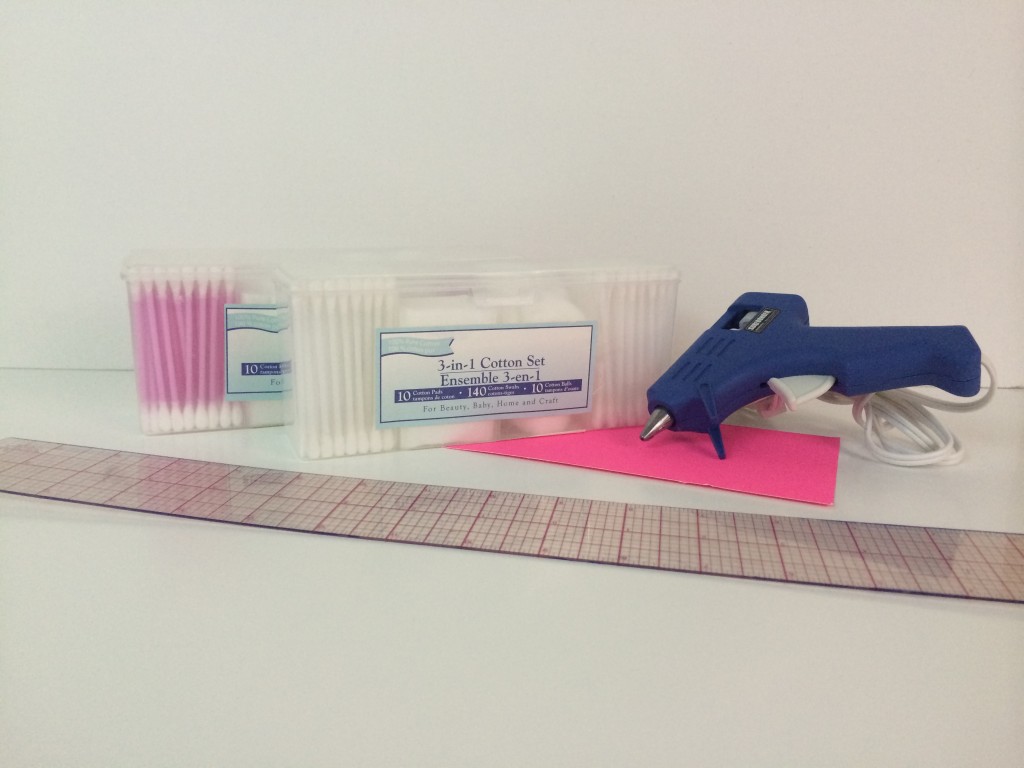
3-in-1 Cotton Sets from Dollar Tree (I used 2 but you can get more for a bigger storage container. I have only seen these at Dollar Tree, but I did find the 3-in-1 Cotton Set on Amazon, although there is $4 shipping)

Thick cardstock, cardboard, or poster board in the color of your choice

Scissors or a paper cutter

Glue gun


COST:

Less than $10 (mine cost $2!)


STEP 1:

Empty out the cotton swabs, cotton swabs, and cotton balls from the Cotton Set box. Then, soak the box in hot water or use Goo Gone to remove the labels on the box.


STEP 2:

I cut out my poster board to fit 2 of the Cotton Set boxes ahead of time with a pair of scissors simply by tracing them with a pencil onto the paper.


STEP 3:

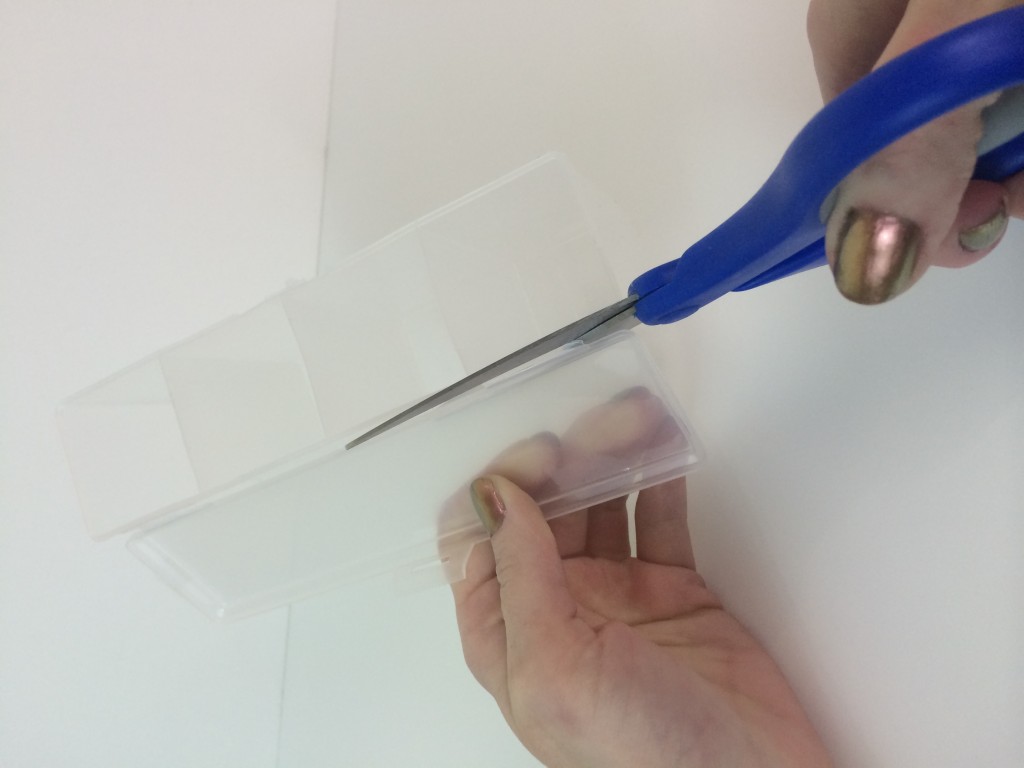
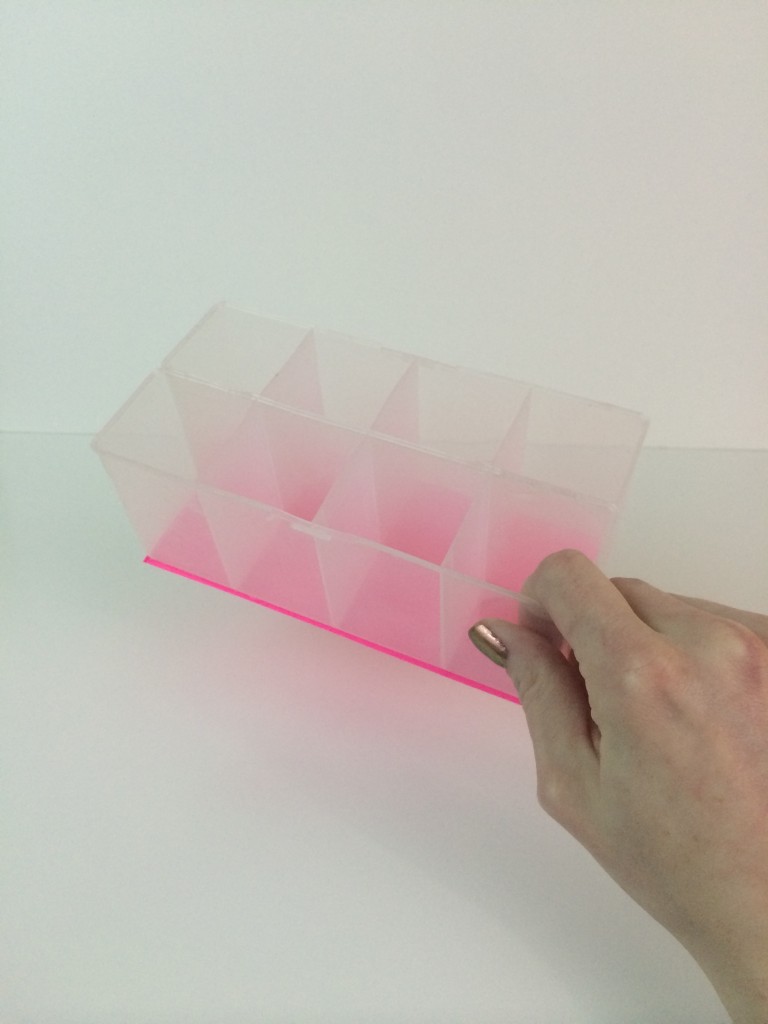
Cut the lid off of the Cotton Set box with a pair of sharp scissors (it was a lot easier to get a clean cut then I thought it would be!)


DIY-LIPSTICK-STORAGE.jpeg


STEP 4:

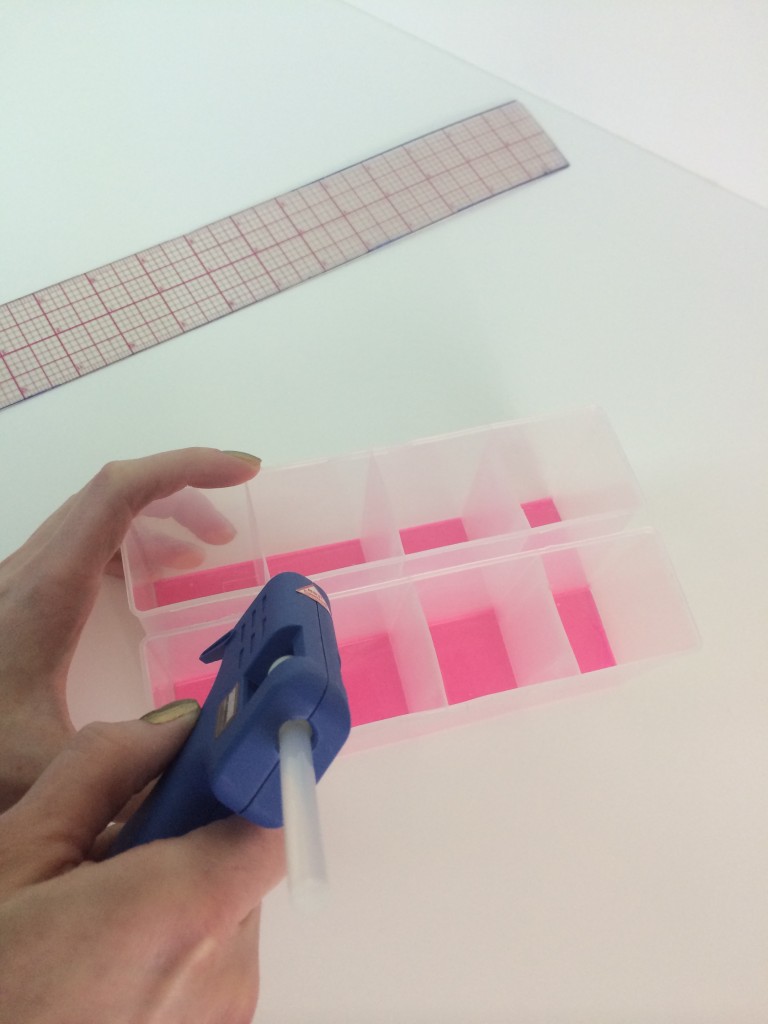
Be sure to have everything set up how you need it because hot glue sets quickly! Use your hot glue gun to put two lines of glue down the length of the poster board or cardstock for the first Cotton Set box and press it onto the glue. Do the same thing with the next Cotton Set box and so on. Be sure to have all of the boxes facing the same way if you are doing more than two boxes, otherwise the tab from where the lid would have snapped closed will cause the boxes to not line up perfectly.


lipstickstorage-diy.jpeg


STEP 5:

Carefully put a line of glue between the boxes and press together (you only have to do this at the very top, and you only need a tiny amount of glue because it’s more important to work fast then to get a perfect line).


lipstickholder-diy.jpeg


STEP 6:

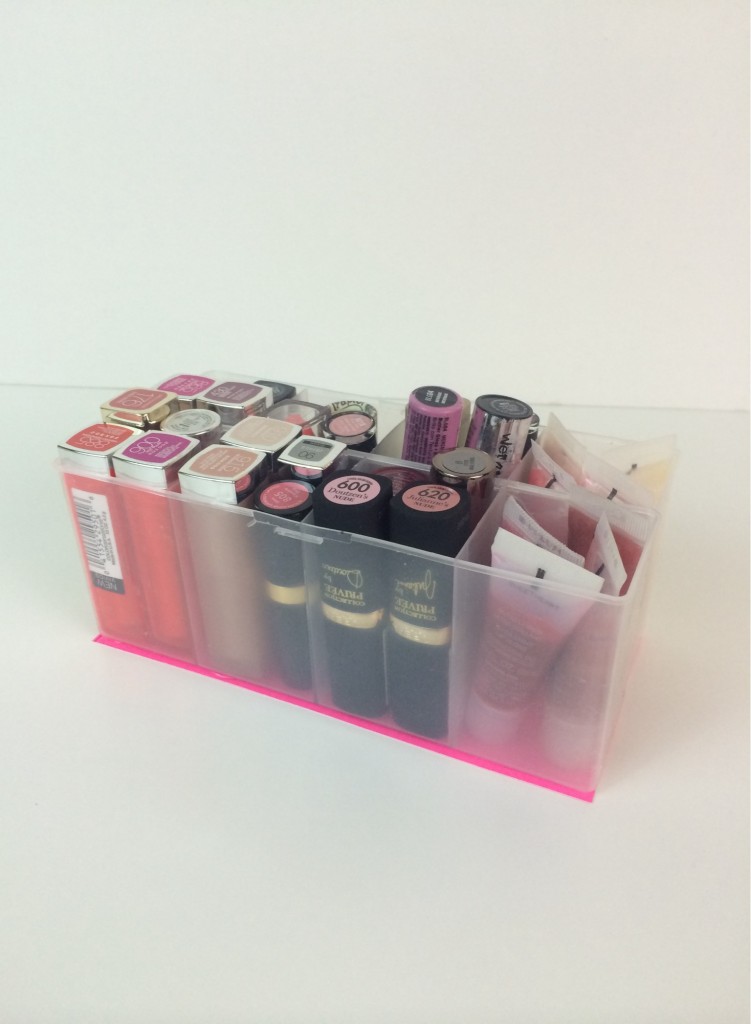
Decorate the box if desired or leave so that it is clear on the sides like I chose to do.


lipstick-holder-diy.jpeg


STEP 7:

Fill the box with lots of lippies!!


lipstickholderdiy.jpeg


I hope that you enjoyed today’s quick and inexpensive DIY project! If you try this out for yourself or have any questions, please comment (click the link by the title of this post!) or find me on Facebook, Twitter, or Instagram! Thank you so much for reading this and thank you SO much to those of you who have subscribed to my blog! To subscribe, enter your email on the right side of this page in the “subscribe” box…it’ll make my day ; ) I hope you have a fantastic day and I will talk to you on Friday!!


FacebookTwitterEmailPinterestShare

Filed Under: Beauty, DIY Projects Tagged With: beauty blogger, blogger, diy, diy beauty, diy lipstick holder, diy project, do it yourself, dollar tree, leah tackles, lippies, lipstick, lipstick holder, lipstick organizer, lipstick storage, make up, makeup storage, organization

APRIL 2014 BEAUTY HAUL!!

April 21, 2014 & 4 Comments

Hi There! Happy Monday!

I hope that you all had a wonderful weekend and a wonderful Easter for those who celebrate! Today I have a collective beauty haul from the past several weeks to share with you that is mostly drugstore with a few other random beauty related things tossed in. This haul is largely made up of concealers and lip products, but that’s really no surprise because those are two of my favorite beauty items to try and to shop for. I have created a Luvocracy collection with all of these items if you’d like more information or want to shop online, and once again all the titles below are also links! If you enjoy this haul, please subscribe to my blog by entering you email in the subscribe box on the right side of this page! Super easy! Okay, let’s get started…


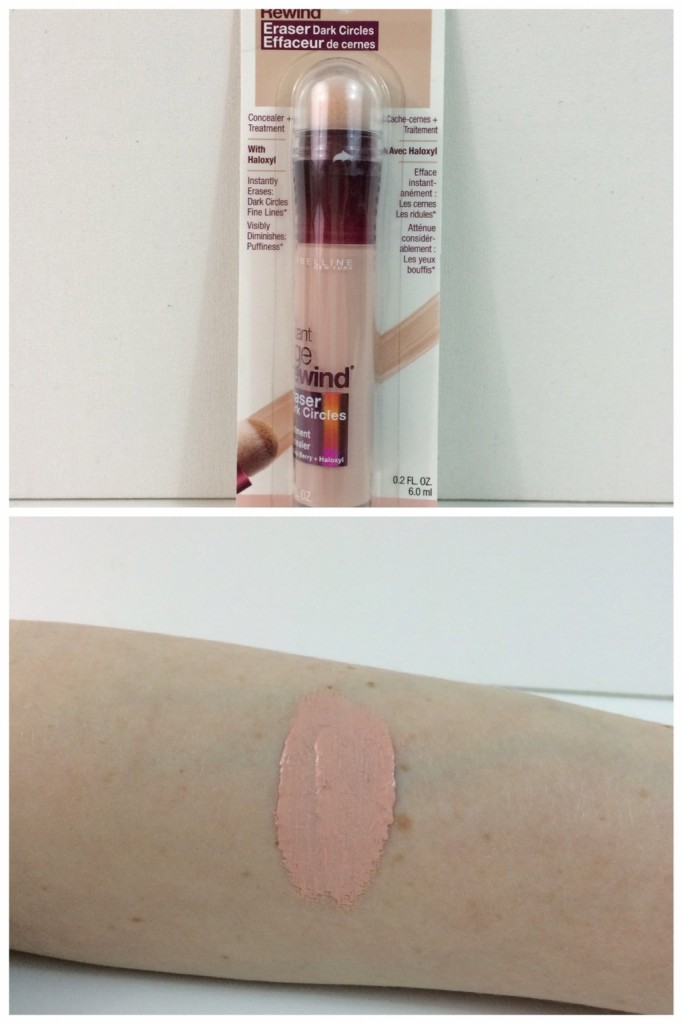
Maybelline Instant Age Rewind Dark Circle Eraser in Brightener


maybelline-age-rewind-brightener.jpeg


I love the Maybelline Insant Age Rewind Dark Circle Eraser in Fair and wanted to try the brightener. The brightener is a pinky salmon color that is the perfect shade to wear underneath your under eye concealer to help really counteract the dark circles underneath your eyes. This product twists and you hear a click sound as it pushes product to the sponge applicator. I dot the product on but then blend with a brush or sometimes with my fingers. I don’t tend to get puffiness under my eyes, but I do battle bad dark circles (hellooo mom two of toddlers!) and love anything that can help to hide them!


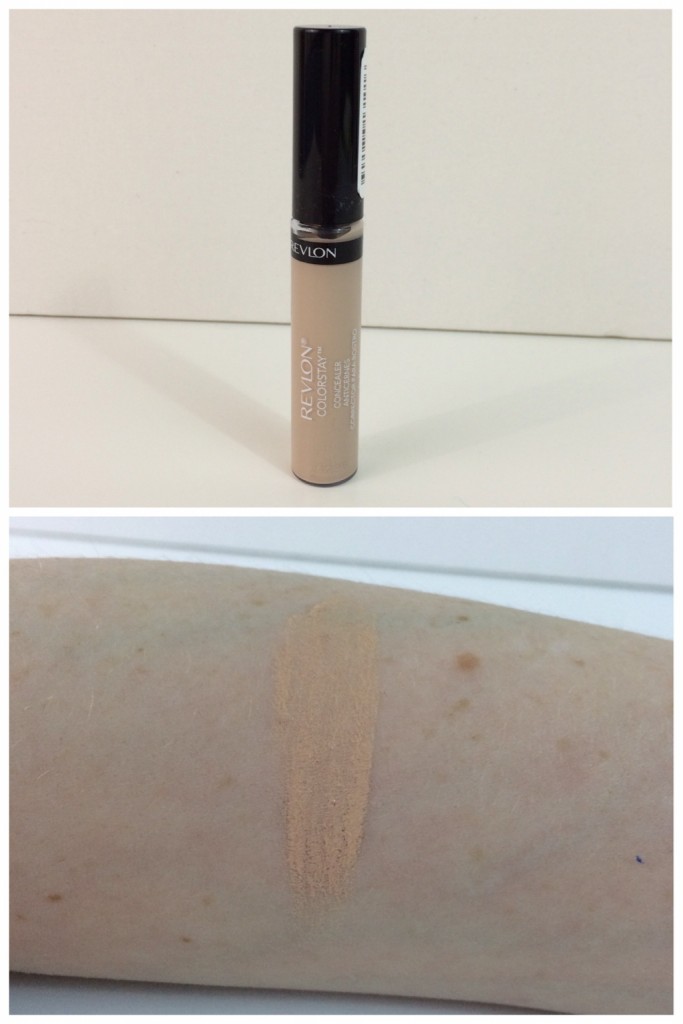
Revlon Colorstay Concealer in 01 Fair


revlon-colorstay-concealer.jpeg


I’ve heard great things about this concealer and heard that it compares to the Nars Creamy Concealer, so when I saw it on sale at my local grocery store, I decided to pick it up and give it a try. It comes out on a wand applicator, which I really like because I can dot it on and then use a makeup brush to blend it out. I love love love my Revlon Colorstay foundation, so I am hoping that I love this just as much.


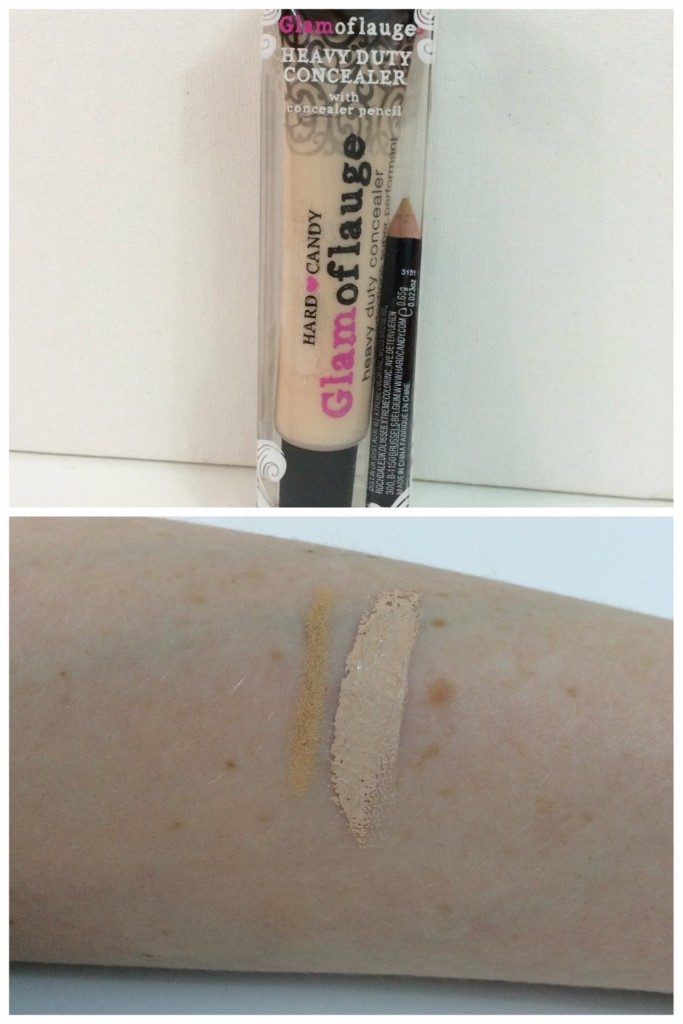
Hard Candy Glamoflauge Heavy Duty Concealer with Concealer Pencil in Ultra Light


hardcandy-glamoflauge.jpeg


This is supposed to be a very heavy duty concealer that can cover anything! It comes in a tube and I can tell that it’ll last a long time because you only need a tiny tiny dab because it is so thick. I haven’t tried it for the under eye area yet, but I do think it’s a product where you’ll want to prime the under eye first and then gently set it with a brightening power. It also comes with a pencil which it says is to outline birth marks or tattoos before covering them, but I’m going to try to find some other uses for that as well.


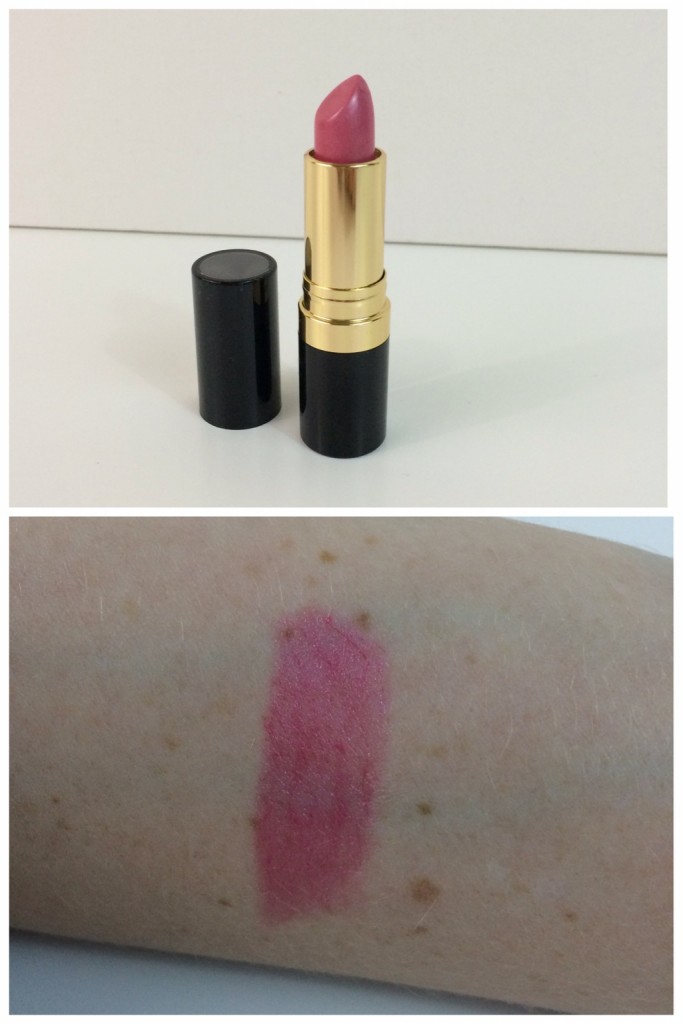
Revlon Super Lustrous Lipstick in 805 Kissable Pink


revlon-kissablepink.jpeg


I picked this up because I wanted another everyday pink color in my collection. It is a bit more sheer than expected, but a very pretty neutral pink color with just enough shine, but no glitter. I thought it would be a little more buildable, but I don’t mind so far because it’s a great color to just toss into your bag and not have to worry too much when you apply it. This doesn’t seem to have any taste or scent. It is very moisturizing, so the color doesn’t last too long, but it feels great on the lips.


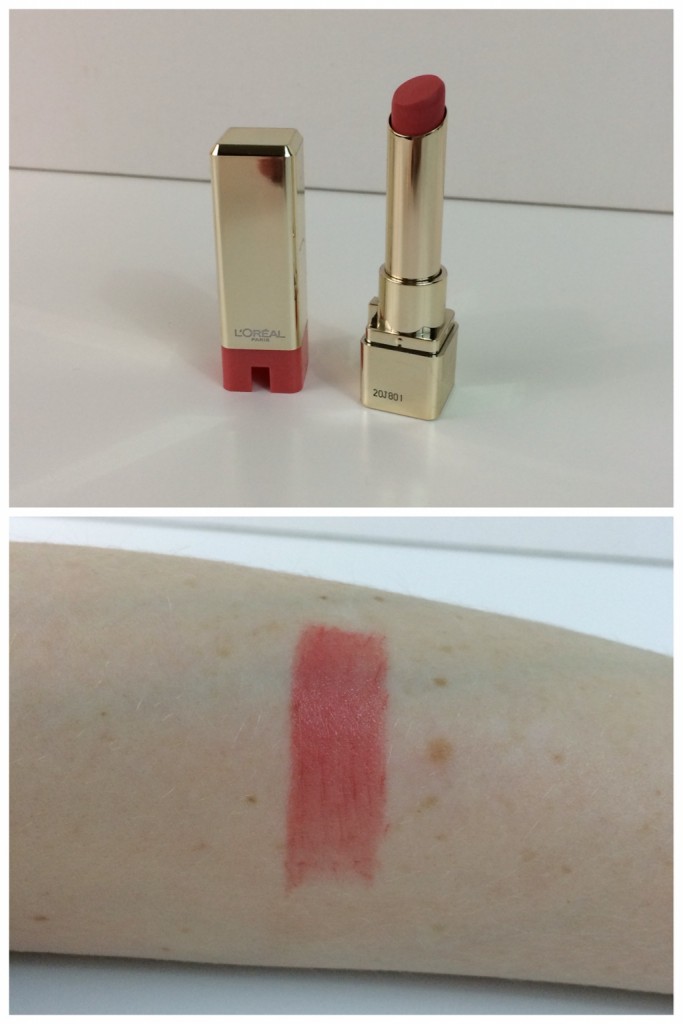
L’Oreal Colour Riche’ Caresse in 176 Sunset Angora


loreal-colour-riche.jpeg


This is a sheer, moisturizing lip color that is in the same family as the Revlon Lip Butters or the Maybelline Color Whisper lip products. The color is very pretty, a very wearable coral-y, muted orange.


Maybelline Color Sensational Color Elixir in 005 Breathtaking Apricot


maybelline-elixir.jpeg


The packaging almost makes this look like a lipstick, but it’s actually a lipgloss! It has a short applicator with a doe-foot applicator. The formula seems pretty thick, so we will see how the wear goes. I am really excited to try this lip gloss, and I think that the color will be great for summer.


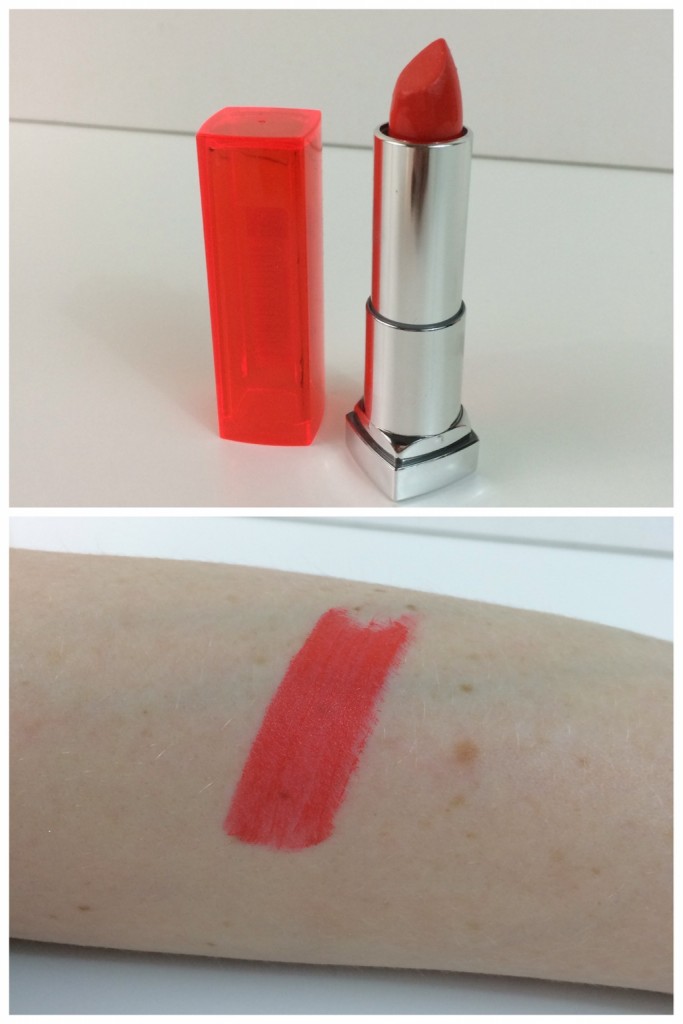
Maybelline Color Sensational Vivids in 885 Vibrant Mandarin


maybelline-vivids.jpeg


I love the Maybelline Color Sensational lipsticks and really wanted to try out something in the orange color that is so on trend for spring and summer 2014. I wasn’t quite brave enough to try the Electric Orange color in the Vivids lineup, so I opted for this more coral-y orange color. It is very bright and I can’t wait to try it!


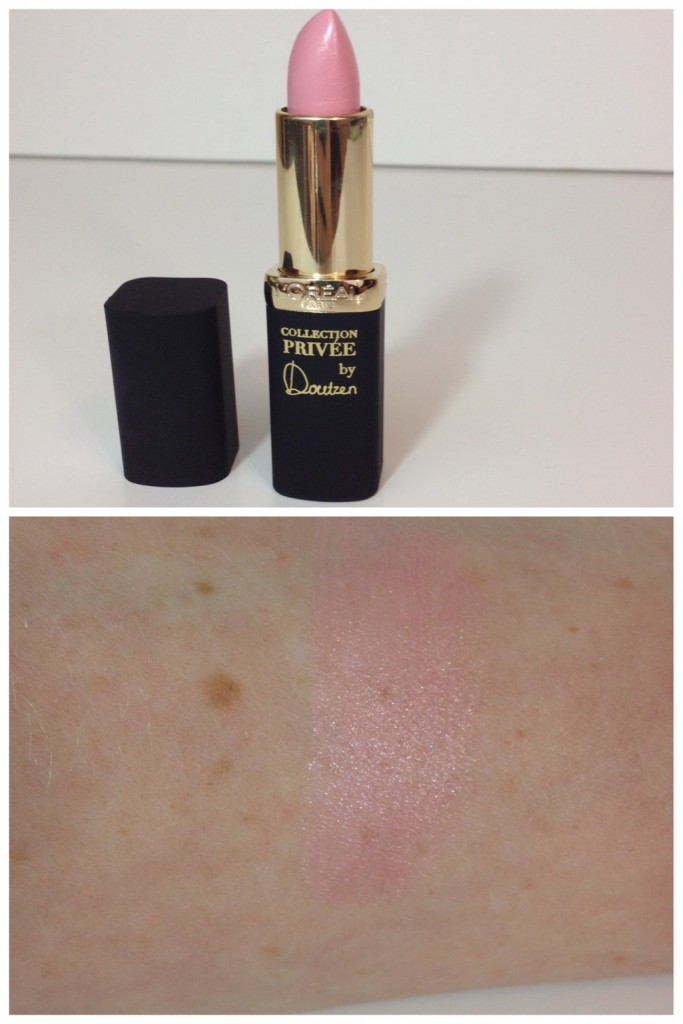
L’Oreal Limited Edition Collection Privee in 600 Doutzen’s Nude


doutzens-nude-lipstick-loreal.jpeg


I have been swooning over these lipsticks since I saw the pictures released online about a month ago. It is part of a collection of nude lipsticks and each lipstick shade is designed for one of their celebrity ambassadors. The matte black packaging with the pretty gold detailing looks very chic, and I love the touch of having the L’Oreal ambassadors signature printed on the lipstick tube. These do have the smell that some probably won’t like…it smells like an old-fashioned lipstick or very floral purfume you’d expect a grandmother to have in her handbag. This  is a sheer, very light, cool toned baby pink with shimmer, and not like anything I have in my collection.


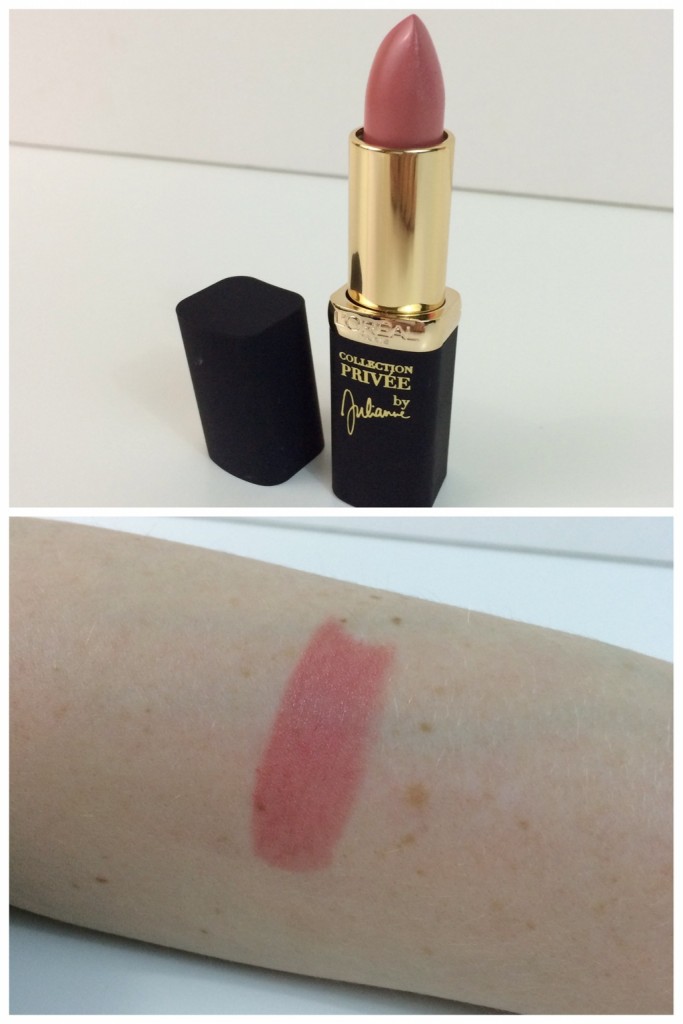
L’Oreal Limited Edition Collection Privee in 620 Julianne’s Nude


collectionprivee.jpeg


This is such a beautiful peachy toned neutral lipstick and it feels great on the lips! I have already worn this and know I’ll reach for it often.


beauty-haul.jpeg


Neutrogena Makeup Remover Cleansing Towelettes

I always use these along with an eye make-up remover before cleansing my face at night (shown in a picture above).


Essential Tools 12 Rainbow Applicators

I picked these up to have to use for my nails as shown in my Nail Polish Tutorial-How to Avoid Brush Strokes with Frost Formula Polish post (shown in a picture above).


Pack of Plastic Mascara Spoolies

I bought these on ebay but you can also get them at Sally’s Beauty Supply or another store like that. I use these for my eyebrows and also for combing through my eyelashes before and after I apply mascara. They are super cheap and great to have on hand (shown in a picture above).


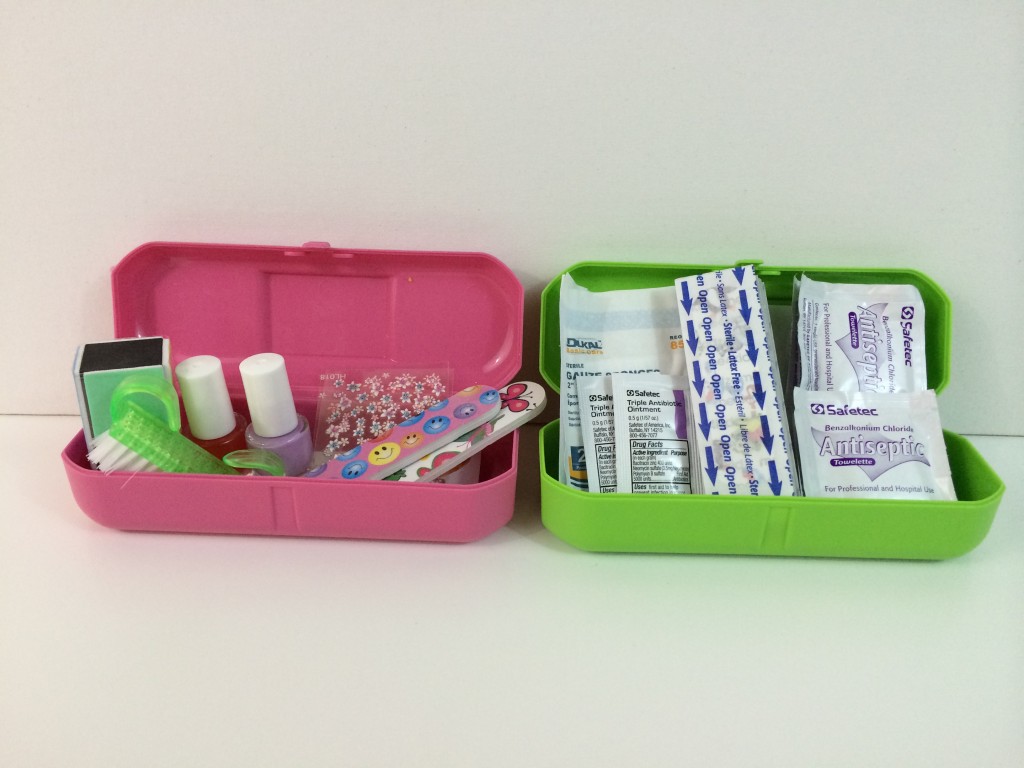
First Aid…Made Fun! Me4kidz.com


me4kidz.jpeg


These little kits came in my kiddos Citrus Lane boxes a month or so ago, and we love them! We also already had the Diaper Bag Buddy (not shown) that I keep in a bag my husband uses when he has the kids. The pink box came with a little nail kit that my daughter loves and I like because the polish is water based. The green kit came with a little first aid kit that is perfect to keep in your car or diaper bag.


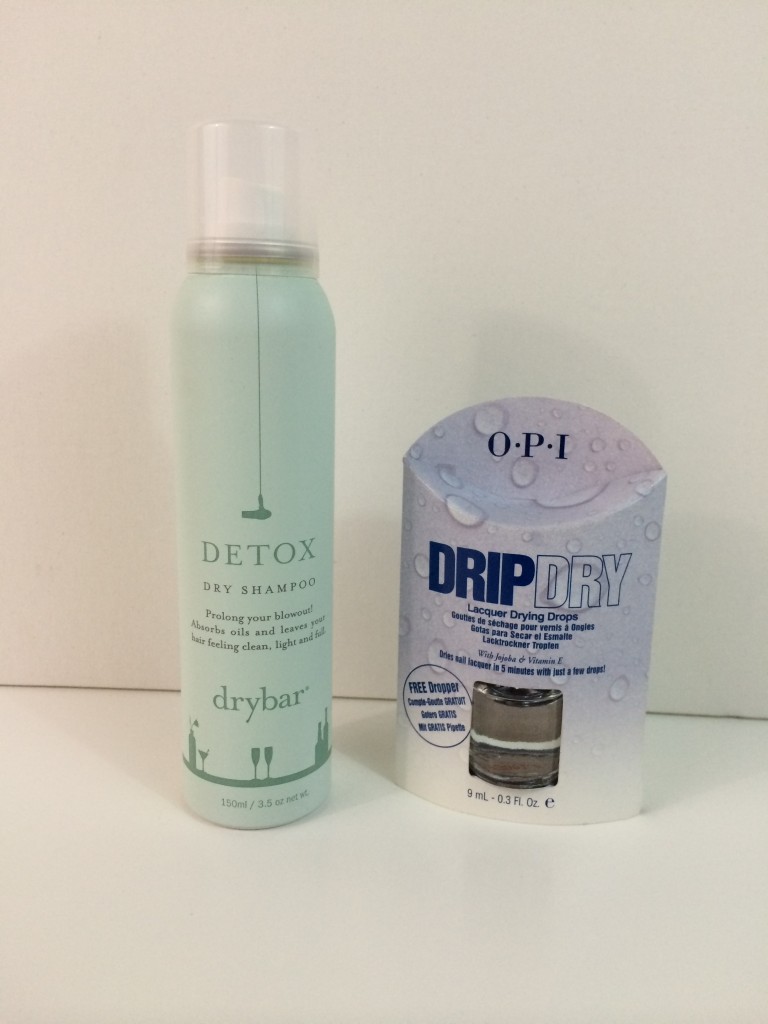
beautyhaul.jpeg


Drybar Detox Dry Shampoo

This was a gift from my mom and I can’t wait to try it out! I love dry shampoos and I am looking forward to trying out a more high end dry shampoo.


O•P•I Drip Dry Drops

These were another gift, given to me by a friend, and I am excited to give them a try! I hate waiting for nail polish to dry!


Okay, that was a long one! Thank you SO much if you read all of that and for all of your support! It means so much to me! If you want to see more information or a review on any of the products mentioned above, let me know by commenting (click the link by the title of this post!) or fine me on Facebook, Twitter, or Instagram! Also be sure to let me know if there are any new products that you think I should try or products that you swear by! If you’ve enjoyed this post, please subscribe and share with your friends! Again, thanks and have a fantastic start to your week!

FacebookTwitterEmailPinterestShare

Filed Under: Beauty Tagged With: april 2014 beauty haul, april beauty haul, beauty, beauty blogger, beauty haul, beauty products, drugstore beauty haul, hardcandy, leah tackles, loreal, make up, maybelline, revlon, spring 2014


SUBSCRIBE

Leave your email to subscribe!

SEARCH

SPONSORS

ARCHIVES

GRAB MY BUTTON


copy & paste code

site design by The Kinch Life Design & development by Olive & Ivy Design

Catch The Webinar Replay! Boundary Setting For Entrepreneurs

Go to leahtacklessocial.com and sign-up for the link!